


Uma reunião de teste do Zoom é a forma mais rápida de verificar seu áudio, seu vídeo e sua conexão com a internet antes de entrar em uma chamada ao vivo. Ela permite conferir o microfone, o alto-falante, a câmera e as configurações de internet e do dispositivo, para que a sua próxima reunião do Zoom corra sem problemas.
Reunião de teste do Zoom: resumo rápido
- Uma reunião de teste do Zoom verifica seu áudio, seu vídeo e sua conexão com a internet antes de uma reunião de verdade
- Você pode entrar em uma reunião de teste em https://zoom.us/test sem ter uma conta do Zoom
- Ela permite testar o alto-falante, testar o microfone e pré-visualizar a câmera
- Você também pode testar manualmente as configurações do dispositivo dentro do aplicativo Zoom
- Fazer uma reunião de teste ajuda a evitar problemas técnicos e reforça o profissionalismo
Por que uma reunião de teste do Zoom é essencial?
Uma reunião de teste do Zoom é essencial porque garante que a sua configuração funciona antes de você entrar em uma reunião de verdade. Ela elimina as incertezas técnicas, e você pode se concentrar na conversa em vez de resolver problemas.
Testar sua configuração antes de uma reunião ajuda você a:
- Evitar problemas com o microfone, o alto-falante ou a webcam
- Confirmar que a sua conexão com a internet está estável
- Reduzir o ruído de fundo e melhorar a qualidade do som
- Conhecer melhor os recursos do Zoom antes da sua próxima reunião do Zoom
- Manter uma presença profissional, com iluminação e enquadramento de câmera adequados
Em chamadas decisivas, como entrevistas, demonstrações de vendas ou apresentações, uma reunião de teste rápida pode ser a diferença entre uma experiência tranquila e uma cheia de interrupções.
O Google Meet e o Microsoft Teams têm recursos de teste parecidos, que permitem pré-visualizar a câmera e o áudio antes de entrar, mas eles ficam na tela que antecede a entrada na reunião, e não em uma reunião de teste guiada e dedicada como a do Zoom.
Como entrar em uma reunião de teste do Zoom?
Você pode entrar em uma reunião de teste do Zoom pela página oficial de reunião de teste do Zoom. Essa é a forma mais confiável de testar sua configuração e conhecer os recursos de videoconferência do Zoom.
Passo a passo para entrar em uma reunião de teste
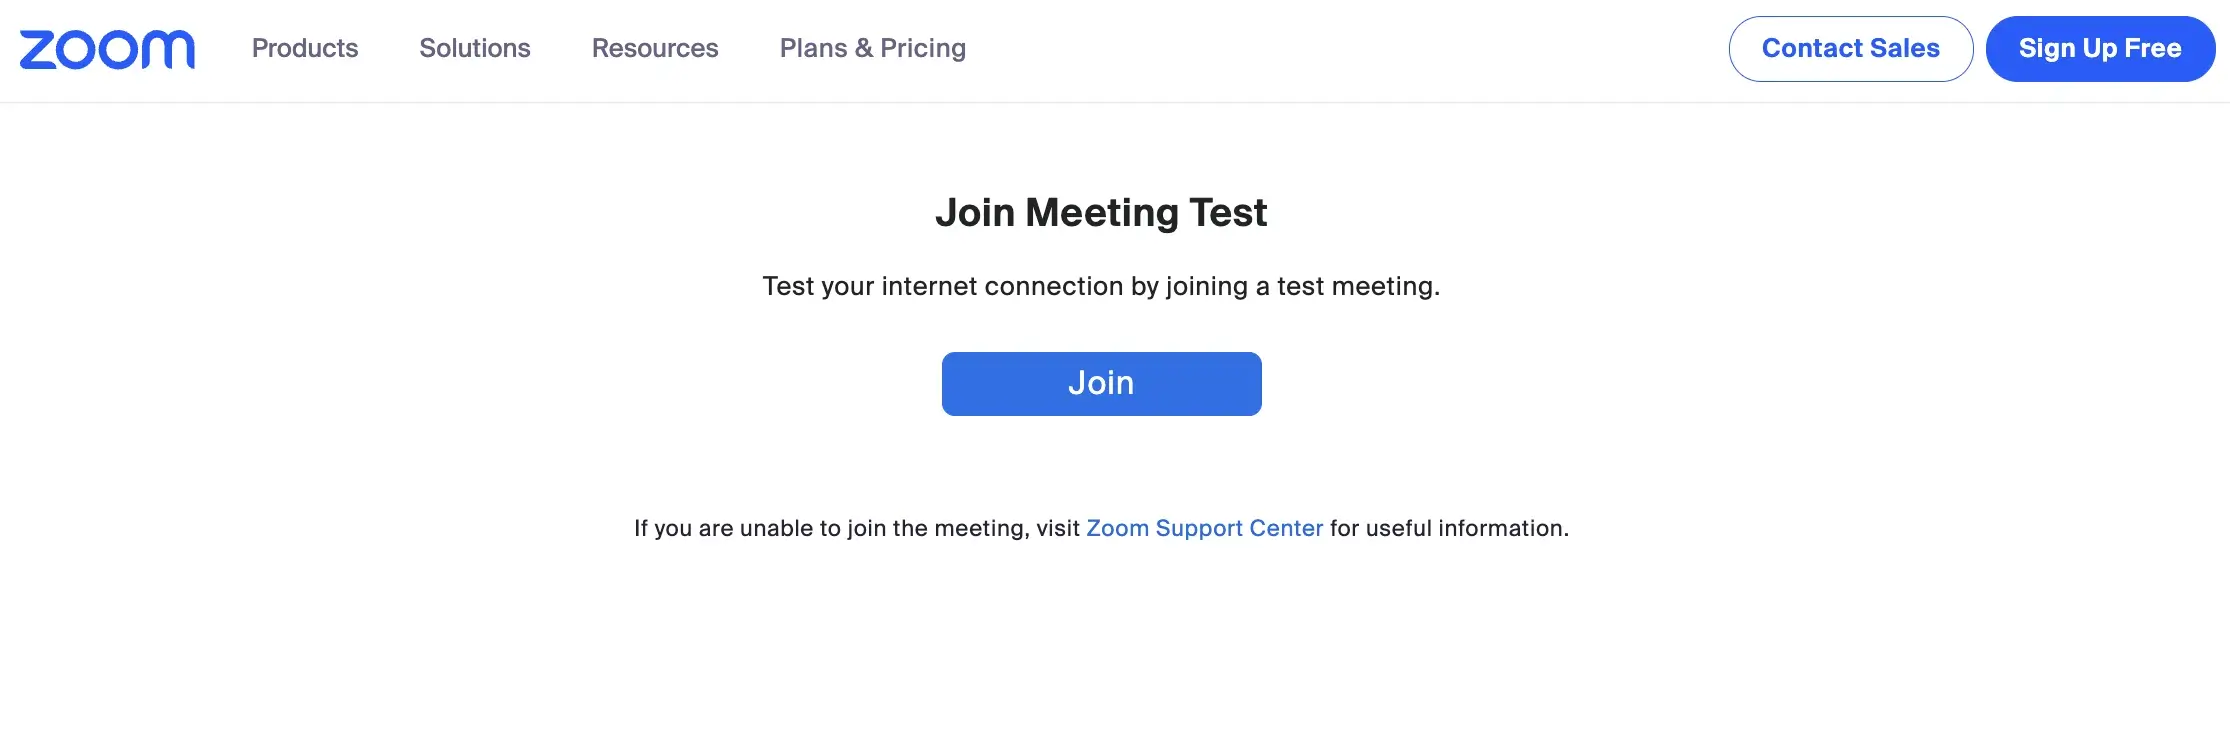
- Acesse a página de reunião de teste do Zoom. Abra https://zoom.us/test no navegador.
- Clique no botão “Ingressar” (Join). Isso inicia a chamada de teste do Zoom.
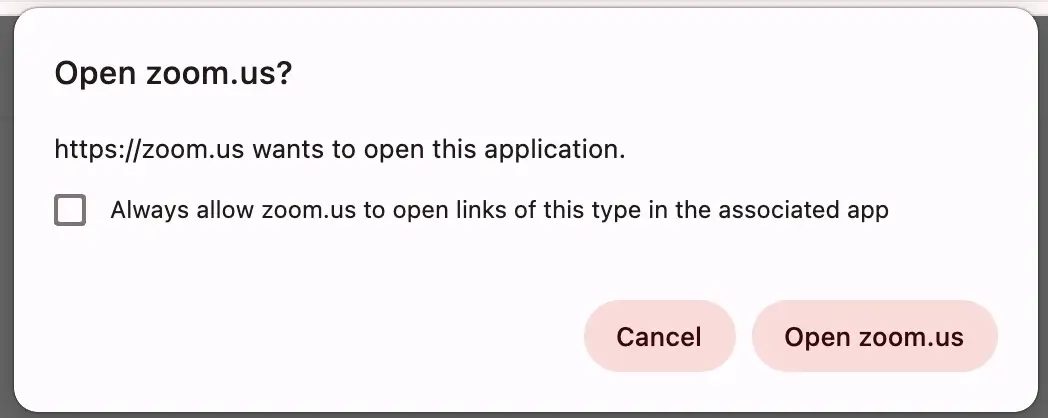
- Abra o Zoom. Uma janela pop-up vai pedir para você abrir o Zoom. Clique em “Abrir Zoom” (Open Zoom) para iniciar o aplicativo, se você tiver o aplicativo Zoom para desktop instalado, ou escolha entrar pelo navegador.
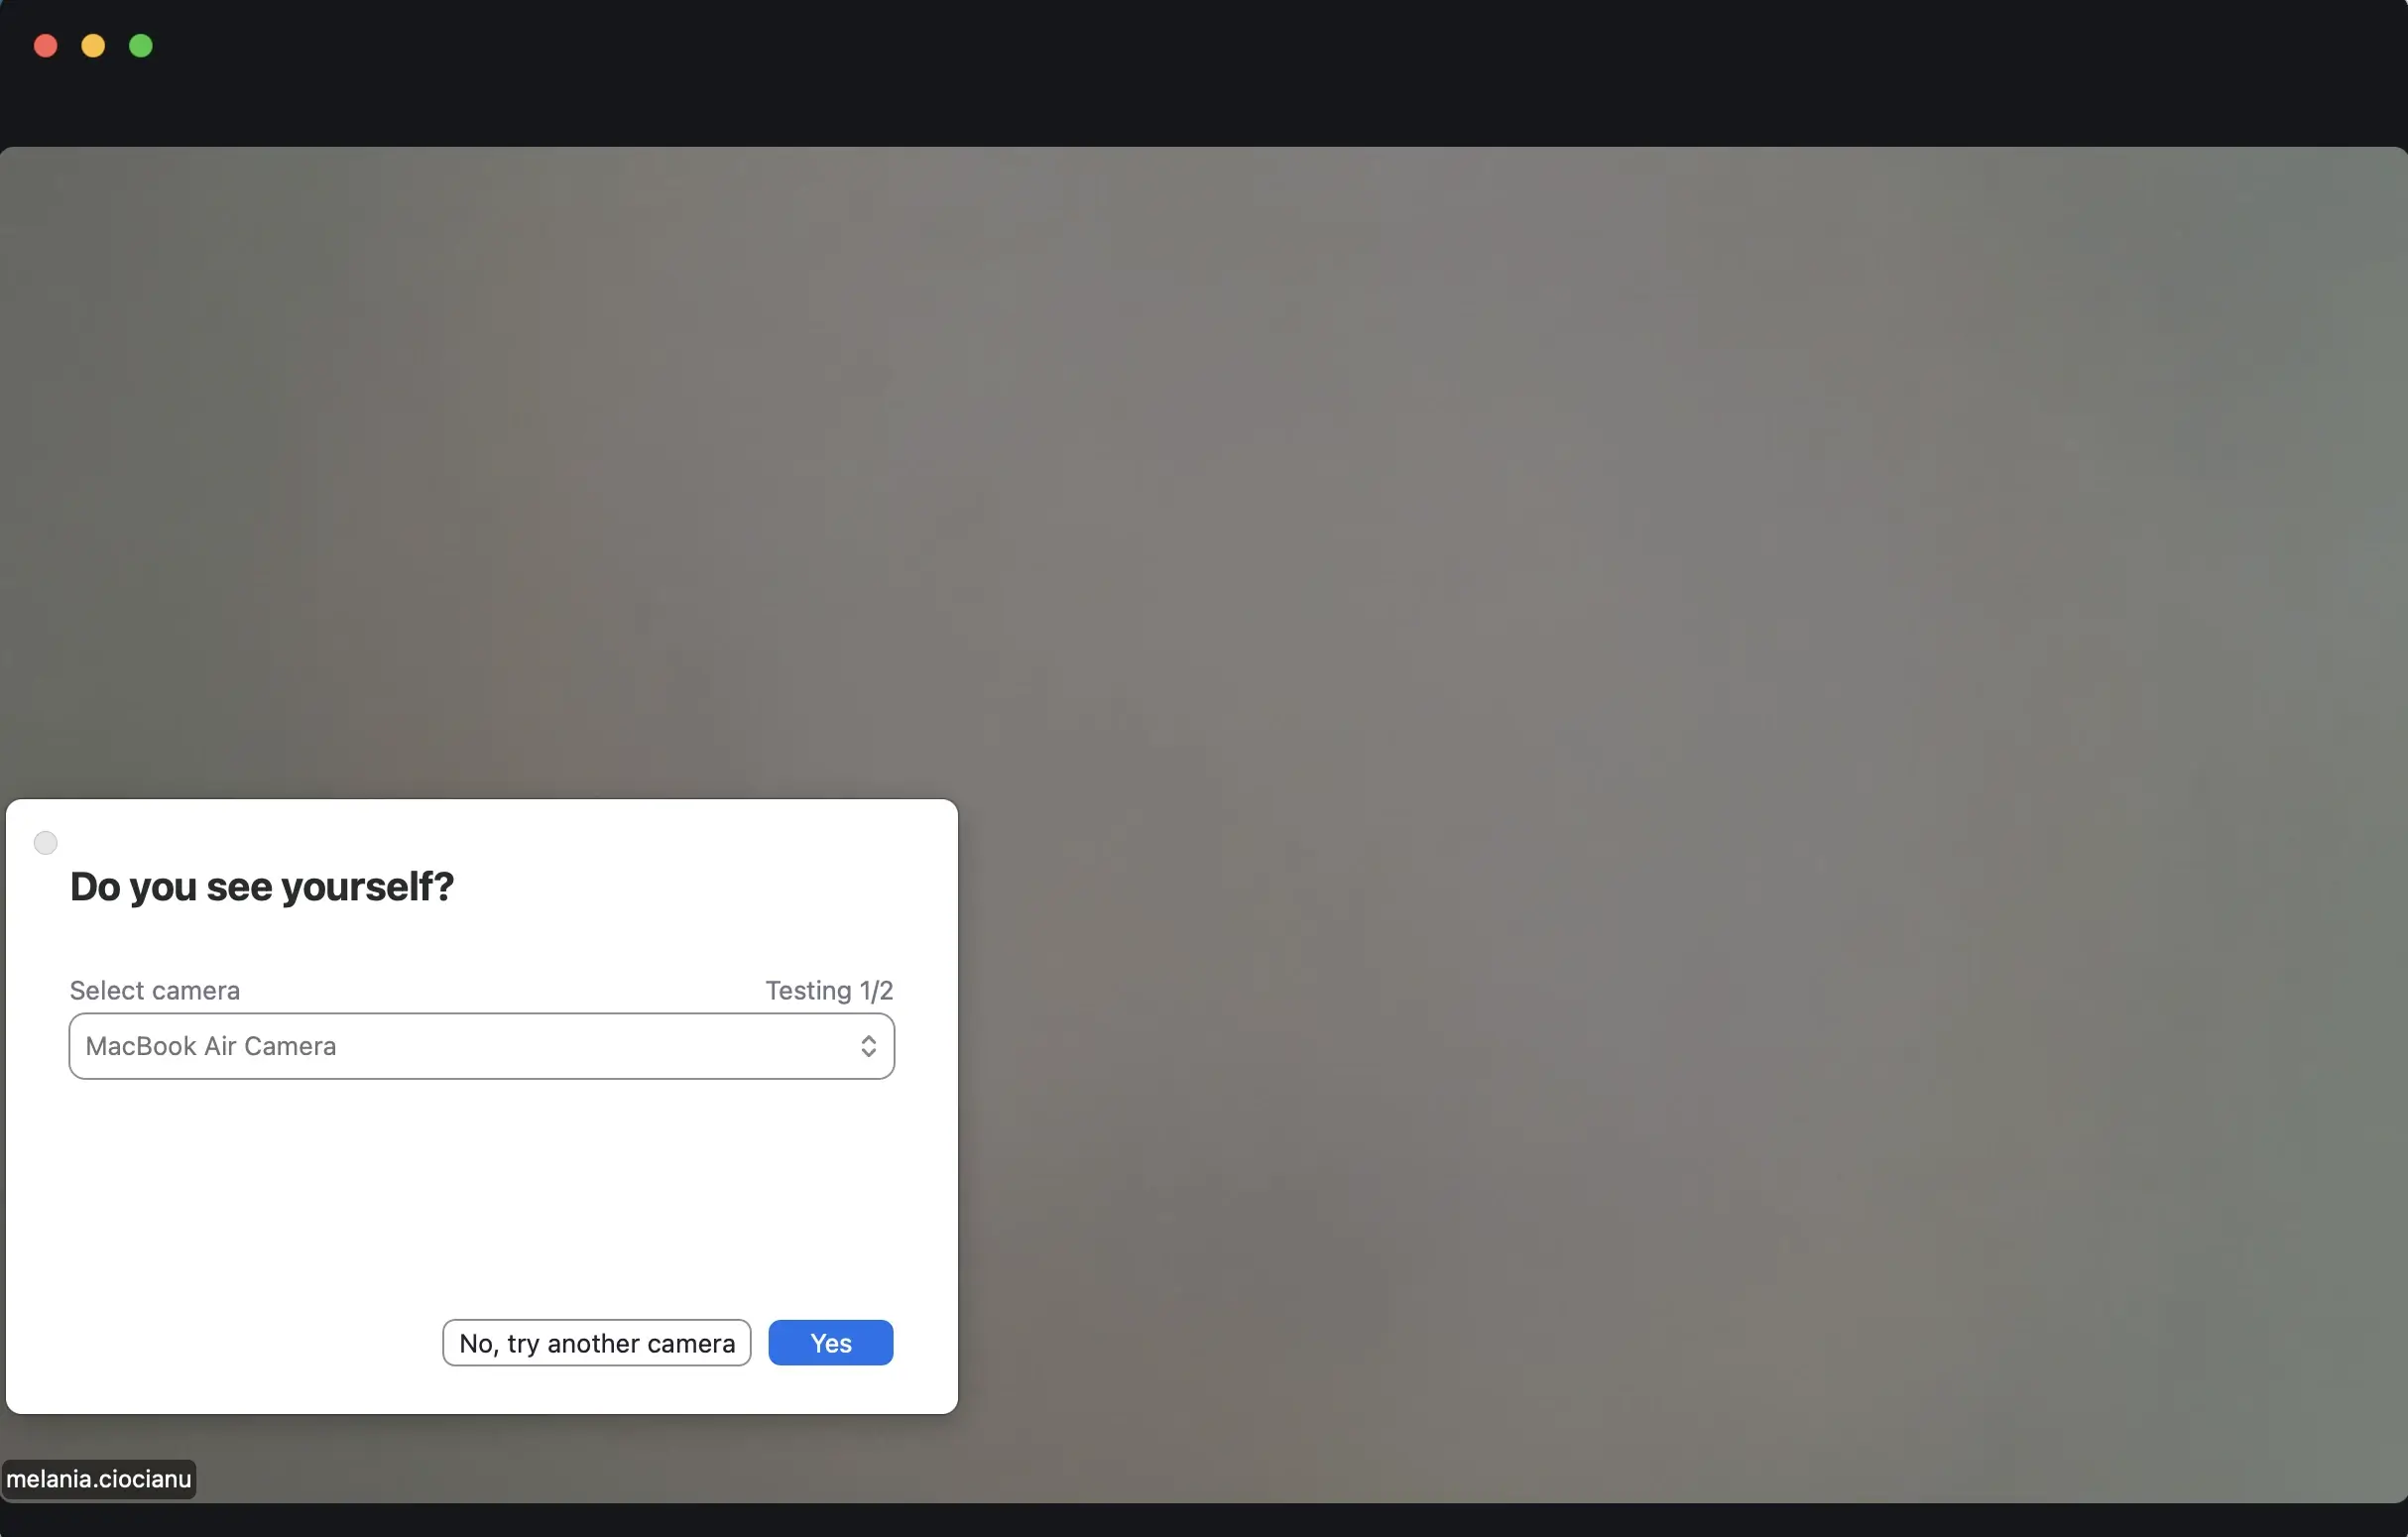
- Entre na reunião de teste. Digite seu nome e clique em Ingressar.
- Permita o acesso aos dispositivos. Dê ao Zoom acesso à sua câmera, ao microfone e ao áudio.
- Siga as instruções. O Zoom vai orientar você a:
- Testar seu vídeo (pré-visualização da câmera)
- Testar o alto-falante (ouvir um toque)
- Testar o microfone (gravar e reproduzir sua voz)
Depois de testar tudo, se deu tudo certo ou se você já corrigiu todos os problemas, é só encerrar a chamada de teste.
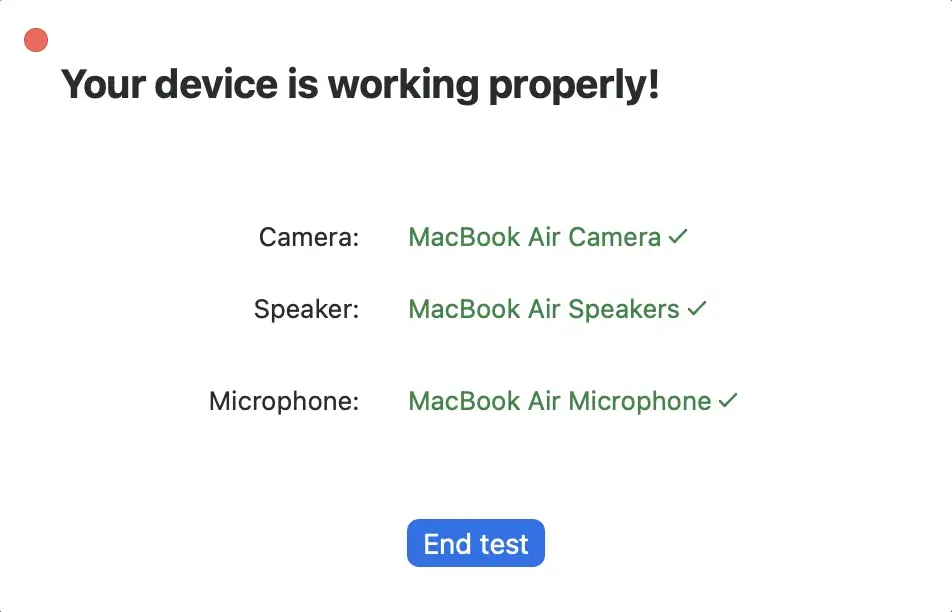
Esse processo funciona no computador, no navegador ou no aplicativo Zoom para celular, desde que o seu dispositivo tenha acesso à internet.
O que acontece durante uma reunião de teste do Zoom?
Uma reunião de teste do Zoom percorre com você, passo a passo, os pontos principais da sua configuração, para confirmar que tudo está funcionando corretamente antes das próximas reuniões do Zoom.
Durante a videochamada de teste, você vai:
- Pré-visualizar a câmera para conferir o enquadramento, a iluminação e a visibilidade do rosto
- Testar a saída do alto-falante ouvindo um som ou toque
- Testar a entrada do microfone falando e ouvindo a reprodução
- Ajustar o volume de saída e os níveis de entrada
- Selecionar dispositivos em um menu suspenso, se necessário
Se algo não funcionar, o Zoom vai pedir que você corrija o problema antes de continuar.
Como testar o Zoom manualmente sem entrar em uma reunião?
Você também pode testar sua configuração manualmente, direto no aplicativo Zoom, sem entrar em uma reunião de teste.
Como testar seu vídeo (câmera)
- Abra o Zoom Meetings
- Clique na sua foto de perfil, no canto superior
- Vá em Configurações → Vídeo (Settings → Video)
- Confira a janela de pré-visualização
Aqui você pode:
- Selecionar outra webcam
- Ajustar a iluminação e o ângulo da câmera
- Confirmar que o vídeo está funcionando corretamente
Como testar seu alto-falante e seu microfone
- Abra o Zoom
- Vá em Configurações → Áudio (Settings → Audio)
- Clique em Testar Alto-falante (Test Speaker)
- Clique em Testar Microfone (Test Mic) e fale
Você deve:
- Ouvir um som ao testar o alto-falante
- Ouvir a reprodução da sua voz ao testar o microfone
Se isso não acontecer, use o menu suspenso para selecionar o dispositivo de entrada/saída correto.
O que verificar antes da sua próxima reunião do Zoom?
Antes de fazer uma reunião de teste do Zoom, é importante revisar rapidamente sua internet, seu áudio e seu vídeo para garantir que tudo está funcionando corretamente, o que ajuda a evitar problemas técnicos quando a reunião começar.
Checklist essencial da reunião de teste
- Conexão com a internet: use uma rede estável (cabeada, se possível) e teste a conexão antes da reunião
- Configurações de áudio: teste o microfone, o alto-falante e os fones de ouvido
- Configuração da câmera: confira o enquadramento, a iluminação e o plano de fundo
- Configurações do dispositivo: selecione os dispositivos de entrada/saída corretos
- Atualizações do aplicativo Zoom: instale a versão mais recente
- Ruído de fundo: reduza as distrações ao mínimo
- Desempenho do computador: feche os aplicativos desnecessários
Como tornar suas reuniões do Zoom mais produtivas com o MeetGeek
Uma reunião de teste do Zoom garante que a sua configuração está funcionando, mas não ajuda você a guardar nem a reaproveitar o que foi discutido depois que a reunião termina.
Pelo que tenho visto em fluxos de trabalho reais, o problema aparece depois. As anotações ficam incompletas, as tarefas não são acompanhadas com clareza e informações valiosas acabam enterradas em gravações que ninguém volta a assistir.
O MeetGeek resolve isso transformando cada reunião do Zoom em conhecimento estruturado e pesquisável.
Ele grava suas reuniões automaticamente e gera transcrições precisas, depois organiza tudo em notas claras, com os pontos principais e as tarefas já identificados.
.webp)
Em vez de vasculhar arquivos, você tem uma biblioteca pesquisável de todas as reuniões anteriores, e encontra na hora decisões, discussões ou momentos específicos em todo o seu histórico.
.webp)
O chat de IA vai um passo além. Você pode fazer perguntas sobre qualquer reunião e receber respostas diretas, extraídas da transcrição, sem precisar percorrer manualmente as notas ou a gravação.
.webp)
O MeetGeek também se conecta a mais de 10.000 integrações, o que significa que os dados das suas reuniões não ficam isolados. Notas, gravações e tarefas podem seguir direto para as ferramentas que você já usa, mantendo tudo alinhado com a forma como a sua equipe já trabalha.
.webp)
Na prática, isso transforma o Zoom de um lugar onde as conversas acontecem em um sistema onde a informação é capturada, organizada e realmente usada depois.
Como corrigir problemas comuns na reunião de teste do Zoom
Mesmo depois de um teste, problemas podem acontecer. Veja como corrigir os mais comuns.
Microfone não funciona
Se o seu microfone não estiver funcionando durante uma reunião de teste do Zoom, comece verificando se ele está no mudo, seja no Zoom, seja no próprio dispositivo. Depois, abra as configurações de áudio e selecione o microfone correto no menu suspenso.
Se a sua voz estiver baixa demais ou não for detectada, ajuste o volume de entrada. Também é importante confirmar, nas configurações do sistema, que o Zoom tem permissão para acessar o microfone. Se você estiver usando um microfone externo, tente reconectá-lo ou trocar de porta.
Problemas no alto-falante (sem som)
Se você não conseguir ouvir nenhum som, primeiro aumente o volume de saída tanto no Zoom quanto no computador. Em seguida, confira se o alto-falante ou os fones de ouvido corretos estão selecionados nas configurações de áudio.
Se o problema continuar, verifique as configurações de som do sistema no Windows ou no Mac para garantir que o dispositivo de saída certo está ativo. Reiniciar o aplicativo Zoom também pode resolver falhas temporárias.
Câmera não funciona
Quando a câmera não estiver funcionando, entre nas configurações do Zoom e confira se a webcam correta está selecionada. Se houver várias câmeras conectadas, alterne entre elas pelo menu suspenso. Verifique também se o sistema operacional permite que o Zoom acesse a câmera. Se você acabou de conectar uma webcam, reiniciar o Zoom costuma ajudar o aplicativo a reconhecer o dispositivo corretamente.
Problemas de conexão com a internet
Se você estiver com problemas de conexão durante uma reunião de teste do Zoom, tente mudar para uma rede mais forte e mais estável. Uma conexão Ethernet cabeada costuma ser mais confiável do que o Wi-Fi. Também ajuda fechar aplicativos ou abas do navegador que consomem muita banda, porque eles podem interferir no desempenho do Zoom.
Dicas de especialista para uma reunião de teste do Zoom bem-sucedida
Além do básico, alguns cuidados simples melhoram a sua experiência:
- Teste de 10 a 15 minutos antes da reunião
- Use iluminação frontal para que seu rosto apareça com nitidez
- Mantenha o plano de fundo organizado ou use um plano de fundo virtual
- Use fones de ouvido para reduzir o eco e melhorar o som
- Familiarize-se com os recursos de silenciar o microfone, usar o bate-papo e compartilhar a tela
- Faça um teste rápido de entrada na reunião se você tiver recebido um link de convite
Esses pequenos ajustes fazem muita diferença na sua imagem e no seu som.
Faça uma reunião de teste do Zoom antes de cada chamada importante
Uma reunião de teste do Zoom leva apenas alguns minutos, mas pode evitar problemas técnicos que atrapalhariam a sua reunião.
Ao testar seu áudio, seu vídeo e sua conexão com a internet com antecedência, você garante uma experiência mais tranquila e profissional para todos os participantes.
E, com a configuração em ordem, ferramentas como o MeetGeek ajudam você a transformar cada reunião em notas claras, insights estruturados e próximos passos concretos.
Experimente o MeetGeek gratuitamente e torne cada reunião do Zoom mais produtiva.
Perguntas frequentes
Dá para entrar em uma reunião de teste do Zoom sem ter uma conta?
Sim, você pode entrar em uma reunião de teste do Zoom sem criar uma conta nem fazer login. Basta acessar a página de reunião de teste do Zoom em https://zoom.us/test, clicar em “Ingressar” (Join) e seguir as instruções na tela para verificar seu áudio e seu vídeo.
Como testar o Zoom antes de entrar em uma reunião?
Para testar o Zoom antes de entrar em uma chamada de verdade, use a mesma página. Clique em “Ingressar” (Join) e siga o passo a passo guiado para verificar se a câmera, o microfone e o alto-falante estão funcionando corretamente. Você também pode testar manualmente as configurações do dispositivo dentro do aplicativo Zoom.
O que uma reunião de teste do Zoom verifica?
Uma reunião de teste do Zoom verifica a câmera, o microfone, o alto-falante e a conexão com a internet. Ela também permite ajustar as configurações de áudio e vídeo e confirmar que tudo está funcionando corretamente antes de uma reunião de verdade.
Posso testar o Zoom sem entrar em uma reunião?
Sim, você pode testar o Zoom manualmente sem entrar em uma reunião: abra o aplicativo Zoom, vá em Configurações e confira o vídeo e o áudio nas abas correspondentes.
Por que meu microfone ou meu alto-falante não funciona no Zoom?
Se o microfone ou o alto-falante não estiver funcionando, a causa costuma ser o dispositivo errado selecionado, o áudio no mudo ou a falta de permissões. Use o menu suspenso nas configurações do Zoom para selecionar o dispositivo correto e teste de novo.




.avif)