.avif)

Zoom-Testmeeting: Schrittweise Anleitung zum Testen Ihres Setups vor jedem Anruf
Erfahren Sie, wie Sie ein Zoom-Testmeeting durchführen, Mikrofon- und Kameraprobleme beheben und sicherstellen, dass Ihr Setup vor einem wichtigen Anruf bereit ist.

✅ Free meeting recording & transcription
💬 Automated sharing of insights to other tools.
EIN Zoom-Testtreffen ist der schnellste Weg, um Ihre Audio-, Video- und Internetverbindung zu überprüfen, bevor Sie an einem Live-Anruf teilnehmen. Damit können Sie Ihre Mikrofon-, Lautsprecher-, Kamera-, Internet- und Geräteeinstellungen überprüfen, damit Sie als Nächstes Zoom-Besprechung läuft reibungslos.
Zoom-Testtreffen: TL; DR
- EIN Zoom-Testtreffen überprüft Ihre Audio-, Video- und Internetverbindung vor einem tatsächlichen Meeting
- Du kannst an einem Testmeeting teilnehmen beim https://zoom.us/test ohne Zoom-Account
- Es lässt dich Testen Sie den Lautsprecher, testen Sie das Mikrofon und schauen Sie sich eine Vorschau Ihrer Kamera an
- Du kannst auch Geräteeinstellungen manuell testen in der Zoom-App
- Die Durchführung eines Testmeetings hilft, technische Probleme zu vermeiden und verbessert die Professionalität
Warum ist ein Zoom-Testmeeting unerlässlich?
Ein Zoom-Testmeeting ist unerlässlich, da es sicherstellt, dass Ihr Setup funktioniert, bevor Sie an einem echten Meeting teilnehmen. Es entfernt technische Unbekannte, sodass Sie sich auf das Gespräch konzentrieren können, anstatt sich auf die Problembehandlung zu konzentrieren.
Das Testen Ihres Setups vor einem Meeting hilft Ihnen dabei:
- Vermeiden Sie Probleme mit Ihrem Mikrofon, Lautsprecher oder Webcam
- Bestätigen Sie Ihre Internetverbindung ist stabil
- Reduzieren Sie Hintergrundgeräusche und verbessern Sie die Klangqualität
- Machen Sie sich vertraut mit Zoom-Funktionen vor Ihrem nächsten Zoom-Meeting
- Sorgen Sie mit der richtigen Beleuchtung und Kamerarahmung für eine professionelle Präsenz
Bei Telefongesprächen, bei denen viel auf dem Spiel steht, wie Interviews, Verkaufsdemos oder Präsentationen, kann ein schnelles Testmeeting den Unterschied zwischen einem reibungslosen und einem unterbrochenen Erlebnis ausmachen.
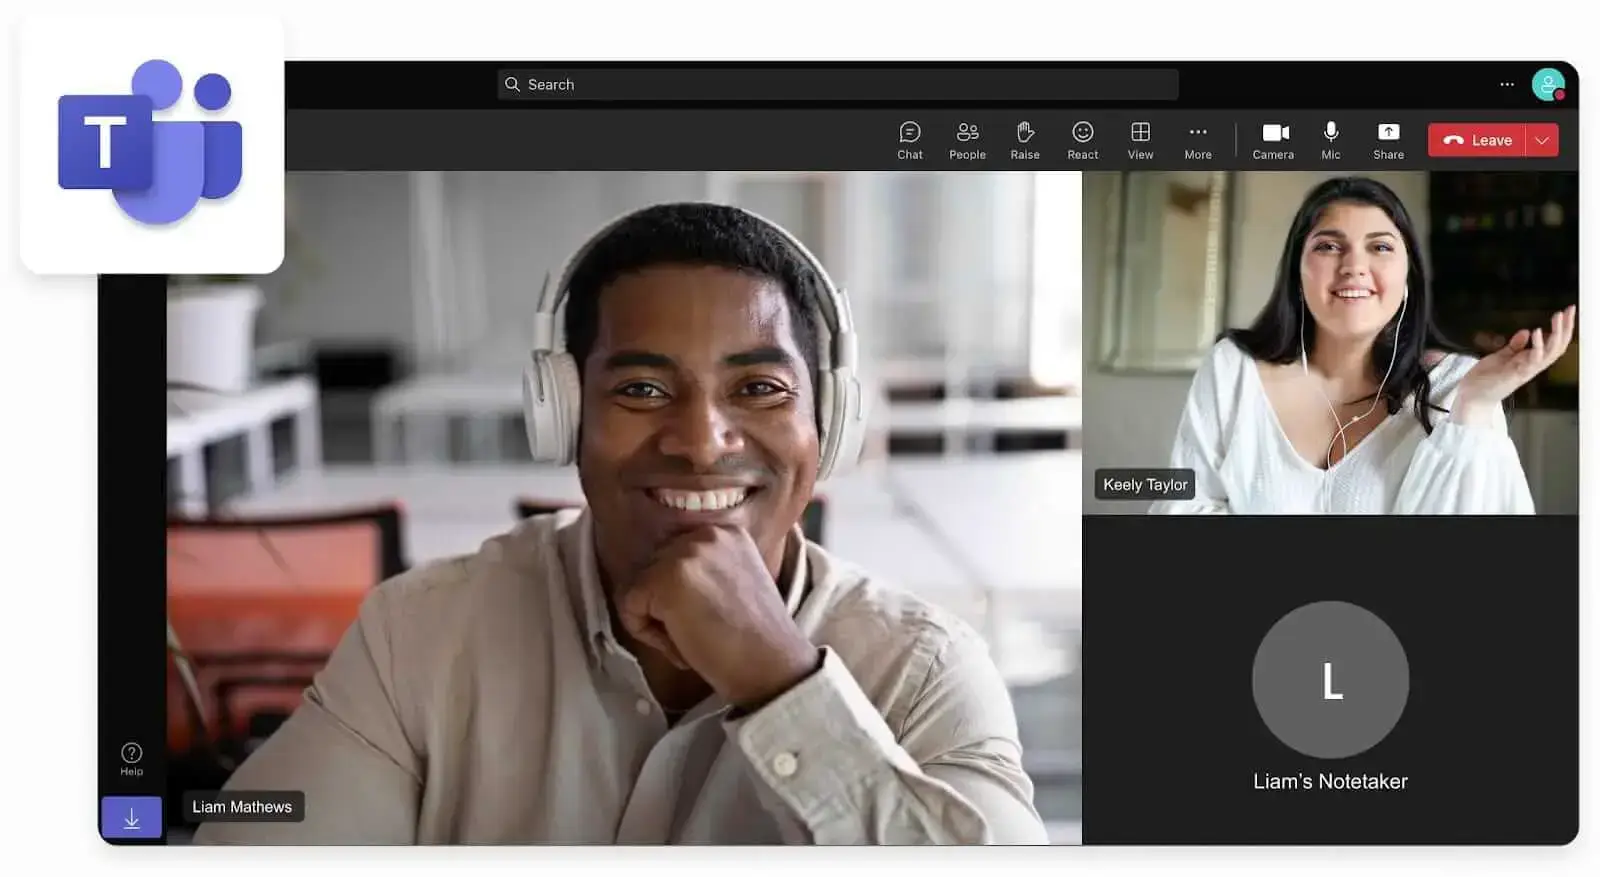
Ähnliche Testfunktionen gibt es in Google Meet und Microsoft Teams, wo Sie vor dem Beitritt eine Vorschau Ihrer Kamera und Ihres Audios anzeigen können. Sie sind jedoch in den Bildschirm vor dem Beitritt integriert und nicht in ein spezielles geführtes Testmeeting wie Zoom.
Wie nehmen Sie an einem Zoom-Testmeeting teil?
Du kannst an einem Zoom-Testmeeting teilnehmen mithilfe der offiziellen Testmeeting-Seite von Zoom. Dies ist die zuverlässigste Methode, um Ihr Setup zu testen und sich mit den Videokonferenzfunktionen von Zoom vertraut zu machen.
Schrittweise Anleitung zur Teilnahme an einem Testmeeting
- Besuchen Sie die Zoom-Testmeeting-Seite. Gehe zu https://zoom.us/test in Ihrem Browser.
- Klicken Sie auf die Schaltfläche „Beitreten“. Dadurch wird der Zoom-Testaufruf gestartet.

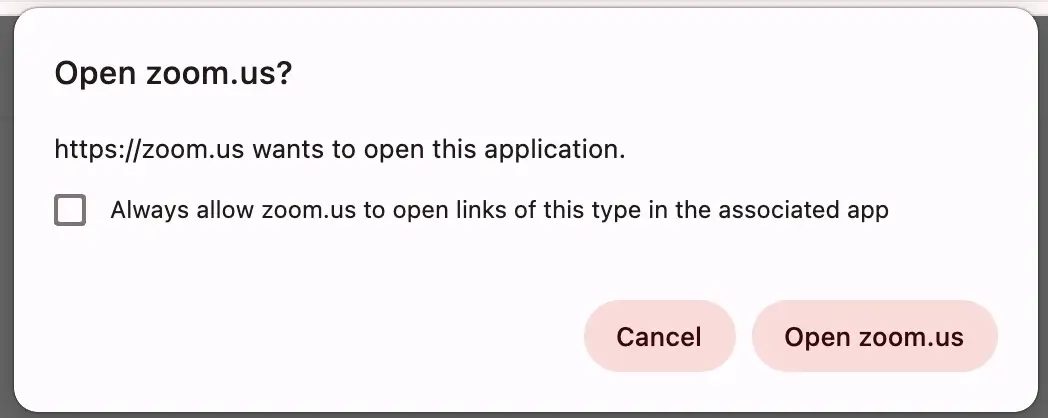
- Starten Sie Zoom. In einem Popup-Fenster werden Sie aufgefordert, Zoom zu öffnen. Klicken Sie auf „Zoom öffnen“, um die Zoom-App zu starten, wenn Sie die Zoom-Desktop-App installiert haben, oder wählen Sie die Teilnahme über Ihren Browser aus.
- Nehmen Sie am Meeting-Test teil. Geben Sie Ihren Namen ein und klicken Sie auf Beitreten.
- Erlauben Sie den Zugriff auf Geräte. Geben Sie Zoom Zugriff auf Ihre Kamera, Mikrofon und Audio.
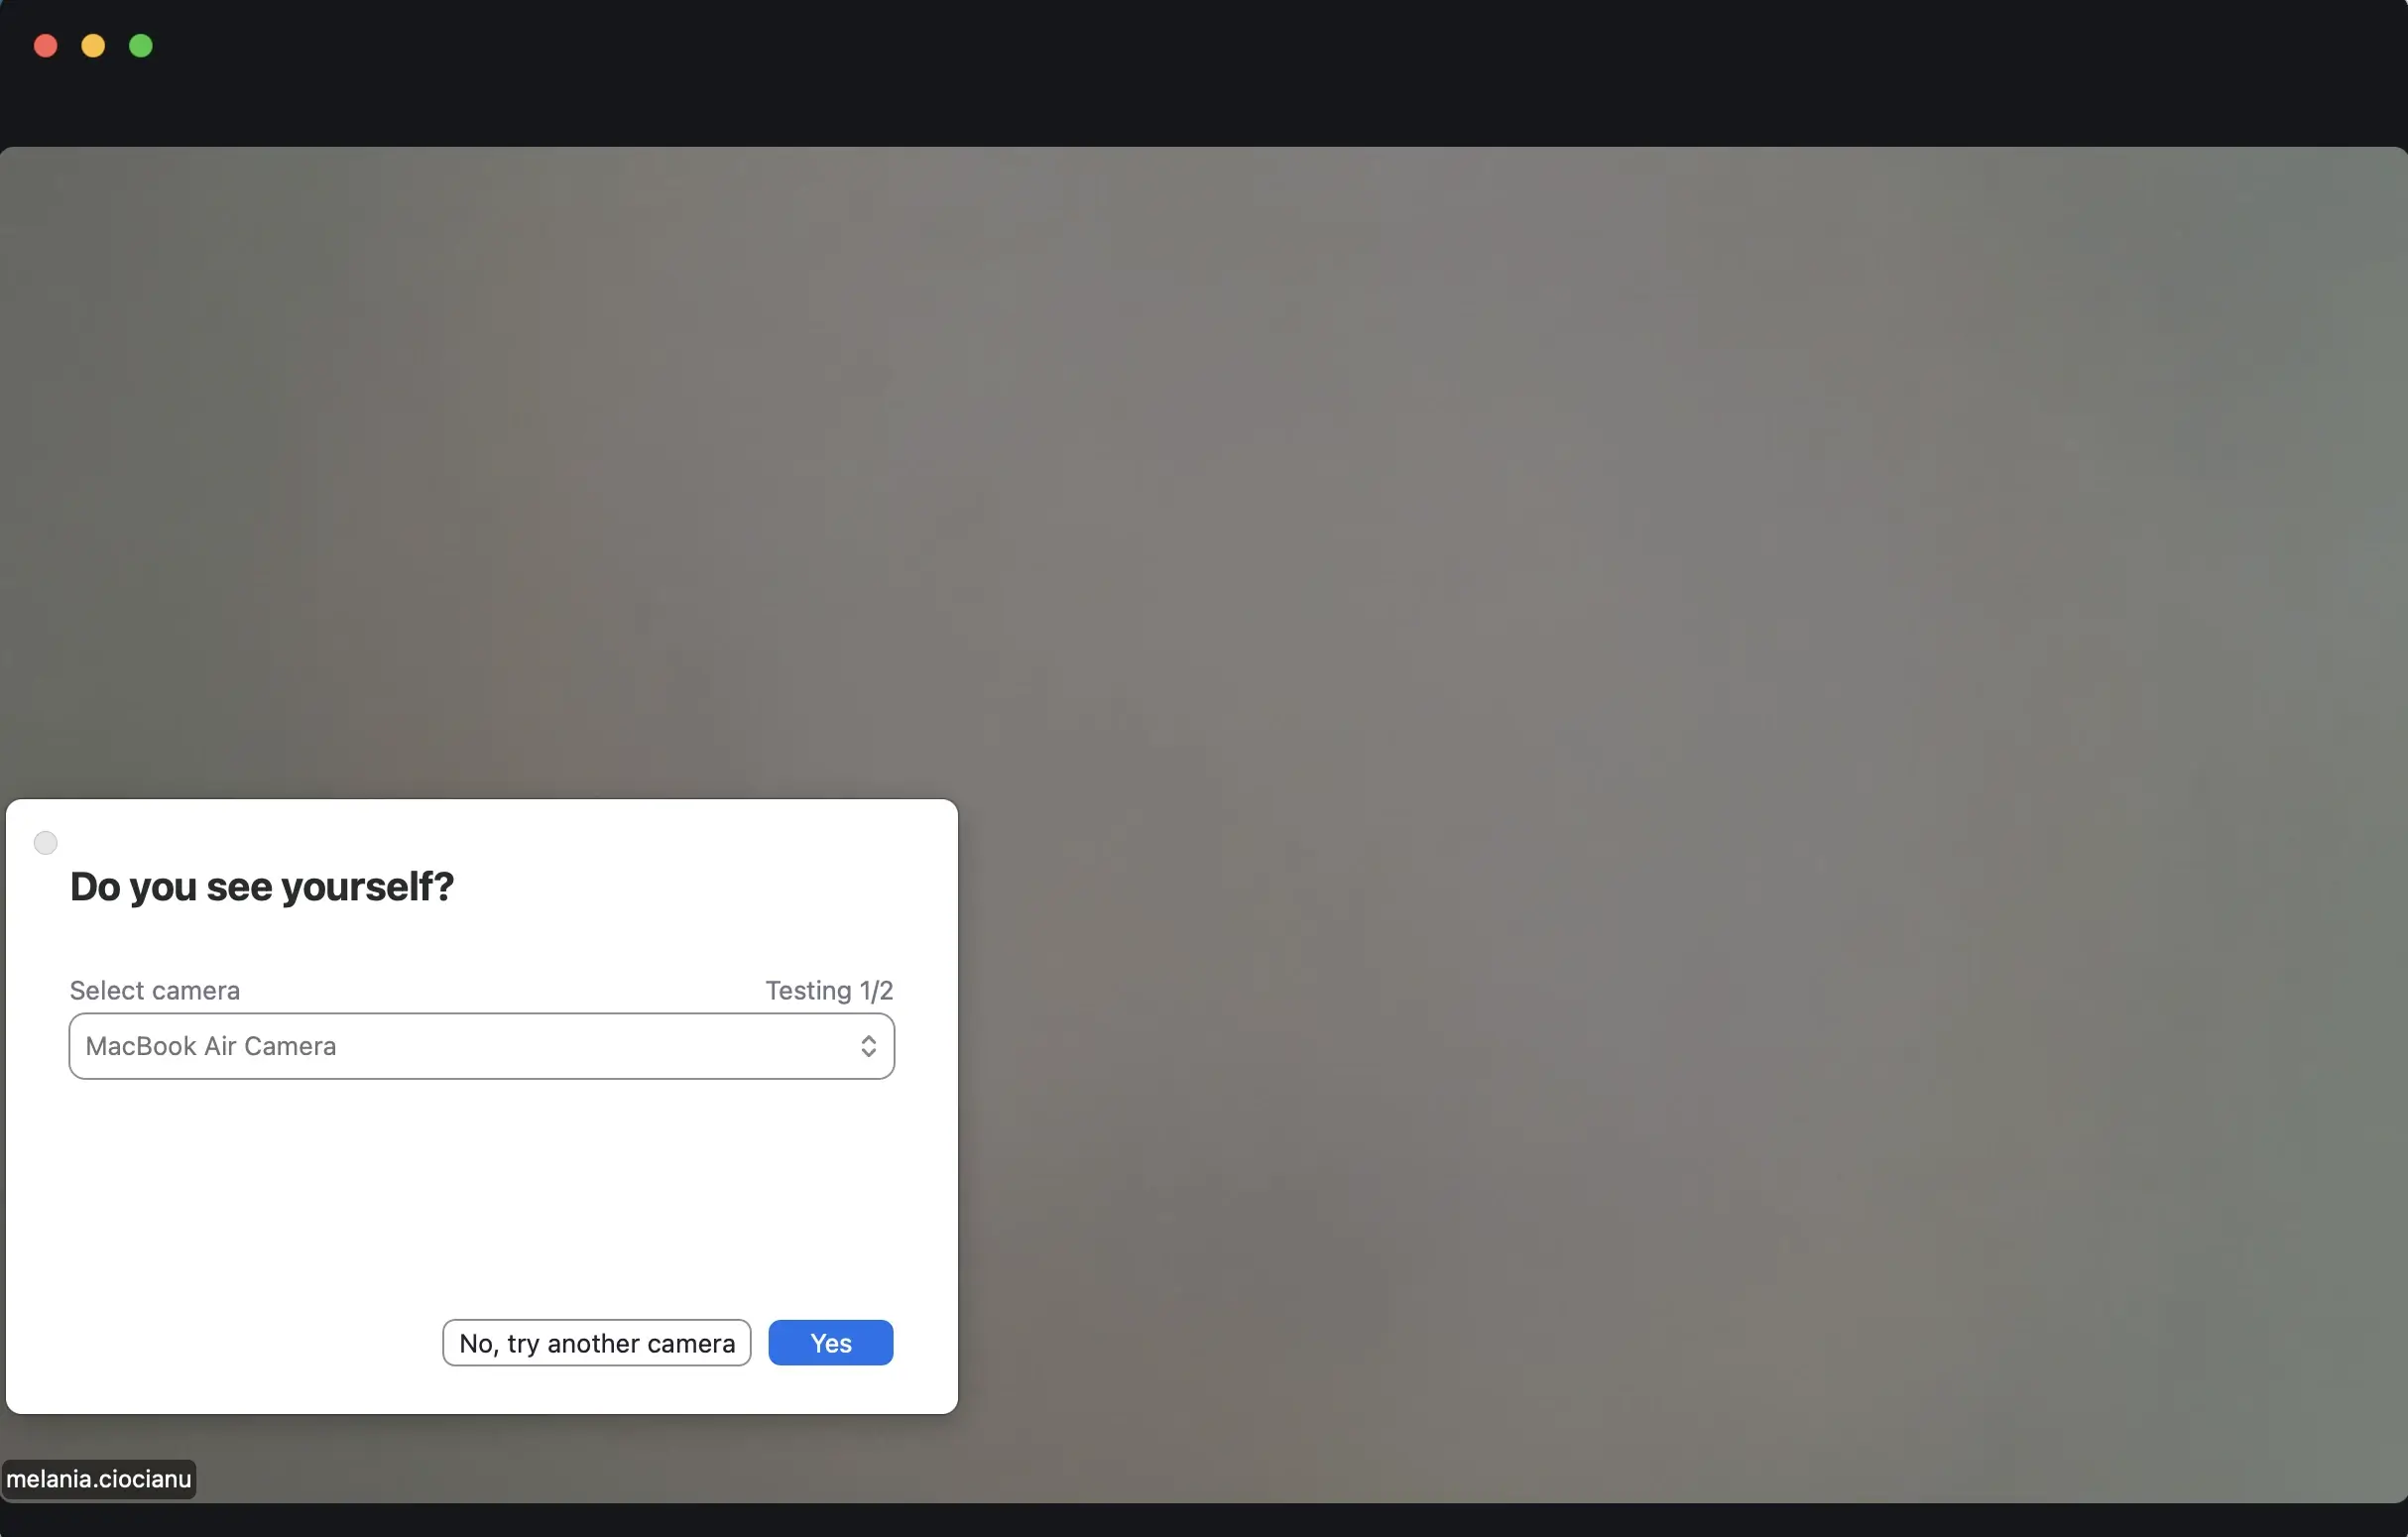
- Folgen Sie den Anweisungen. Zoom führt Sie zu:
- Testen Sie Ihr Video (Kameravorschau)
- Lautsprecher testen (einen Klingelton hören)
- Testmikrofon (Stimme aufnehmen und abspielen)
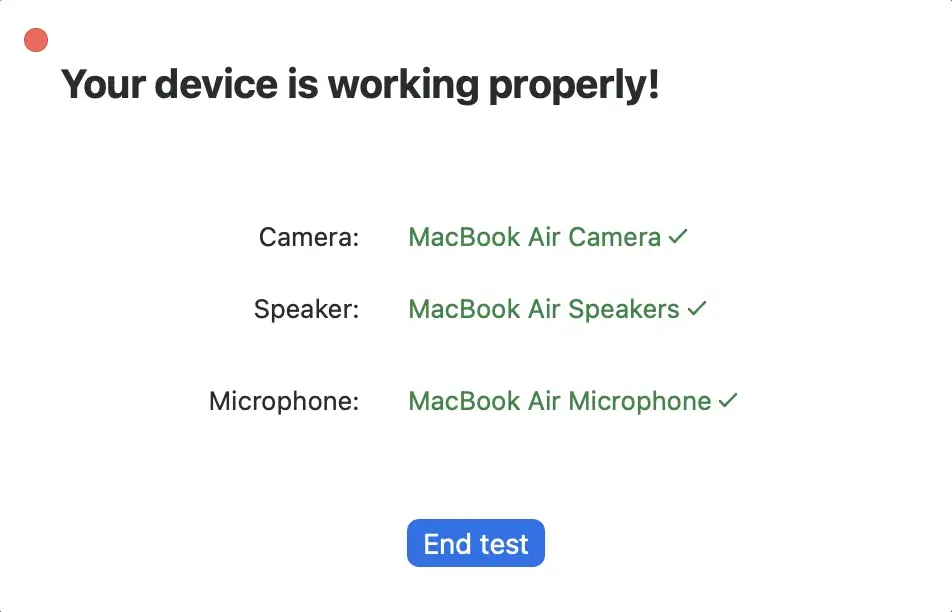
Nachdem Sie alles getestet haben und alles reibungslos verlaufen ist oder Sie alle Probleme behoben haben, können Sie den Testanruf beenden.
Dieser Vorgang funktioniert auf dem Desktop, in einem Browser oder in der mobilen Zoom-App, sofern Ihr Gerät über einen Internetzugang verfügt.
Was passiert während eines Zoom-Meeting-Tests?
In einem Zoom-Testmeeting werden Sie Schritt für Schritt durch Ihr Kern-Setup geführt, sodass Sie vor bevorstehenden Zoom-Meetings überprüfen können, ob alles ordnungsgemäß funktioniert.
Während des Testvideoanrufs werden Sie:
- Vorschau Ihrer Kamera um Rahmen, Beleuchtung und Sichtbarkeit des Gesichts zu überprüfen
- Lautsprecherausgang testen durch Anhören eines Sounds oder Klingeltons
- Mikrofoneingang testen durch Sprechen und Hörwiedergabe
- Passen Sie Ihre an Ausgangslautstärke und Eingangspegel
- Wählen Sie Geräte aus Drop-down-Menü bei Bedarf
Wenn etwas nicht funktioniert, werden Sie von Zoom aufgefordert, das Problem zu beheben, bevor Sie fortfahren.
Wie testet man Zoom manuell, ohne an einem Meeting teilzunehmen?
Du kannst auch Testen Sie Ihr Setup manuell direkt in der Zoom-App, ohne an einem Testmeeting teilzunehmen.
So testen Sie Ihr Video (Kamera)
- Zoom-Besprechungen öffnen
- Klicken Sie auf Ihr Profilbild in der oberen Ecke
- Gehe zu Einstellungen → Video
- Überprüfe das Vorschaufenster
Hier kannst du:
- Wählen Sie eine andere Webcam
- Passen Sie Beleuchtung und Kamerawinkel an
- Stellen Sie sicher, dass Ihr Video ordnungsgemäß funktioniert
So testen Sie Ihren Lautsprecher und Ihr Mikrofon
- Zoom öffnen
- Gehe zu Einstellungen → Audio
- Klicken Sie Lautsprecher testen
- Klicken Sie Testmikrofon und sprich
Du solltest:
- Beim Testen des Lautsprechers ein Geräusch hören
- Höre deine Sprachwiedergabe, wenn du das Mikrofon testest
Wenn nicht, verwenden Sie das Drop-down-Menü, um das richtige Eingabe-/Ausgabegerät auszuwählen.
Was sollten Sie vor Ihrem nächsten Zoom-Meeting überprüfen?
Bevor Sie ein Zoom-Testmeeting durchführen, ist es wichtig, dass Sie Ihre Internet-, Audio- und Videodaten schnell überprüfen, um sicherzustellen, dass alles ordnungsgemäß funktioniert und Sie technische Probleme vermeiden können, sobald das Meeting beginnt.
Unverzichtbare Checkliste für das Testmeeting
- Internetverbindung: Verwenden Sie ein stabiles Netzwerk (wenn möglich verkabelt) und testen Sie die Verbindung vor dem Treffen
- Audio-Einstellungen: Testen Sie Mikrofon, Lautsprecher und Kopfhörer
- Kamera-Setup: Prüfe Rahmen, Beleuchtung und Hintergrund
- Einstellungen des Geräts: Wählen Sie die richtigen Eingabe-/Ausgabegeräte
- Aktualisierungen der Zoom-App: Installieren Sie die neueste Version
- Hintergrundgeräusche: Minimiere Ablenkungen
- Leistung des Computers: Unnötige Apps schließen
So machen Sie Ihre Zoom-Meetings mit MeetGeek produktiver
Ein Zoom-Testmeeting stellt sicher, dass Ihr Setup funktioniert, aber es hilft Ihnen nicht, das, was besprochen wurde, nach Ende des Meetings beizubehalten oder wiederzuverwenden.
Nach dem, was ich in echten Workflows gesehen habe, taucht das Problem danach auf. Die Notizen sind unvollständig, Aktionspunkte werden nicht eindeutig verfolgt und wertvolle Informationen werden in Aufzeichnungen vergraben, die niemand erneut aufruft.
MeetGeek löst dieses Problem, indem jedes Zoom-Meeting in strukturiertes, durchsuchbares Wissen umgewandelt wird.
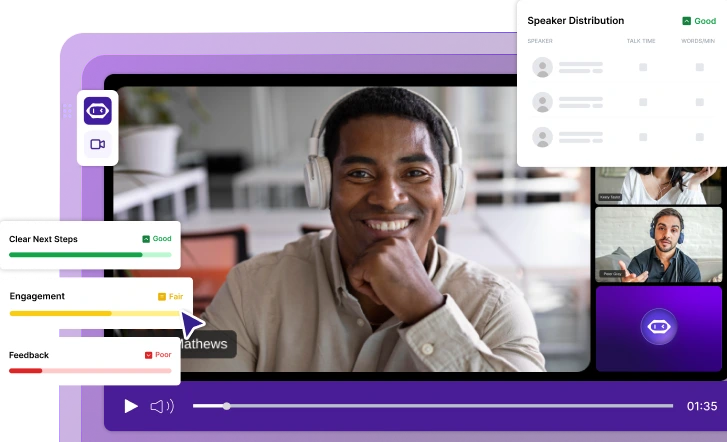
Es zeichnet Ihre Besprechungen automatisch auf und generiert genaue Transkriptionen. Anschließend organisiert es sie in übersichtlichen Notizen, in denen die wichtigsten Punkte und Aktionspunkte bereits identifiziert wurden.
.webp)
Anstatt Dateien zu durchsuchen, erhalten Sie eine durchsuchbare Bibliothek aller vergangenen Besprechungen, sodass Sie Entscheidungen, Diskussionen oder bestimmte Momente in Ihrem gesamten Verlauf sofort finden können.
.webp)
Der KI-Chat geht noch einen Schritt weiter. Sie können zu jedem Meeting Fragen stellen und erhalten direkte Antworten aus dem Protokoll, ohne dass Sie Notizen manuell scannen oder abspielen müssen.
.webp)
MeetGeek verbindet sich auch mit Über 10.000 Integrationen, was bedeutet, dass Ihre Meeting-Daten nicht isoliert bleiben. Notizen, Aufzeichnungen und Aktionspunkte können direkt in Ihre vorhandenen Tools einfließen, sodass alles auf die aktuelle Arbeitsweise Ihres Teams abgestimmt ist.
.webp)
In der Praxis wird Zoom dadurch von einem Ort, an dem Konversationen stattfinden, zu einem System, in dem Informationen erfasst, organisiert und anschließend tatsächlich verwendet werden.
So beheben Sie häufig auftretende Probleme mit Zoom-Testmeetings
Auch nach einem Test können Probleme auftreten. Hier erfahren Sie, wie Sie die häufigsten Probleme beheben können.
Mikrofon funktioniert nicht
Wenn Ihr Mikrofon während eines Zoom-Testmeetings nicht funktioniert, überprüfen Sie zunächst, ob es entweder in Zoom oder auf Ihrem physischen Gerät stummgeschaltet ist. Öffnen Sie dann Ihre Audioeinstellungen und wählen Sie das richtige Mikrofon aus dem Drop-down-Menü aus.
Wenn Ihre Stimme zu leise klingt oder nicht erkannt wird, passen Sie die Eingangslautstärke an. Es ist auch wichtig, in Ihren Systemeinstellungen zu bestätigen, dass Zoom die Erlaubnis hat, auf Ihr Mikrofon zuzugreifen. Wenn Sie ein externes Mikrofon verwenden, versuchen Sie, es erneut anzuschließen oder die Anschlüsse zu wechseln.
Probleme mit dem Lautsprecher (Ton kann nicht gehört werden)
Wenn Sie keinen Ton hören können, erhöhen Sie zunächst die Ausgangslautstärke sowohl in Zoom als auch auf Ihrem Computer. Stellen Sie dann sicher, dass in den Audioeinstellungen der richtige Lautsprecher oder die richtigen Kopfhörer ausgewählt sind.
Wenn das Problem weiterhin besteht, überprüfen Sie Ihre Soundeinstellungen auf Systemebene unter Windows oder Mac, um sicherzustellen, dass das richtige Ausgabegerät aktiv ist. Durch einen Neustart der Zoom-App können auch vorübergehende Störungen behoben werden.
Kamera funktioniert nicht
Wenn Ihre Kamera nicht funktioniert, gehen Sie in die Zoom-Einstellungen und stellen Sie sicher, dass die richtige Webcam ausgewählt ist. Wenn Sie mehrere Kameras angeschlossen haben, wechseln Sie mithilfe des Dropdownmenüs zwischen ihnen. Sie sollten auch überprüfen, ob Ihr Betriebssystem Zoom den Zugriff auf Ihre Kamera ermöglicht. Wenn Sie gerade eine Webcam angeschlossen haben, hilft ein Neustart von Zoom häufig dabei, das Gerät richtig zu erkennen.
Probleme mit der Internetverbindung
Wenn Sie während eines Zoom-Meeting-Tests Verbindungsprobleme haben, versuchen Sie, zu einem stärkeren und stabileren Netzwerk zu wechseln. Eine kabelgebundene Ethernet-Verbindung ist in der Regel zuverlässiger als eine Wi-Fi-Verbindung. Es hilft auch, alle Apps oder Browser-Tabs zu schließen, die viel Bandbreite verbrauchen, da sie die Leistung von Zoom beeinträchtigen können.
Profi-Tipps für ein erfolgreiches Zoom-Testmeeting
Neben den Grundlagen können ein paar einfache Tricks dein Spielerlebnis verbessern:
- Testen Sie 10—15 Minuten vor Ihrem Meeting
- Benutzen nach vorne gerichtete Beleuchtung um dein Gesicht deutlich zu zeigen
- Halte deinen Hintergrund sauber oder verwende einen virtuellen Hintergrund
- Benutzen Kopfhörer um das Echo zu reduzieren und den Klang zu verbessern
- Mache dich mit den Funktionen zum Stummschalten, Chatten und Bildschirmteilen vertraut
- Lauf schnell am Meeting-Test teilnehmen wenn Sie einen Meeting-Link erhalten haben
Diese kleinen Anpassungen können einen großen Unterschied darin machen, wie Sie klingen und aussehen.
Führen Sie vor jedem wichtigen Anruf ein Zoom-Testmeeting durch
Ein Zoom-Testmeeting dauert nur wenige Minuten, kann Sie jedoch vor technischen Problemen bewahren, die Ihr Meeting stören könnten.
Indem Sie Ihre Audio-, Video- und Internetverbindung im Voraus testen, sorgen Sie für ein reibungsloseres und professionelleres Erlebnis für jeden Teilnehmer.
Und sobald Ihr Setup solide ist, helfen Ihnen Tools wie MeetGeek dabei, aus jedem erfolgreichen Meeting klare Notizen, strukturierte Einblicke und umsetzbare Ergebnisse zu machen.
Testen Sie MeetGeek kostenlos und machen Sie jedes Zoom-Meeting produktiver.
Häufig gestellte Fragen
Können Sie ohne Konto an einem Zoom-Testmeeting teilnehmen?
Ja, Sie können an einem Zoom-Testmeeting teilnehmen, ohne ein Konto zu erstellen oder sich dort anzumelden. Gehen Sie einfach zur Zoom-Testmeeting-Seite unter https://zoom.us/test, klicken Sie auf „Beitreten“ und folgen Sie den Anweisungen auf dem Bildschirm, um Ihre Audio- und Videoeinstellungen zu überprüfen.
Wie teste ich mein Zoom-Meeting, bevor ich beitrete?
Verwenden Sie dieselbe Seite, um Ihr Zoom-Meeting zu testen, bevor Sie an einem tatsächlichen Anruf teilnehmen. Klicken Sie auf „Teilnehmen“ und folgen Sie dann den Anweisungen, um sicherzustellen, dass Ihre Kamera, Ihr Mikrofon und Ihre Lautsprecher ordnungsgemäß funktionieren. Sie können Ihre Geräteeinstellungen auch manuell in der Zoom-App testen.
Was überprüft ein Zoom-Testmeeting?
Bei einem Zoom-Testmeeting werden Ihre Kamera, Ihr Mikrofon, Ihre Lautsprecher und Ihre Internetverbindung überprüft. Außerdem können Sie damit Ihre Audio- und Videoeinstellungen anpassen und vor einem Live-Meeting überprüfen, ob alles ordnungsgemäß funktioniert.
Kann ich Zoom testen, ohne an einem Meeting teilzunehmen?
Ja, Sie können Zoom manuell testen, ohne an einem Meeting teilzunehmen, indem Sie die Zoom-App öffnen, zu den Einstellungen gehen und Ihr Video und Audio unter den entsprechenden Tabs überprüfen.
Warum funktioniert mein Mikrofon oder mein Lautsprecher bei Zoom nicht?
Wenn dein Mikrofon oder dein Lautsprecher nicht funktioniert, liegt das in der Regel an einer falschen Geräteauswahl, stummgeschalteten Einstellungen oder fehlenden Berechtigungen. Verwenden Sie das Dropdownmenü in den Zoom-Einstellungen, um das richtige Gerät auszuwählen und erneut zu testen.

Zoom Transkription mit KI: 8 Tools im Test (2026)
Wie 8 KI-Tools für die Zoom Transkription sich wirklich mit Zoom verbinden und was jedes davon tut, wenn Sie nicht der Host sind.
KI Meeting Protokoll Kostenlos: 7 Tools im Test
Sieben kostenlose Tools für Ihr KI Meeting Protokoll im Vergleich, und vor allem: wie viele Meeting-Stunden Sie bekommen, bevor Sie zahlen müssen.
So planen Sie ein Meeting in Google Meet: Schritt-für-Schritt-Anleitung 2026
Drei Desktop-Methoden, zwei mobile Abläufe und ein Trick, um jeden geplanten Anruf produktiver zu machen.

Lustige Zoom-Hintergründe für jede Art von Meeting
Entdecken Sie die besten lustigen Zoom-Hintergründe für Arbeitsanrufe und virtuelle Besprechungen, darunter Memes, Fernsehszenen, gefälschte Büros und KI-generierte Ideen.
Die Vorlage für ein Agile-Retrospektiv-Meeting: 5 Formate, die funktionieren
Fünf Retro-Formate (Start/Stop/Continue, 4Ls, Mad/Sad/Glad, Sailboat, DAKI), wann man sie verwenden sollte und der Commitment-Schritt, der aus Reden Veränderung macht.
HIPAA-konforme Tools zur Transkription von Besprechungen: Ein Leitfaden zur Überprüfung
Was HIPAA tatsächlich von Transkriptionstools verlangt, warum sich die meisten KI-Notizer nicht qualifizieren und eine 10-teilige Checkliste für klinische Operationsteams.
Zoom-Testmeeting: Schrittweise Anleitung zum Testen Ihres Setups vor jedem Anruf
Erfahren Sie, wie Sie ein Zoom-Testmeeting durchführen, Mikrofon- und Kameraprobleme beheben und sicherstellen, dass Ihr Setup vor einem wichtigen Anruf bereit ist.
Das Playbook zum Projektstart (+ Vorlage)
Die 7-teilige Agenda, die Vorlage und die 24-Stunden-Checkliste für die Nachbereitung, die aus einem Projektstart die wertvollsten 60 Minuten des gesamten Projekts machen.

Was ist eine Jahreshauptversammlung (AGM)? Ein vollständiger Leitfaden
Machen Sie sich mit Jahreshauptversammlungen vertraut, was in die Tagesordnung einer Hauptversammlung aufgenommen werden muss und wie Sie strukturierte, gesetzeskonforme Versammlungen abhalten, die Entscheidungen beeinflussen.

Ist es illegal, jemanden ohne dessen Erlaubnis aufzunehmen?
Das Aufzeichnen eines Gesprächs kann in einigen Situationen legal und in anderen illegal sein. In diesem Leitfaden wird erklärt, wann das Aufnehmen einer Person ohne Genehmigung in den USA und der EU zulässig ist, wie die Zustimmungsgesetze funktionieren und wie rechtliche Probleme vermieden werden können.
Spiele zum Spielen auf Zoom: 20 Ideen für Teambuilding (und echte Lacher)
Eine praktische Liste von Zoom-Spielen, die Remote-Teams dabei helfen, Kontakte zu knüpfen, Energie zu tanken und virtuelle Besprechungen ansprechender und interaktiver zu gestalten.
So automatisieren Sie Besprechungen sicher in regulierten und risikoreichen Umgebungen
Erfahren Sie, wie Sie Besprechungen in regulierten Umgebungen automatisieren können, ohne die Sicherheit, den Datenschutz oder die Einhaltung von Vorschriften zu gefährden.
Die besten tl;dv-Alternativen zur Optimierung Ihrer Besprechungen
Entdecken Sie die besten tl;dv-Alternativen und erkunden und vergleichen Sie deren Funktionen, um das richtige KI-Meeting-Tool für Ihr Unternehmen auszuwählen.
KI-Tagenten: Wie autonome KI die Zukunft der Arbeit verändert
Erfahren Sie, wie KI-Besprechungsagenten die Zukunft der Arbeit neu definieren. Sie kümmern sich um die Planung, Nachbereitung und sprechen sogar in Ihrem Namen, um Zeit zu sparen und jedes Meeting in echte Aktionen umzusetzen.
Granola AI Notes-Alternativen: Die besten Optionen, die Sie 2026 ausprobieren sollten
Entdecken Sie die besten Granola AI Notes-Alternativen für 2026 mit intelligenteren Tools, die über die Transkription hinausgehen und Automatisierung, Einblicke und Zusammenarbeit bieten.
Folge-E-Mail nach dem Interview: Wie man es schreibt, wann man es sendet und was man sagt
Erfahren Sie, wie Sie nach einem Interview eine effektive Folge-E-Mail schreiben. Von Zeitplan und Vorlagen bis hin zu Ton und Struktur behandelt dieser Leitfaden alles, was Sie brauchen, um sich abzuheben und unvergesslich zu bleiben.

Tactiq Preise 2026: Lohnt es sich? Pläne und Kosten
Ein klarer Blick auf jeden Tactiq-Tarif, was die KI-Credits wirklich einschränken und wie sich die Kosten für Einzelnutzer und Teams summieren.

Bedeutung und Durchführung eines Ad-hoc-Meetings
Entdecken Sie die wahre Bedeutung von Ad-hoc-Meetings und lernen Sie, wie Sie spontane Diskussionen zielgerichteter und effektiver gestalten können. Finden Sie heraus, wann Sie sie abhalten und verwalten sollten.
Etikette für virtuelle Besprechungen: 15 grundlegende Regeln für professionelle Videoanrufe
Entdecken Sie 15 wichtige Regeln und Tipps zur Etikette virtueller Besprechungen, die dafür sorgen, dass Gespräche konzentriert, professionell und ansprechend bleiben.
So sehen Sie Ihren Google Meet-Verlauf und finden Aufzeichnungen (4 einfache Methoden)
In diesem Artikel werden verschiedene Möglichkeiten zum Anzeigen Ihres Google Meet-Verlaufs sowie zum Wiederherstellen und Teilen von Aufzeichnungen beschrieben. Außerdem werden die Anforderungen für den Zugriff auf diese Daten beschrieben.

Fireflies AI Pricing | Testbericht und Dinge, von denen ich wünschte, ich wüsste sie vor dem Kauf (2026)
Entdecken Sie die Preise und Funktionen von Fireflies 2026. Erfahre, warum Nutzer von dieser Plattform wechseln, und wähle Alternativen für Zusammenfassungen und Einblicke in KI-Meetings.
So wählen Sie die richtigen Vorlagen für Sitzungsprotokolle für verschiedene Arten von Besprechungen aus
Der erste Schritt bei der Auswahl der richtigen Vorlage besteht darin, die verschiedenen Besprechungstypen und ihre Dokumentationsanforderungen zu verstehen. In diesem Artikel werden wir lernen, wie das geht.
So greifen Sie auf Ihren Zoom-Meeting-Verlauf zu und überprüfen ihn: Eine vollständige Anleitung
In diesem Artikel zeigen wir Ihnen, wie Sie auf Ihren Zoom-Meeting-Verlauf zugreifen und ihn überprüfen können: sowohl mithilfe der integrierten Tools von Zoom als auch mithilfe eines KI-Meeting-Assistenten.
KI-Protokoll für Meetings vor Ort: die besten Apps zum Aufzeichnen und Transkribieren (2026)
Wir haben mobile Apps, KI-Notizblöcke und dedizierte Rekorder getestet, die Gespräche im Raum wirklich erfassen.
So zeichnen Sie einen Discord-Anruf auf: Eine schrittweise Anleitung (2026)
Diese schrittweise Anleitung zeigt Ihnen, wie Sie einen Discord-Anruf sowohl mit einfachen, integrierten Gerätefunktionen als auch mit leistungsstarken Tools von Drittanbietern aufzeichnen.
So verwenden Sie die Zoom Chrome-Erweiterung und die 9 besten Erweiterungen für Besprechungen
In diesem Handbuch erfahren Sie genau, wie Sie die Zoom Chrome-Erweiterung und einige andere Tools verwenden, um Ihren Besprechungsprozess zu vereinfachen.

So zeichnen Sie Webex-Meetings auf: Eine schrittweise Anleitung [2 Methoden]
Nehmen Sie auf Webex auf, indem Sie die integrierte Aufnahmefunktion verwenden, oder verbessern Sie die Aufnahme mit Tools von Drittanbietern wie der MeetGeek AI Chrome-Erweiterung.

Die Überlastung von Besprechungen ist nicht das eigentliche Problem — schlechtes Meeting-Design schon
Wenn eine Überlastung der Besprechungen offensichtlich wird, gibt es einige kleine Änderungen, die Ihre gesamte Meetingkultur verändern können.

So zeichnen Sie Videokonferenzen auf: Eine Anleitung zu integrierten Funktionen und KI-Tools
Nehmen Sie Videokonferenzen mit integrierten Plattformtools oder KI-Transkriptionsdiensten auf, um dauerhafte Ressourcen zu erstellen. Verwenden Sie Tools wie MeetGeek, um die Zusammenarbeit zu automatisieren und die Produktivität zu verbessern.
AI-Besprechungsnotizen: Ihr Leitfaden für die automatisierte Besprechungsdokumentation im Jahr 2026
Schauen wir uns alles genauer an, was Sie über die kostenlosen Optionen für KI-Besprechungsnotizen wissen müssen.
Die 4 besten kostenlosen Transkriptionssoftware für 2026 | Persönlich getestet
In diesem Artikel stellen wir die 4 besten Transkriptionssoftware vor, die wir auf der Grundlage persönlicher Tests für 2026 gefunden haben.

Otter AI Pricing | 4 Dinge, die ich gerne vor dem Kauf gewusst hätte (2026)
„Lohnt sich Otter AI?“ Es ist eine gute Frage, und viele von Ihnen haben sie gestellt. Erfahren Sie, was wir über die Preise und Funktionen von Otter AI herausgefunden haben und welche anderen Optionen Sie haben.
Gong-Preise im Jahr 2026 | Dadurch sparen Sie +30.000 $
Wenn Sie über Gong nachgedacht haben, haben Sie wahrscheinlich die Frage gestellt: „Wie viel kostet Gong?“. Finden Sie heraus, wie viel Gong-Kunden bezahlen und welche anderen Optionen Sie haben.
So treten Sie Zoom mit der Meeting-ID bei + Alternativen
Erfahren Sie, wie Sie mit einer Meeting-ID an einem Zoom-Meeting teilnehmen können, und erkunden Sie alternative Methoden, um eine nahtlose Verbindung herzustellen.

Die 6 Besten Apps für Besprechungsnotizen 2026
In diesem Artikel haben wir nicht nur die besten KI-Besprechungsassistenten zusammengestellt, sondern auch die besten Apps für manuelles Notieren, wenn es um Besprechungsnotizen geht.

Wir haben die 5 besten Fathom-Alternativen für 2026 getestet und gefunden
Nach einem tiefen Einblick in die Erfahrungen der Benutzer mit diesem KI-Meeting-Assistenten haben wir herausgefunden, welche Fathom-Alternativen für Sie am besten geeignet sind.
Read AI im Test: Warum verlassen so viele Nutzer die Plattform? (2026)
Wir führen Sie durch die wichtigsten Funktionen, Preise sowie Vor- und Nachteile und geben Ihnen einige Einblicke, warum Benutzer von diesem KI-Meeting-Assistenten wechseln.

Wann und wie organisiert man ein persönliches Treffen im Jahr 2026
Planen Sie intelligentere persönliche Besprechungen! Erfahren Sie, wann Sie sich treffen sollten, wie Sie sich effektiv organisieren und jedes Meeting produktiv und ansprechend gestalten können.
.png)
Die 7 besten KI-Notizbuchhalter im Jahr 2026 | Über 15 getestete Tools
Ich habe versucht, +15 KI-Notizen zu schreiben, um die besten zu finden. In diesem Artikel wird anhand von Funktionen und Preisen das beste KI-Notizbuch vorgestellt.
So führen Sie ein effektives Touchpoint-Meeting durch: Strategien für Manager
Sie möchten erfolgreiche Touchpoint-Meetings durchführen? Erfahren Sie umsetzbare Tipps und Strategien, um die Zusammenarbeit zu fördern, Fortschritte zu verfolgen und Ihr Team dazu zu inspirieren, mehr zu erreichen.
Die 6 besten Gong-Alternativen nach +2 Jahren Testen (2026)
Wir haben über 300 Stunden in dieses Projekt investiert, um die besten Gong-Alternativen zu entdecken. Lassen Sie uns in die besten eintauchen.

Top 8 Online Virtual Meeting Platforms for Growing Organizations
With more and more virtual meeting platforms being available in the market, choosing the right one for your business can be quite confusing and challenging.

Google Meet Aufzeichnen auf Jedem Gerät (2026)
In unserer umfassenden Anleitung erfahren Sie, wie Sie ganz einfach ein Google Meet aufzeichnen können. Lesen Sie diesen Artikel, um sich nie wieder Sorgen zu machen, wichtige Informationen zu verpassen!
So meistern Sie Scrum-Meetings: Best Practices und Vorlagen
Erfahren Sie anhand praktischer Tipps und Vorlagen, wie Sie effektive Scrum-Meetings durchführen können. Optimieren Sie Ihren Arbeitsablauf, fördern Sie die Teamzusammenarbeit und holen Sie das Beste aus jedem Meeting heraus!
So richten Sie ein Teams-Meeting ein: Eine schrittweise Anleitung für Anfänger
Erfahren Sie mit unserem anfängerfreundlichen Leitfaden, wie Sie mühelos ein Team-Meeting einrichten können. Von der Planung bis zur Einladung — wir decken jeden Schritt ab!

So transkribieren Sie Zoom-Meetings ohne zusätzliche Berechtigungen in Google Docs
Erfahren Sie mit diesen einfachen Schritten, wie Sie Ihre Zoom-Meetings effizient in Google Docs transkribieren können. Steigern Sie die Produktivität und verweisen Sie einfach auf frühere Diskussionen.

6 Tips to Write a Successful Meeting Agenda with Examples
Want to write the ultimate meeting agenda and achieve all-time productivity in your team meetings? Follow these 6 pro tips to learn how and check out our free templates to get started.

How to Run an Effective Discovery Meeting
Learn how to run an effective discovery meeting with practical tips and strategies that ensure success.
How to ‘Share Screen’ on Zoom [PC/Mobile] + Pro Tips
Learn how to share your screen during Zoom meetings on both PC and mobile devices with our expert tips!

How to Choose the Right Meeting Cadence: The Manager’s Playbook
Unlock the secrets to setting the perfect meeting cadence for optimal team productivity with this guide for managers.

Die 10 Geheimnisse für effektives Meetingmanagement
Enthüllen Sie die Geheimnisse eines effektiven Meetingmanagements! Entdecken Sie 10 wegweisende Strategien für produktive Besprechungen.
How to Set Up a Zoom Meeting & Stellar Tips for Boosted Engagement
Master the Zoom setup with our easy step-by-step guide. From scheduling to hosting, learn how to connect & engage in the digital world.
The 10 Best Vowel.ai Alternatives for Your Meetings
Click through for a look at 7 of the top alternatives to Vowel for your next meeting.

How to Host the Ultimate One-on-One Meeting
Discover how to organize one-on-one meetings that improve communication, foster engagement, and build stronger relationships in your team by reading this article!

How to Plan and Run Productive Sales Meetings [+Free Sales Meeting Agenda]
Learn effective strategies to make your sales meetings more impactful and productive. Discover tips to boost engagement and results!

Find Your Perfect Meeting Notes Template
Are meetings a part of your work life, but you have no idea what they should contain or even look like? Read this article to get your meeting notes template!

What is Virtual Meeting & What to Expect in 2026: A Look Ahead
Discover the future of virtual meetings in 2026 and some out-of-time tips with this insightful article.

Effective Data Visualization for Meeting Insights
Visualization makes conveying complex data more understandable. Let's discover how to level up your next meeting with visual assets.

Why You Need to Set Meeting Goals and How to Do That
The first step to a successful meeting is defining your meeting goals. Read this article to learn how high-performing teams do this!

Google Meet vs. Zoom: Was 2026 Wählen?
Entdecken Sie das ultimative Duell zwischen Google Meet und Zoom in 2026! Finden Sie heraus, welches Videokonferenz-Tool bei Funktionen und Preis-Leistung gewinnt.

The Ultimate End-of-Year Review: A Guide for Managers
Master the art of end-of-year reviews with our comprehensive guide for managers. Learn proven strategies to evaluate performance and set goals for success in the coming year.
15 Free Meeting Agenda Examples
Are you still trying to find the perfect meeting agenda examples to use as inspiration before your next meeting? Check out our free 15 templates!
How to Write an Effective Meeting Recap: Tips & Templates
Discover 10 practical tips to write clear and effective meeting recaps that keep your team informed and on track. Enhance communication and productivity with these easy steps.

15 Types Of Meetings: What Makes Them Different & Tips
Are you a manager who wants to master the art of hosting meetings? Learn how to approach these 15 types of meetings effectively with our exclusive tips!

How to Facilitate Inclusive and Collaborative Meetings
Good meeting planning and facilitation are what makes team meetings inclusive, collaborative, and effective leading to problem resolution and new idea generation.

How to Write an Effective Meeting Invitation Email
Ever wondered what the recipe for a successful meeting invitation email is? Read this article to learn all of our tips and insights!

The 10 Best Meeting Scheduling Software for 2026
The best meeting scheduling tools offer a frictionless experience for all participants. Here are 10 options that will save hours of your time!

How To Record a Zoom Meeting If You’re Not a Host
Discover how to record Zoom meetings without hosting privileges from any device for a streamlined meeting experience!

20 Outside-the-Box Ideas for Team Meetings
Energize and engage your team with one of these 20 innovative team meeting ideas.

How to Change the Zoom Host + How to Add a Zoom Alternative Host
Learn the quick and easy steps to change hosts in Zoom meetings with this comprehensive and beginner-friendly guide.

How to Run an Effective Brainstorming Session
Get ready to unlock your team's creativity. Don't miss this guide to running an effective brainstorming session that will bring innovative ideas to life.

The Power of a Blog: How Meetings Can Be Transformed into Engaging Content
In this article, we'll unpack six inventive strategies for leveraging meeting transcripts to enhance your marketing efforts.

10 Wege, wie ein KI-Meeting-Assistent bei Ihren Meetings & Interviews helfen kann
Ohne die richtigen Tools können Meetings zu einem mühsamen Prozess werden. Lesen Sie diesen Artikel, um die 10 besten Anwendungsfälle eines KI-Meeting-Assistenten zu entdecken!

How to Have a Successful Business Meeting in 2026
Master the art of successful business meetings this year with our top tips for planning, engaging, and achieving results in the modern workplace.

Innovative Meeting Formats: Exploring Alternatives to Traditional Business Meetings for Enhanced Creativity
Explore some alternative meeting formats that can revolutionize how your team collaborates and generates ideas.

10 Types of HR Screening Questions to Ask If You're a Hiring Manager
Are you trying to find the best candidate for a job posting in your company? Read this article to discover the best types of HR screening questions!

The 5 Best Types of Check-In Questions for Meetings
Are you a manager trying to find the best check-in questions for meetings? Read this before your next meeting!

How to Join a Zoom Meeting from Any Device in 2026
Step into 2026 with ease: Learn to join Zoom meetings from any device with this simple, user-friendly guide for seamless virtual connections.