




Have you ever struggled to take notes during a Microsoft Teams meeting, only to dig through pages and pages afterward looking for that one valuable detail?
You don't have to work that way anymore. In this guide, we'll walk through how to generate Microsoft Teams transcripts so that no relevant idea or action item slips past you.
Whether you're a Teams veteran or just getting started, mastering transcription changes how you run meetings, work with colleagues, and get things done. And if you'd rather not depend on licenses or admin permissions, the MeetGeek integration for Microsoft Teams records and transcribes the same call automatically. Ready to start?
Prerequisites for Transcribing Microsoft Teams Meetings
Before you start transcribing your Microsoft Teams meetings, you need to set the stage.
Here are the prerequisites for transcribing Teams meetings:
- Get the right permissions: transcription is a powerful feature, but it isn't available to everyone by default, so check your user type and your permissions in the Microsoft Teams admin center before you move ahead;
- Check your Microsoft Teams version: the feature only shows up in the most recent versions of the app, so keep Teams updated to avoid missing this capability and others;
- Pick the language before you start: Teams transcribes in dozens of languages, English included, but it recognizes only one language per meeting, and you set that language before transcription begins;
- Turn the feature on: before the meeting, you or your IT admin needs to enable the transcription service, which is usually off by default to protect attendee privacy;
- Stay compliant: confirm that using transcription lines up with your company policies and with applicable regulations, especially when the conversation involves sensitive information;
- Prepare the participants: use the Teams meeting invite to let people know the conversation will be transcribed, which is a courtesy and also helps keep the discussion organized;
- Have the right technology: the result depends on the audio, so use good microphones and a stable connection to cut down on transcription errors;
- Know your post-meeting processes: get familiar with the steps for reviewing and editing the transcript, and with the protocols for storing or deleting those files under your company data retention policy.
How to Transcribe Microsoft Teams Meetings
Having your virtual meetings transcribed means every word gets captured, which makes those meetings more inclusive and saves you precious note-taking time.
Here are the main ways to create transcripts in Microsoft Teams. Below you'll find a quick walkthrough video, followed by the detailed steps.
A. How Do You Turn on Automatic Transcription in Teams?
When you schedule a meeting, there's nothing special to do here, so just set up your Teams meeting the way you normally would.
NOTE: automatic transcription works for scheduled meetings and for spontaneous "Meet now" sessions alike.
Here's how to turn on automatic transcription in Microsoft Teams meetings:
1. Once your meeting starts, look for the "..." (more options) button in the meeting control bar.

2. In the dropdown menu, select Start transcription. From that point on, Teams converts spoken words into text in real time.

3. When the meeting ends, the transcript is available in the meeting chat or in the Recordings and Transcripts tab of the meeting in Teams, where you can download, share, or delete the file.

B. How to Automatically Transcribe Your MS Teams Meetings
Let's be honest: if you meet often, forgetting to turn transcription on is going to happen more than once.
That's why we built MeetGeek, a meeting automation platform that records, transcribes, and summarizes your conversations automatically. The table below compares the two paths:
| Feature | Microsoft Teams | MeetGeek |
|---|---|---|
| Price | Needs a paid Microsoft 365 license, since transcription is not included in the free version of Teams | Free plan with transcription included, upgradable when your team needs more |
| Languages | Dozens of languages, English included, but only one per meeting, chosen before you start | More than 100 languages, with automatic detection of the spoken language |
| Who can transcribe | The organizer or a colleague from the same organization, and an admin has to switch the feature on | Any participant with a MeetGeek account, host or not |
| Integrations | Transcripts stay inside the Microsoft 365 ecosystem, in OneDrive and SharePoint | More than 20 native integrations and more than 10,000 connected apps through Zapier, Make, and n8n |
| Extra features | Live transcription with speaker identification | AI summaries, action items and highlights, meeting analytics with KPIs, and automated follow-up emails |
Table last updated: August 17, 2026.
The best part? Even when you're only an attendee and not the host, you still get your own transcript without asking a Teams admin for permission.
Here's how MeetGeek improves your Microsoft Teams experience:
- Automated recording and transcription: MeetGeek joins your meetings as a separate participant and quietly records everything in the background;
- AI summaries: your transcripts turn into concise AI meeting minutes, ready before your next meeting and written in the language of the conversation, with automatic detection across more than 100 supported languages;
- Action item extraction: the platform's algorithms pull tasks and key points out of the conversation so you stay on top of your workload;
- Automated follow-up emails: recap emails are written and sent automatically, straight to your inbox and to your teammates;
- Meeting archive: MeetGeek keeps a central repository of meeting notes so you can access, share, and revisit your conversations whenever you need them;
- Conversation intelligence: MeetGeek meeting analytics scores how effective your meetings are against customizable KPIs and shows how the team is performing;
- Automated workflows: with more than 20 native integrations and more than 10,000 connected apps through Zapier, Make, and n8n, your workspaces stay up to date automatically.
Here's how to set up your MeetGeek account:
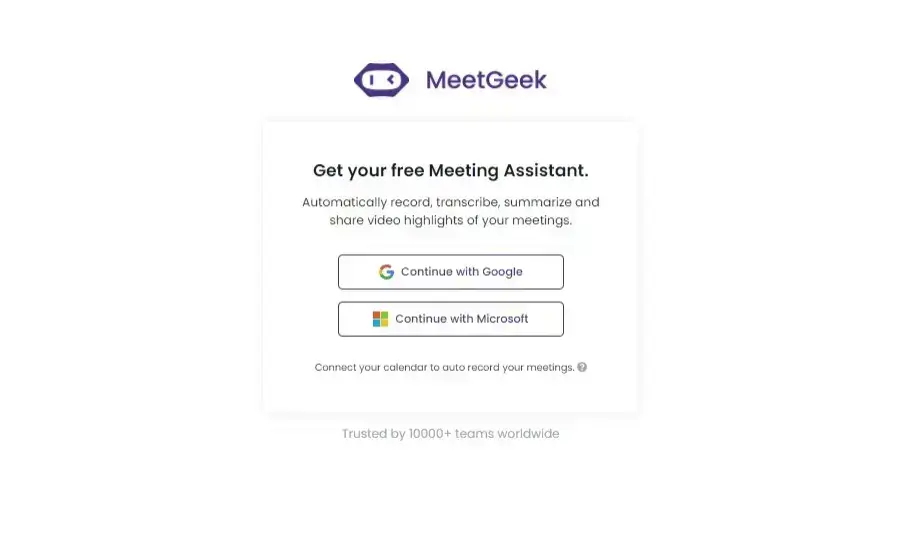
1. Create a free MeetGeek account with your Microsoft account credentials.
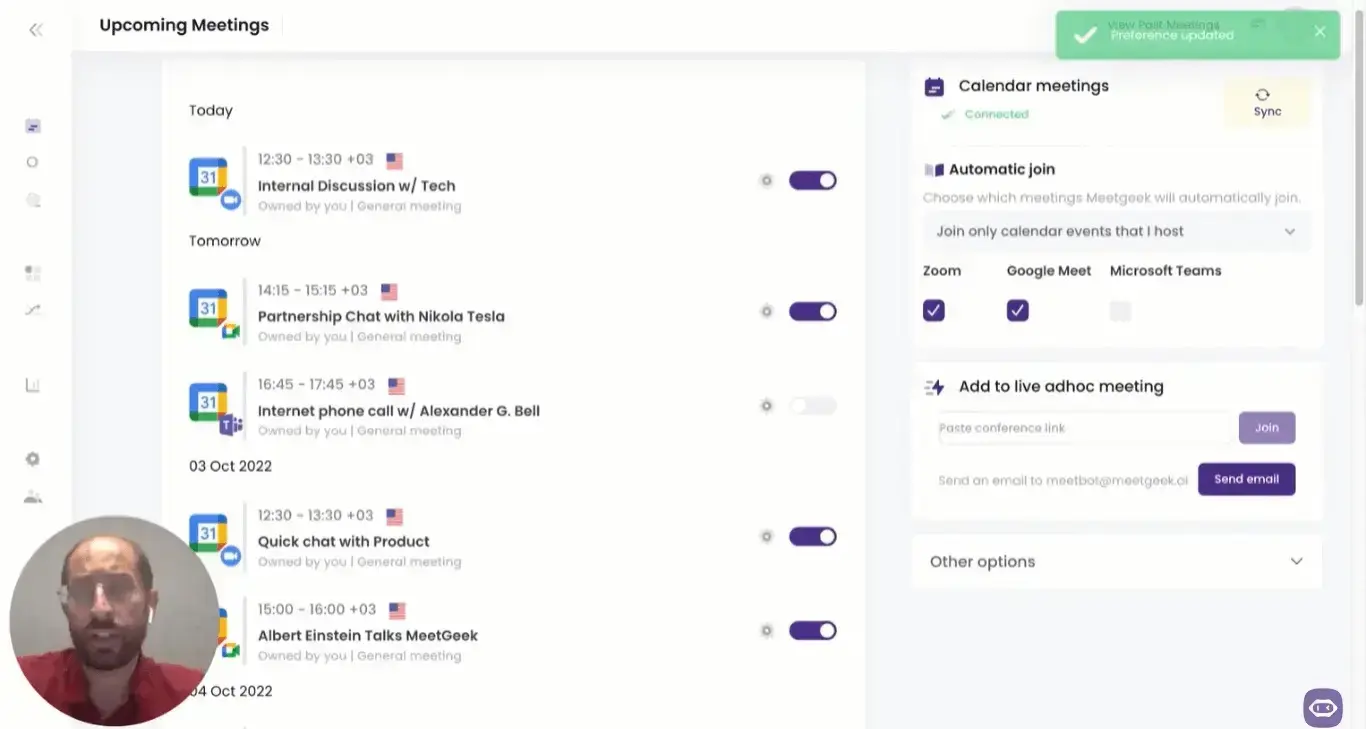
2. Connect your Microsoft calendar to MeetGeek so the assistant joins your meetings automatically. For instant calls, paste the link into the live ad hoc meeting field.
3. When the meeting starts, MeetGeek joins as a participant and records video and audio, which it uses to build the transcript and the AI summary.

TIP: whenever you can't attend a Teams meeting, ask MeetGeek to join in your place and review the recording and the transcript in your account when you have time.
If you want to stop depending on licenses, permissions, and remembering to click Start transcription, this is where MeetGeek comes in. It records, transcribes, and summarizes every Teams meeting without asking you to remember a thing.
C. How to Manually Transcribe Your MS Teams Meetings
Transcribing your Teams meetings by hand takes effort, but it also forces you into the detail of the conversation. Working through the recording line by line makes you review the discussion closely, so no idea gets lost and every voice is heard.
Here's how to transcribe meetings manually.
Step 1: Prepare Your Tools
First, you'll need the recording of your Teams meeting. If you've been recording your sessions and you have the right permissions, they sit in the Microsoft Teams meeting chat or in the Recordings tab of the channel where the meeting took place. Download the file to your device.
Next, get your transcription tools ready. The old-school method of playing the recording back and typing into a document works, but plenty of software options make the job faster.
Step 2: Choose Your Transcription Method
Decide how you want to run the process:
- Manual option: open a new document in your text editor of choice, play the recording, and pause often to type out the conversation, using headphones and slower playback to catch every word;
- Semi-automated option: use a transcription service to get a first draft by uploading the recorded audio file to MeetGeek and letting the tool do the work.
NOTE: most tools need some time to process the file, depending on how long the recording is.
Step 3: Edit and Format Your Transcript
Whether you type the transcript by hand or lean on software, editing is what makes the difference. Automatically generated transcripts usually need a pass to fix inaccuracies, cut filler words, and make sure the text flows coherently.
TIP: format the file with speaker names, timestamps, and sections, which improves readability and makes the document easier to search later.
Step 4: Review and Refine
If you can, share the draft transcript with the organizer and the other attendees. They help clear up confusing passages and confirm that every important point was captured correctly.
That review round improves the document and gets the team more invested in what it says.
Step 5: Use and Share Your Transcript
Now that the transcript is ready, put it to work. Share it with your team, turn the discussion into tracked action items in your project management tools, and use the document as a reference in later discussions.
A well-made transcript becomes a valuable resource for the team, keeping everyone aligned and making it possible to revisit decisions with clarity.
Best Uses for Your Microsoft Teams Transcripts
The benefits of having meeting transcripts go well beyond recordkeeping or compliance with internal policies.
Here are the best uses for your Microsoft Teams transcripts:
- More accessibility: by offering live captions and a written record of the conversation, you make sure deaf and hard-of-hearing colleagues can participate fully;
- Language translation: when you are managing remote teams across continents and cultures, a transcript lets you translate the text into other languages so nothing gets lost along the way;
- Review and follow-up: a transcript works like a rewind button, ideal for revisiting decisions and action items and for making sure the follow-up emails you promised actually get sent;
- Accountability: the clarity of a written record creates accountability and turns the commitments made in the meeting into action, moving the team from "I think" to "I know";
- Performance evaluation: the text gives you data you can analyze to understand team dynamics and individual contributions, which makes your end-of-year performance review more about growth and less about guesswork;
- Content creation: your next post, newsletter, or training material may be hiding in your transcripts, ready to become useful content for a wider audience;
- Training and onboarding: for new hires, transcripts of certain meetings become learning material, carrying the project history and the context that a standard employee onboarding process rarely covers.
Start Generating Better MS Teams Transcripts with MeetGeek
MS Teams transcripts make meetings easier to act on, easier to share, and easier for everyone to follow, because they keep a record of what was actually said.
The pursuit of efficiency and accuracy doesn't end there, though. For teams that want to take transcription further, a tool like MeetGeek shortens the whole process. Every Teams meeting produces a recording, a transcript, a summary, and action items, whether or not anyone remembered to click Start transcription.
With every detail on the record, your next big idea may already be sitting in the transcript of your last meeting.
Frequently Asked Questions
1. Can I Transcribe in Teams Without Recording?
Yes. As long as you have a valid Microsoft 365 subscription, you can transcribe the meeting without recording it.
2. Why Can't I Use Transcription in Teams?
If the MS Teams transcription features aren't working, check the three points below:
- Permissions: transcription rights are tied to recording rights, so talk to your Teams admin to confirm that you're cleared;
- Outdated app: an old version of Teams may not show every feature, so update the app before you try again;
- Language and region: transcription has its own language preferences and recognizes one per meeting, and some features still depend on the region, which is worth confirming in your case.
3. Where Are Teams Transcripts Stored?
Teams transcripts are stored in the cloud, alongside your meeting recordings. In practice, you'll find them in the meeting chat or in the Details tab of the meeting in Teams.
If you prefer to keep your own copy, you can download the transcript in VTT format and store, share, or review it offline.




.avif)