How to Send a Teams Meeting Invite from Any Device
Discover how to invite people to your Teams meetings in only a few steps with this guide!

✅ Free meeting recording & transcription
💬 Automated sharing of insights to other tools.

Image Source: rawpixel.com on Freepik
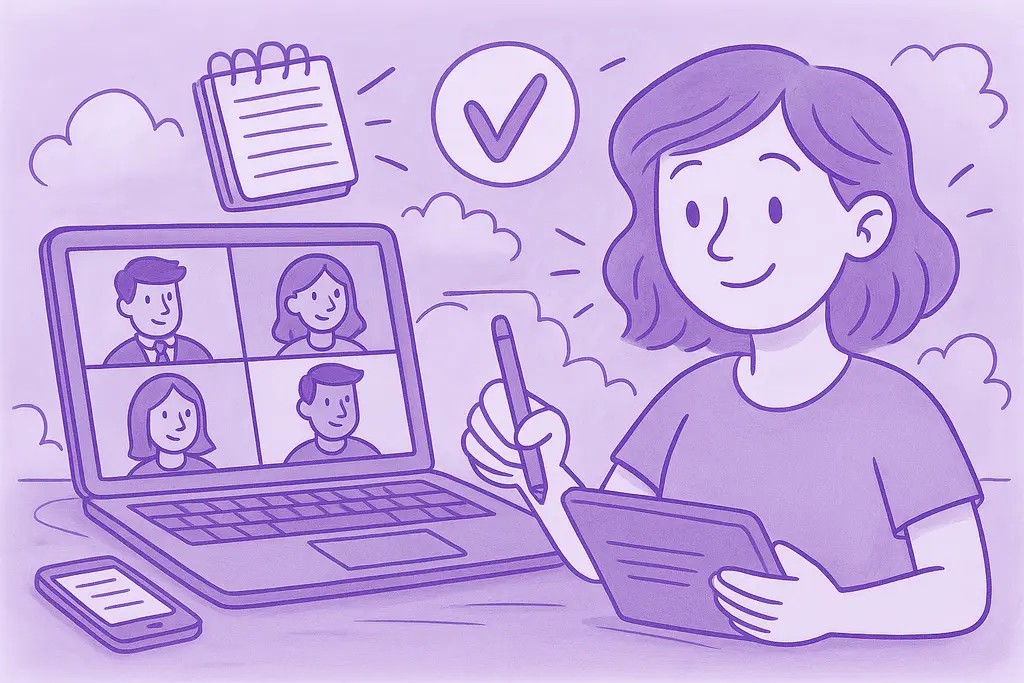
Whether you're working from home, managing a global team, or just trying to stay in touch with colleagues, Microsoft Teams is a lifeline for seamless communication.
But how do you bridge the gap between wanting to connect and initiating that meeting? The answer lies in learning how to send a Teams meeting invite. And with Microsoft’s intuitive platform, you can do it from any device.
Let us walk you through the simple steps to send a Teams meeting invite, ensuring you stay connected, productive, and collaborative. Shall we begin?
What Does a Microsoft Teams Meeting Invite Include?
When you're setting up a Teams meeting, sending out an invitation is an integral part of the process. Since the invite itself can significantly impact participation rates, use it to inform participants about what to expect and build momentum.
Thankfully, Microsoft enables online meeting organizers to include all the details attendees need, ensuring they come to the meeting informed, prepared, and ready to engage.
Here’s what a Teams meeting invite includes:
- Meeting title: Think of it as the subject line of an email — it should be concise yet descriptive enough to give attendees a clear idea of the meeting's purpose.
- Date and time: Microsoft Teams’ scheduling assistant adjusts the timing for different time zones, ensuring that everyone sees the start time in their local time zone. This greatly reduces confusion and helps you to increase attendance rates.
- Meeting link: The link is prominently placed in a Teams meeting invitation email, making it easy for attendees to find when it's time to join. Participants won't have to navigate through apps or enter meeting codes, allowing every new Teams meeting to take off smoothly.
- Meeting details: Taking the time to accurately fill in your Teams meeting details can significantly improve your gathering’s outcomes. Include the meeting agenda to assign roles and help your team prepare accordingly.
- Any attached files or relevant information (optional): Sometimes, a meeting requires more than just an agenda. For those instances, Teams invites allow you to attach files or include links to relevant documents, spreadsheets, or presentations. It's an excellent way to foster collaboration from the get-go.
How to Invite People to a Microsoft Teams Meeting Invite
Inviting colleagues or clients to a Microsoft Teams meeting is a straightforward process, designed to integrate seamlessly into your workflow whether you're at the office or on the move.
A. How to Send a Teams Meeting Invitation on a Desktop
If you’re all about the desktop experience, the process is intuitive, and you can create the invite in a matter of minutes.
Here’s how to send a Teams meeting invitation on your desktop:
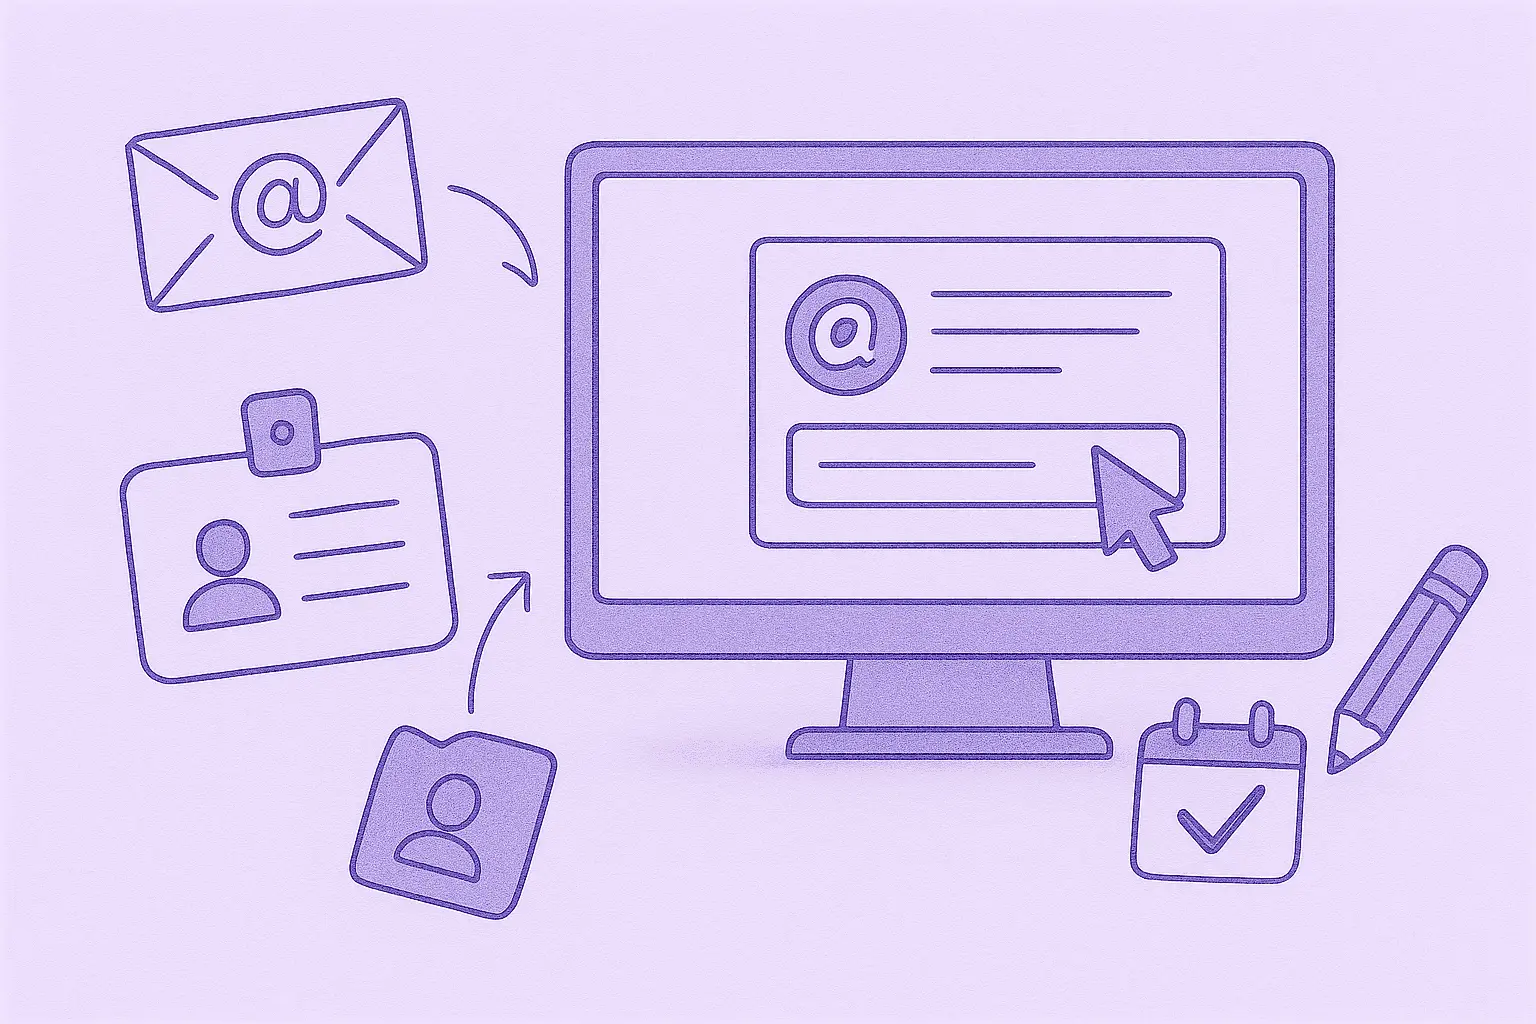
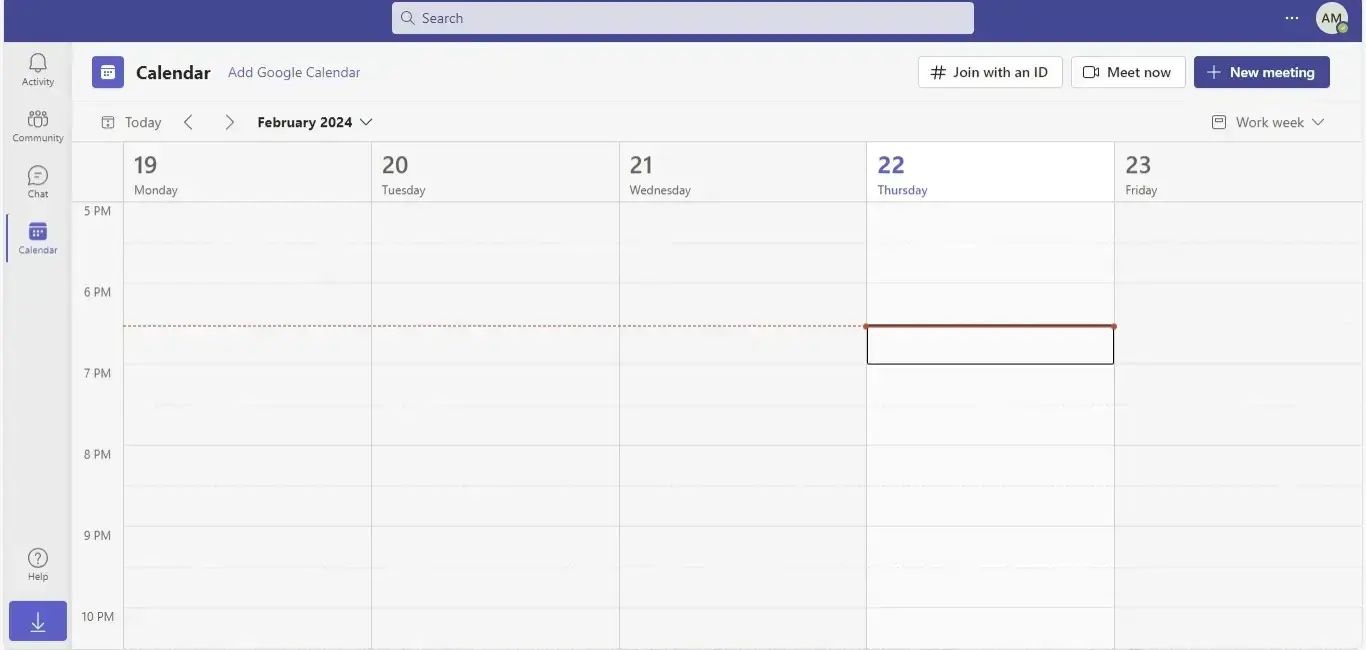
- Open Outlook calendar or the Teams app on your desktop. Click on the calendar icon, on the left-hand sidebar.
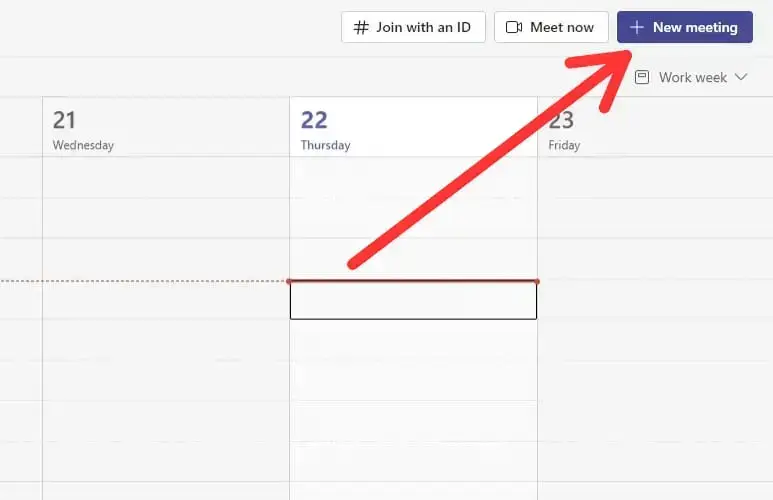
- In the top right corner of your calendar, you'll find a “New meeting” button. Click on it to access the meeting scheduling form.
- Enter the essential information: the meeting subject, date, time, and any description or agenda you wish to include. The form mirrors the structure of an ordinary meeting invite, making it a one-stop process for organizing your meeting.
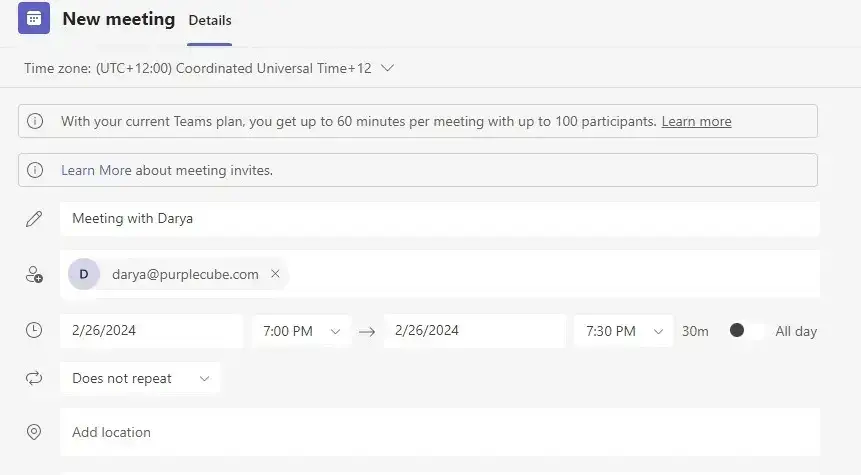
- In the “Add required attendees” box, enter the names or email addresses of the people you wish to invite. Teams suggests members from within your team, but you can also invite attendees from outside your organization by entering their full email addresses.
- Once everything is set, hit the Send button in the top right of the app to save the meeting and invite participants. The meeting will appear in both the Outlook calendar and the Teams calendar of every participant.
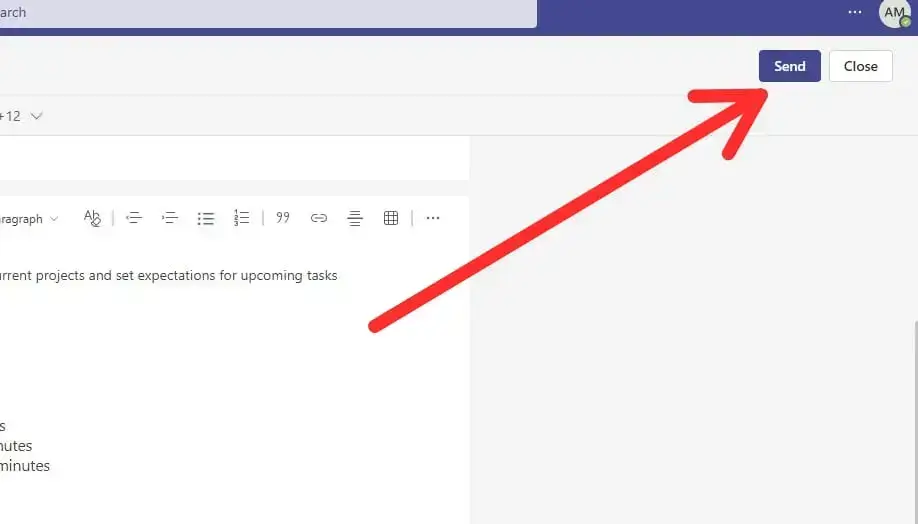
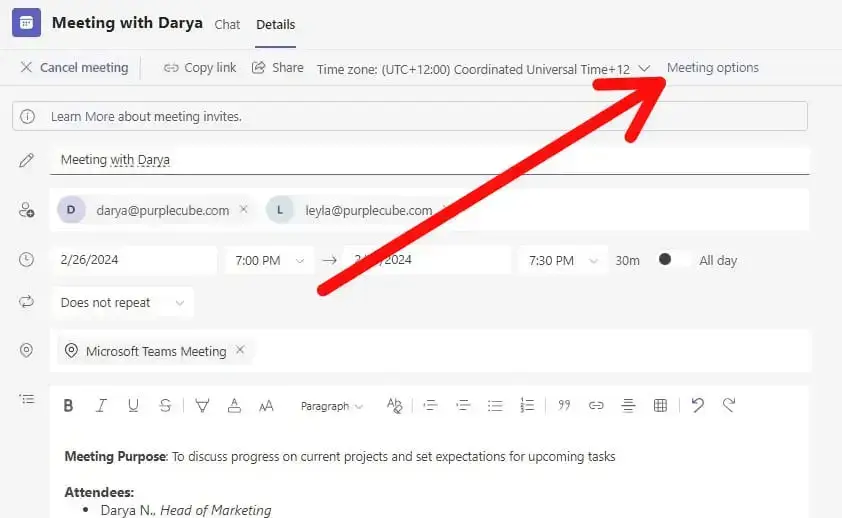
- After sending out the scheduled meeting invite, you can adjust additional settings, like who has presenter rights and whether participants can bypass the lobby. Click on “Meeting options” to tailor these settings to your meeting's needs.
B. How to Send a Teams Meeting Invitation on Mobile
If you’re more of a mobile device person, the Teams mobile app ensures you’re never dependent on your desk to schedule a meeting.
Here's how to send Teams meeting email on mobile:
- Launch the Teams app on your mobile device. Click on the “Calendar” icon at the bottom to access the calendar view.
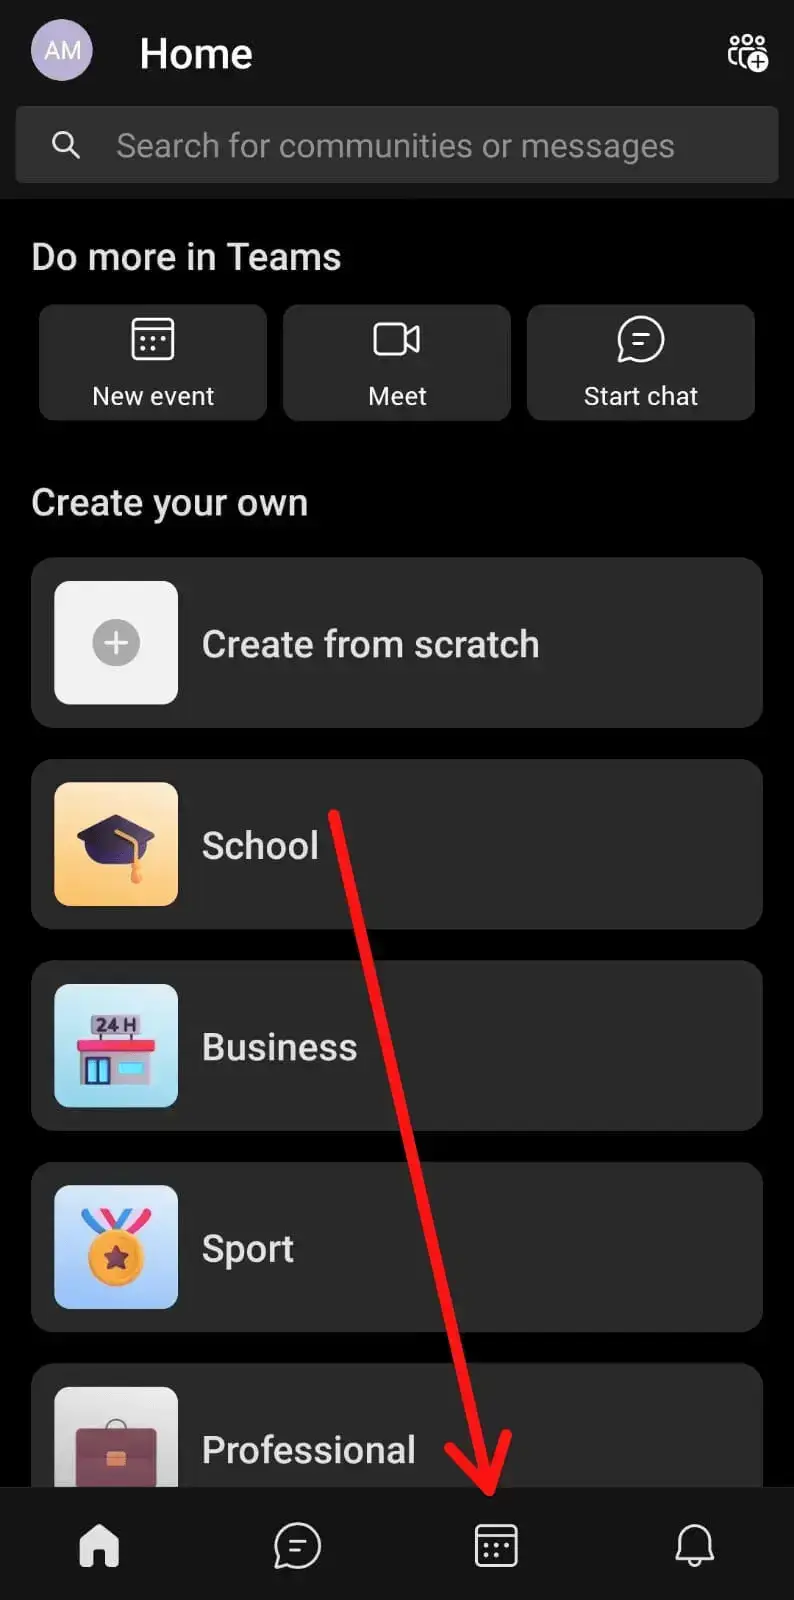
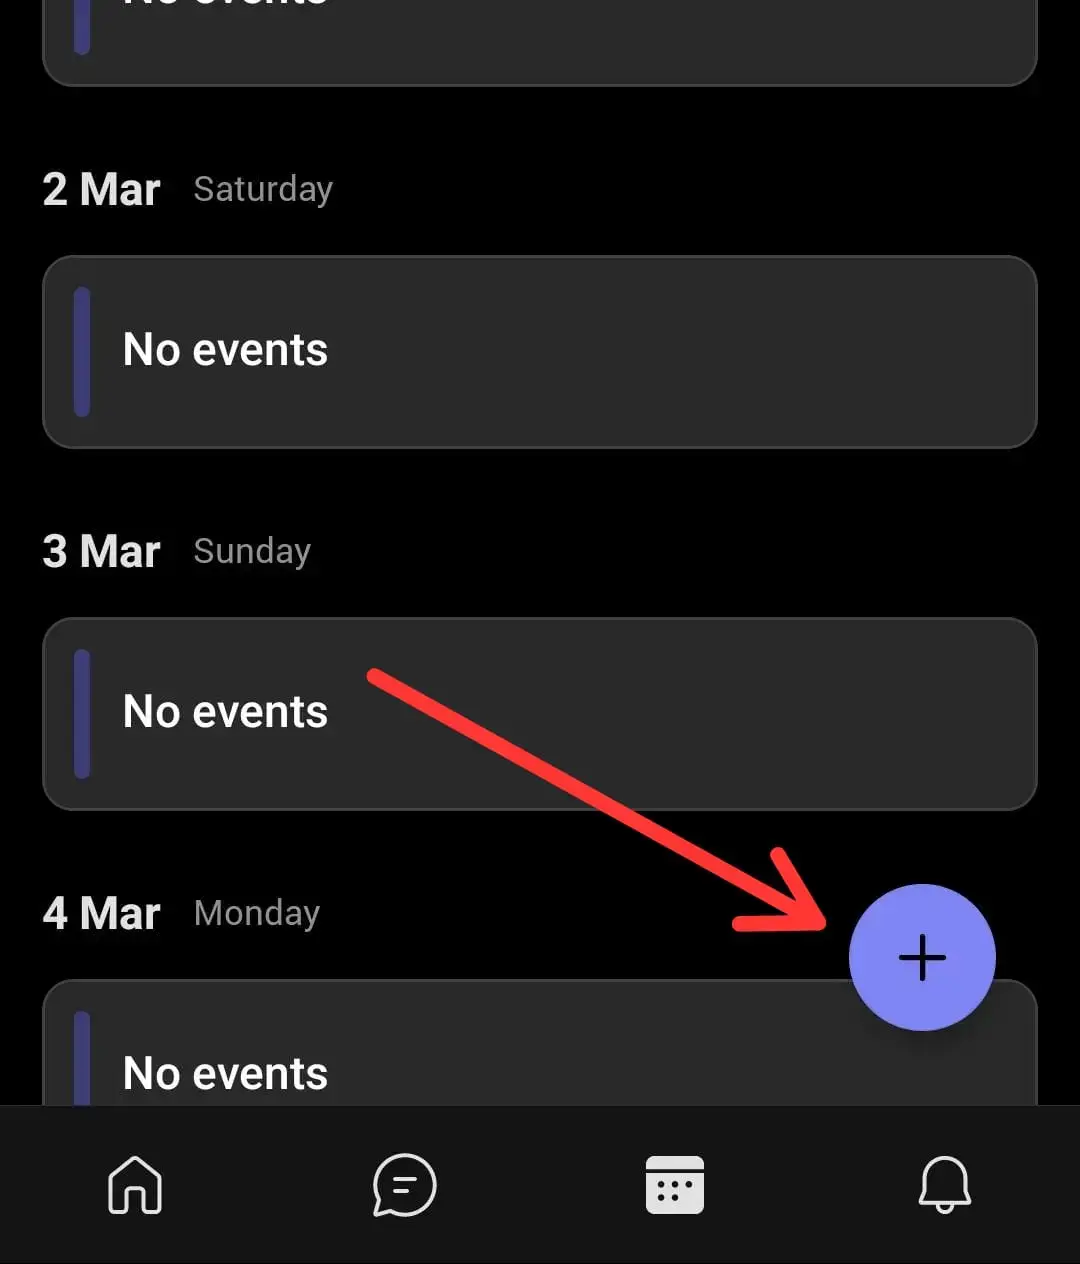
- To schedule a new meeting, look for the “Schedule meeting” button (‘+’ sign), found at the bottom right of your screen.
- Like the desktop version, you’ll be prompted to fill in the meeting’s title, participants, date, and time, along with any other relevant details. If you’re planning to record your Teams meeting, mention that in the meeting description tab.
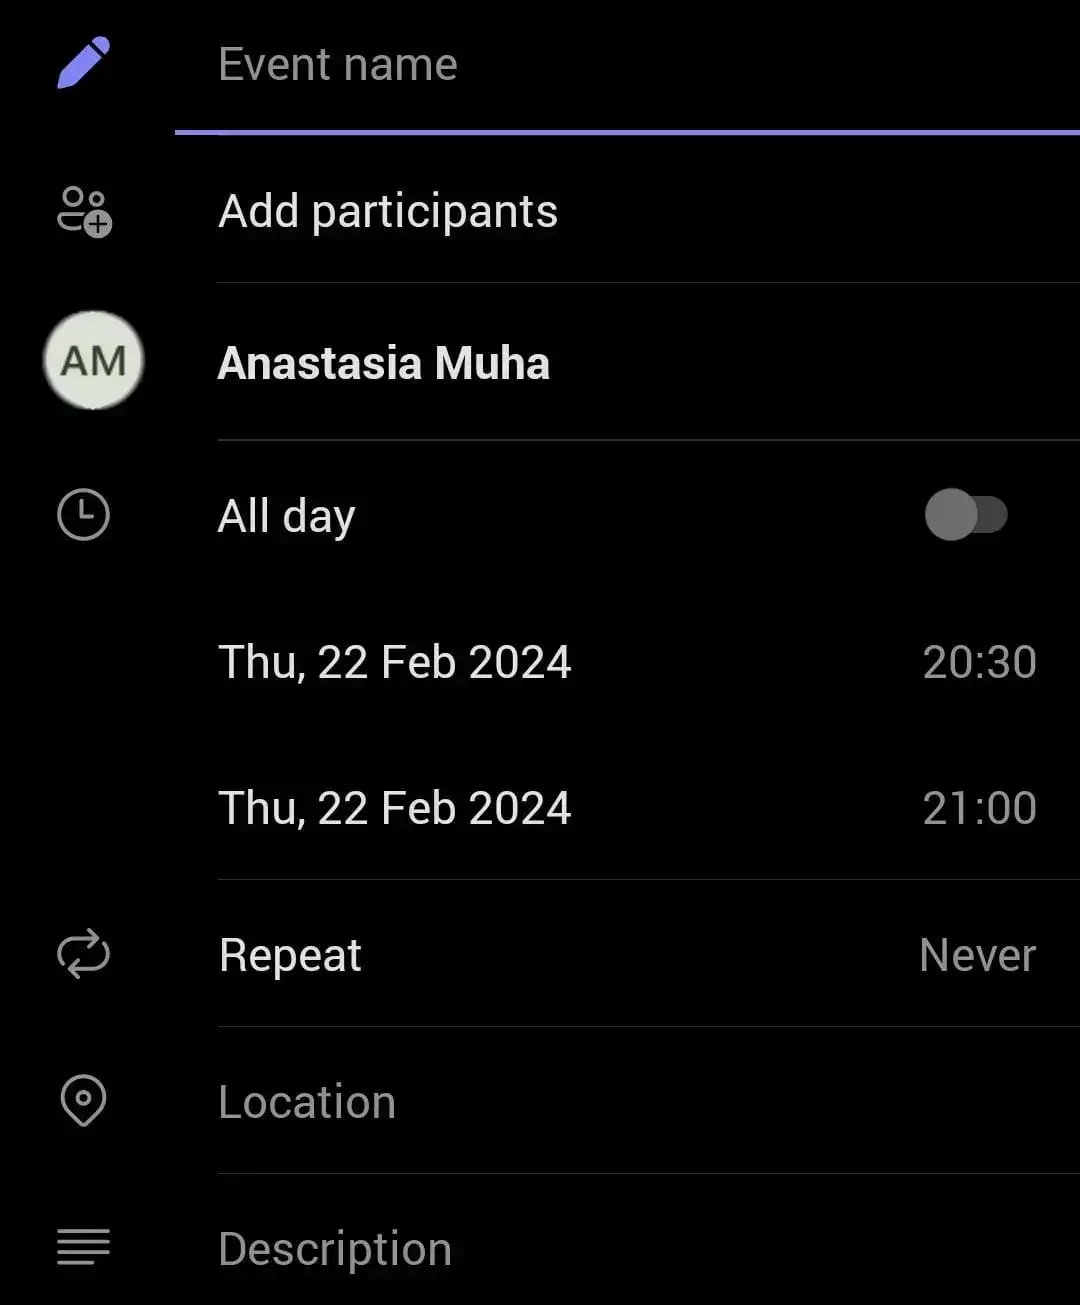
- In the “Add participants” field, type the attendees’ names. As you add people, Teams will suggest contacts from your organization. For external guests, simply enter their email address.
- Once you've added all the necessary information, double-check the meeting details. Then, tap “Done” or “Send” to dispatch your invitation. Participants will receive an email invite and a notification within the Teams app.
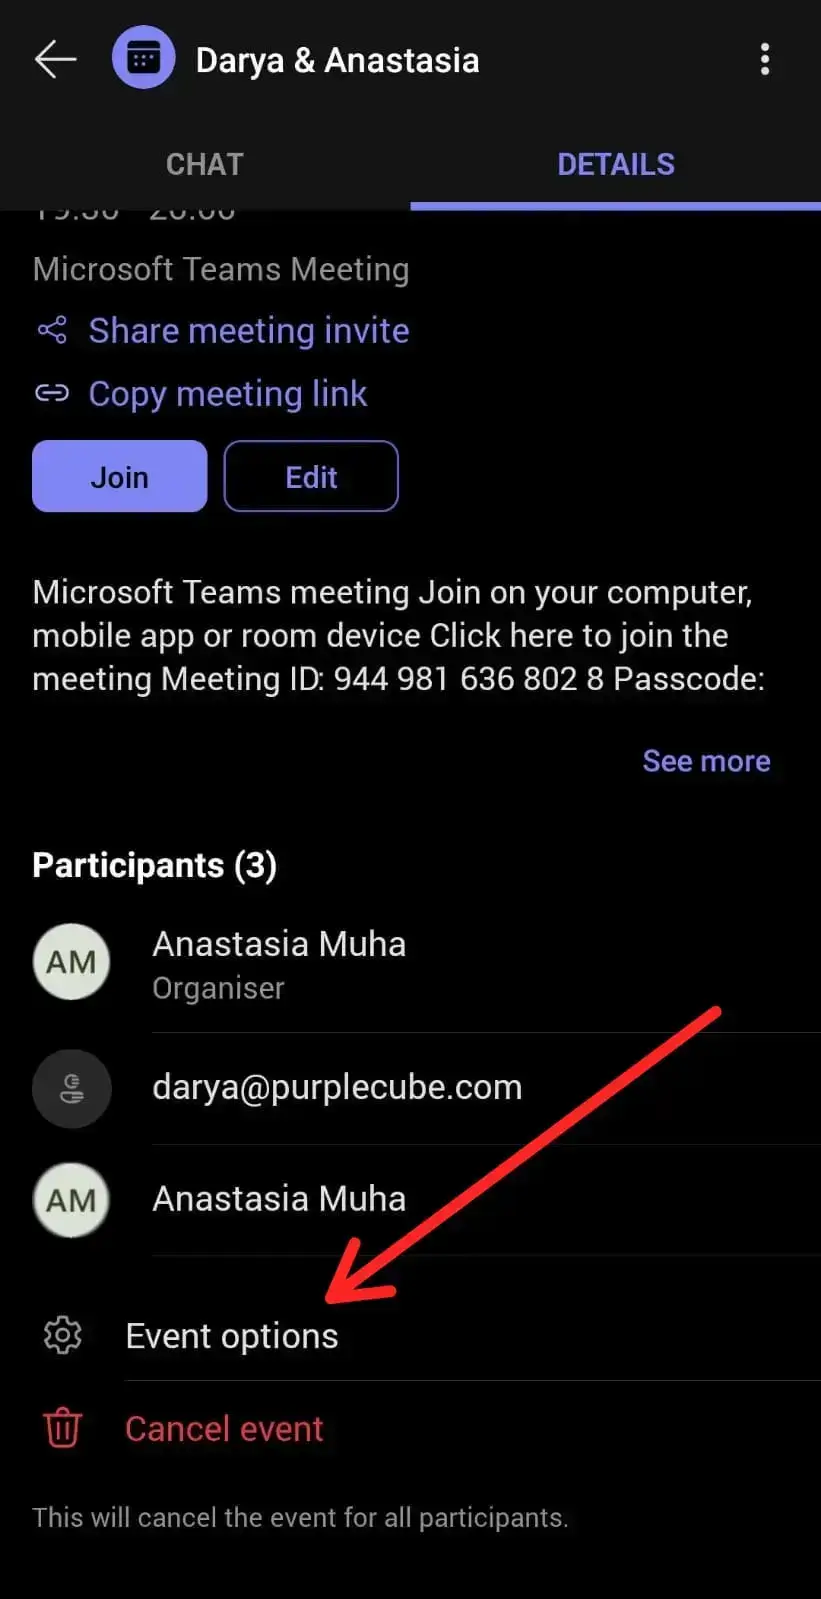
- After sending out the invitation, you can adjust additional settings, like assigning presenter rights or allowing participants to bypass the lobby. Click on “Event options” to tailor these settings to your meeting's needs.
How to Follow Up After Every Teams Meeting in 3 Steps
You scheduled and hosted your meeting…now what? You have to follow up with participants. While you can do that manually, a MeetGeek meeting automation platform can help you automate all your post-meeting responsibilities.
Here is what MeetGeek does after every meeting:
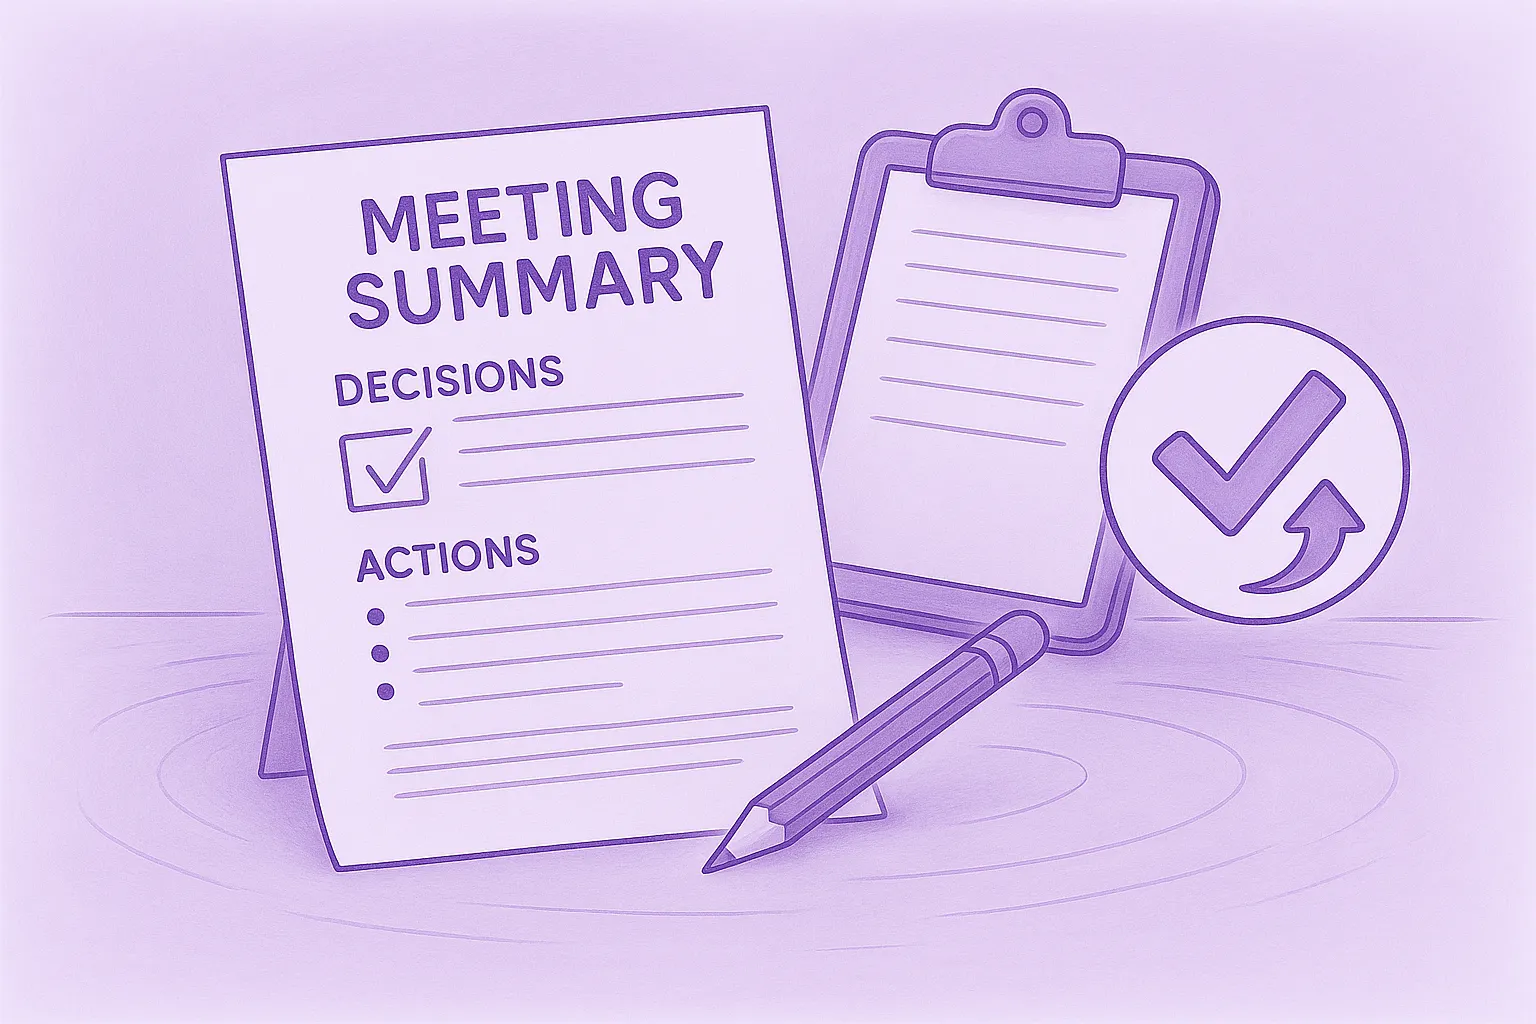
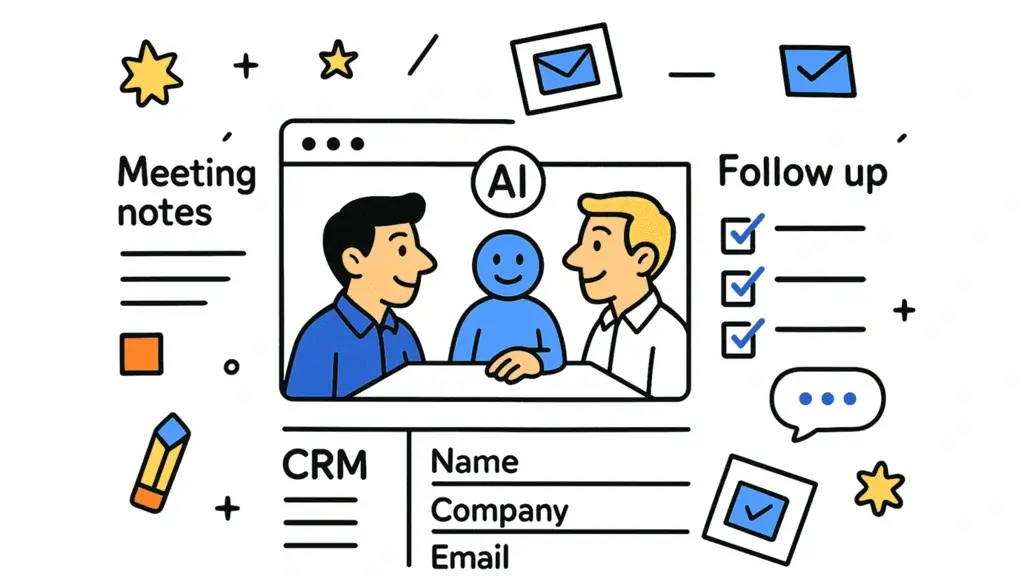
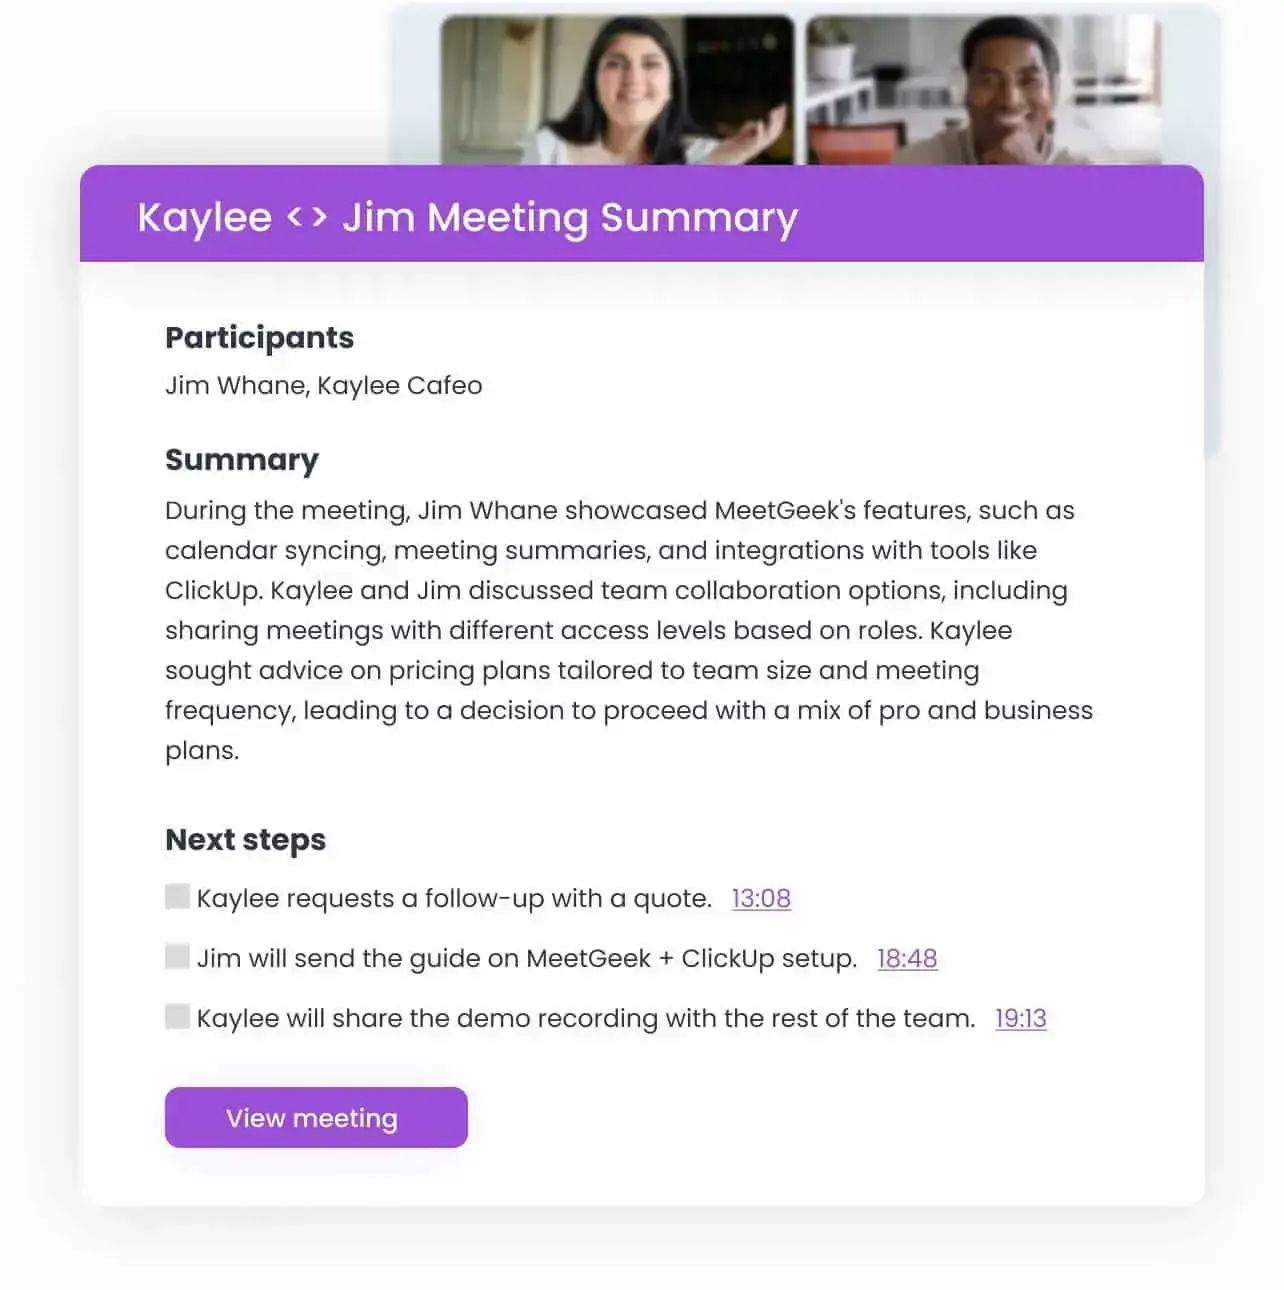
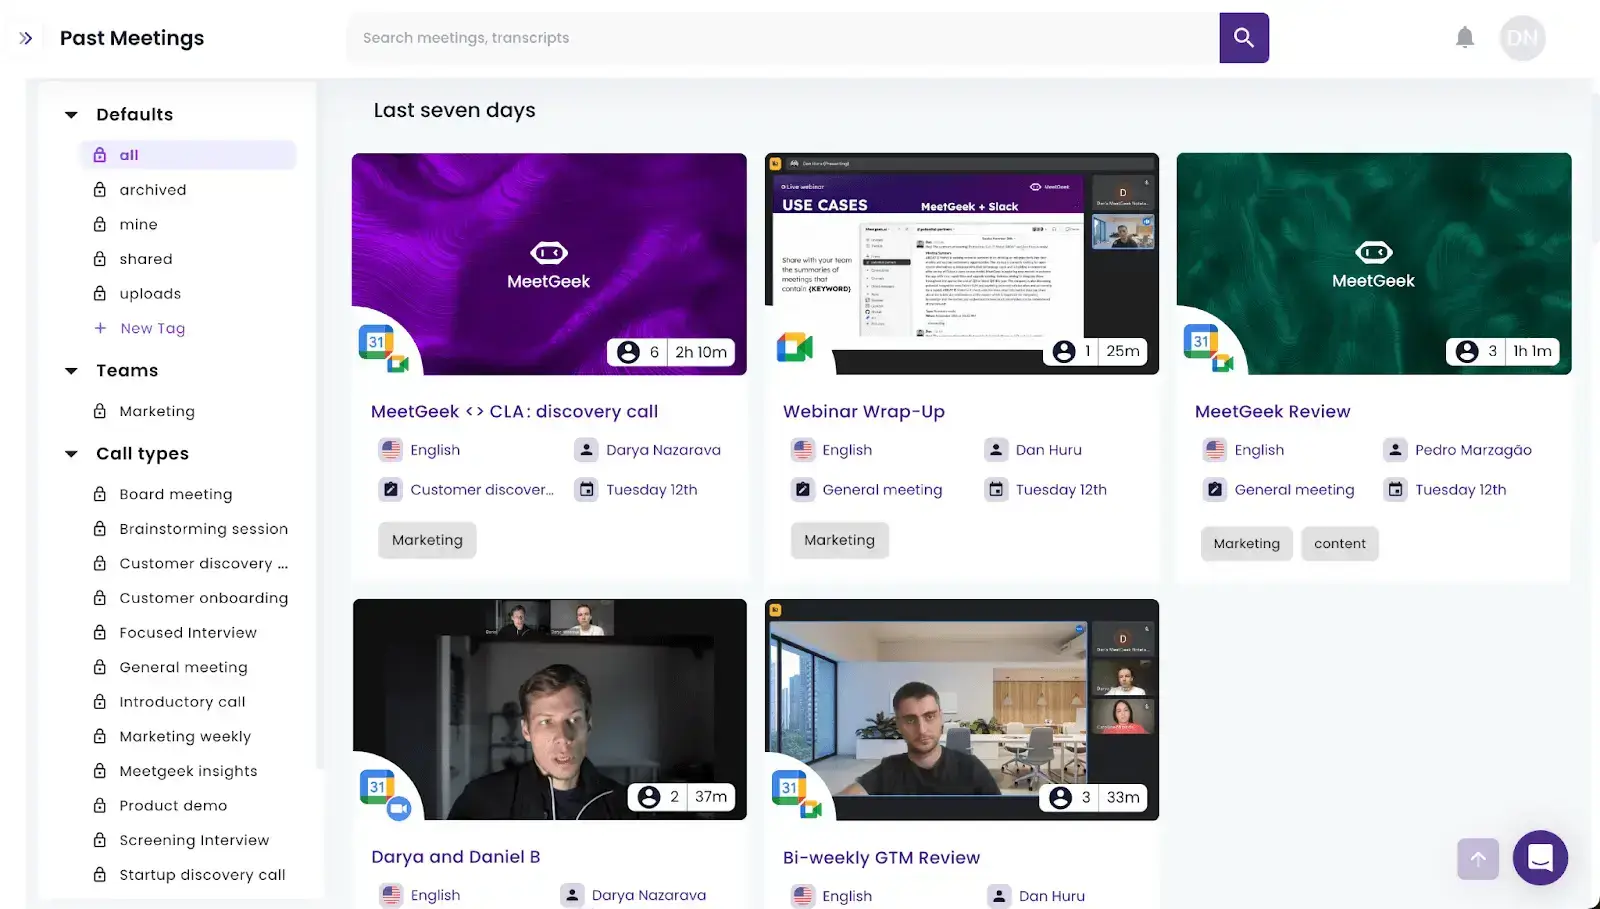
- AI meeting summarization and sharing: Have all your Teams sessions automatically summarized with key points, decisions, and action items, and shared with organization members. Additionally, you can manually send them to any third-party individuals who may benefit from the contents of your meetings.
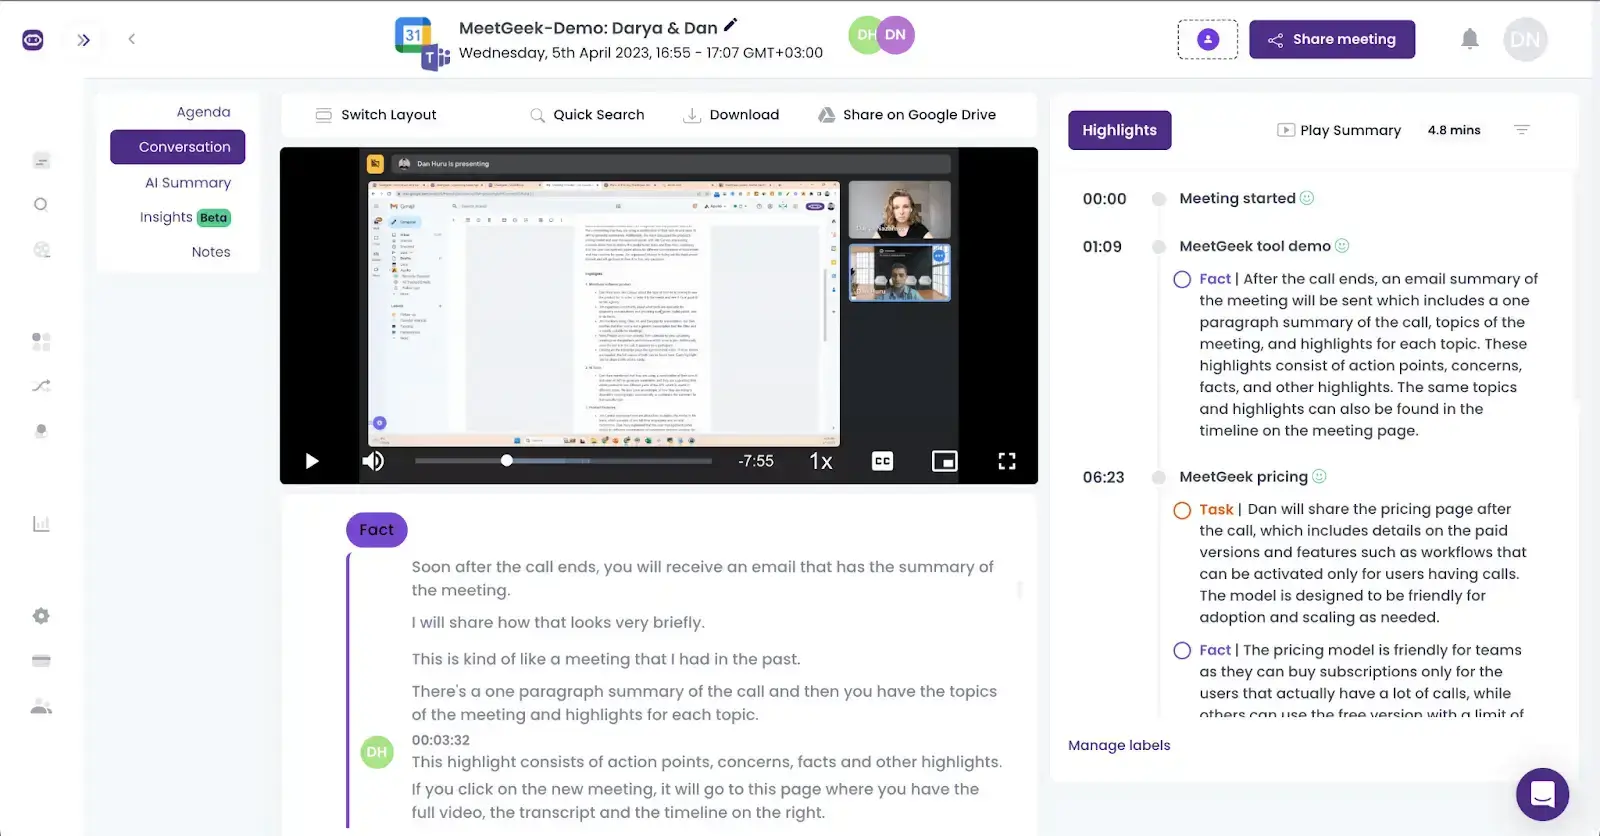
- Meeting repository: Access your Teams meetings in a centralized meeting hub to re-watch, download, or share your online gatherings through a secure link. Doing so not only allows for a centralized approach to knowledge-sharing but also enables recipients to work at their most suitable pace.
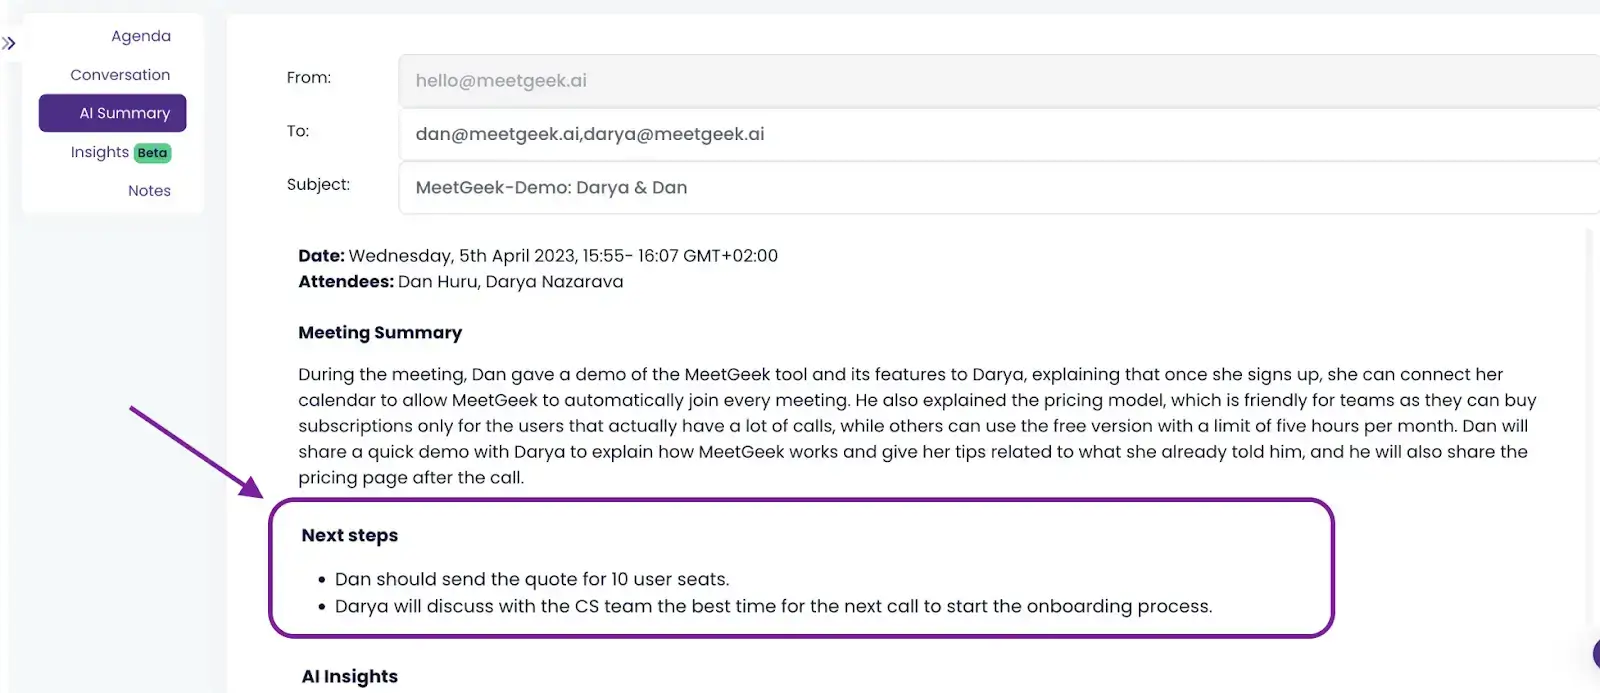
- Action item detection: MeetGeek’s Task Detection feature identifies and extracts action points from your meetings, ensuring nothing important slips through the cracks. This provides a written record of the tasks agreed upon and assigned during meetings, keeping everyone accountable.
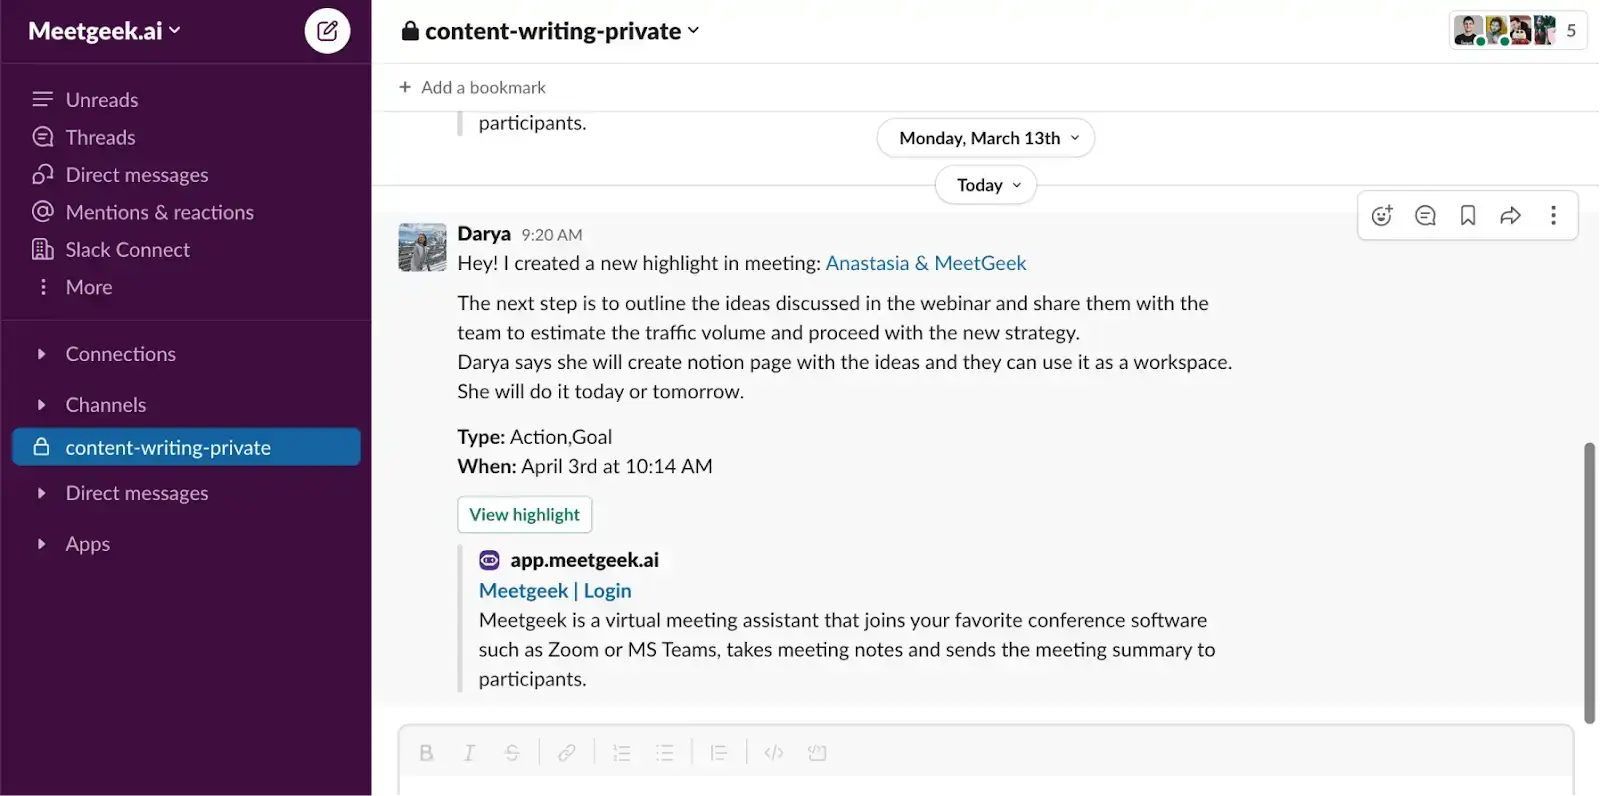
- Seamless workflows: Set meeting workflow automation that directly updates your organization’s workspace with action items, so everyone can jump on the productivity train soon after the meeting. This way, you can monitor the progress of projects to ensure that things are moving forward and solve any issues before they escalate.
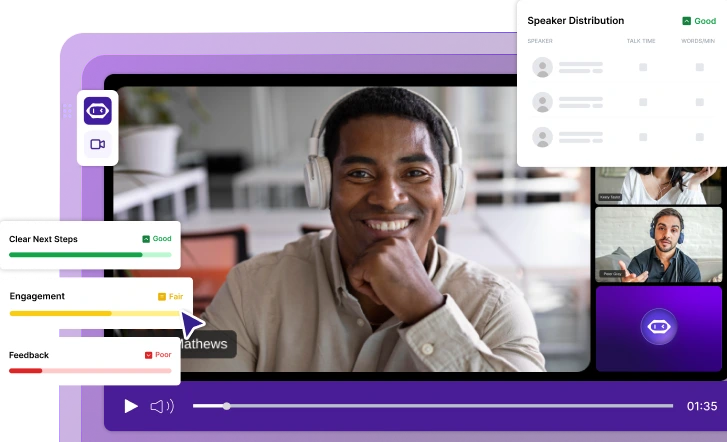
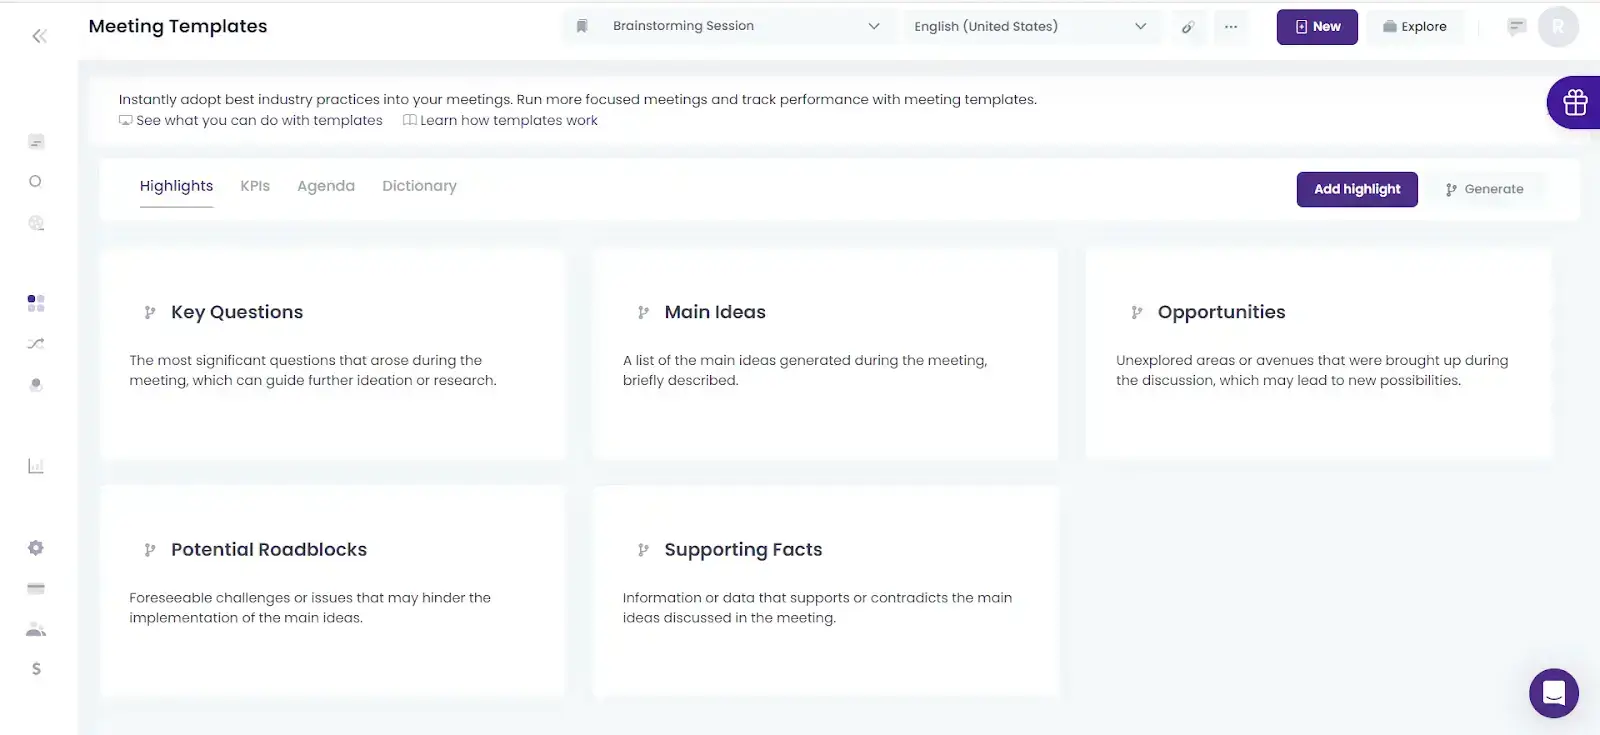
- AI-driven conversation analytics : To assess the effectiveness of your Teams meetings, MeetGeek assigns a unique score to each of your sessions, determined by the KPIs of your choice.
How Do I Set Up a MeetGeek Account?
Using MeetGeek with Microsoft Teams not only streamlines your post-meeting experience but also automatically records and transcribes Teams meetings.
Here’s how to set up your MeetGeek account:
- Create a free MeetGeek account by signing in with your Microsoft account.
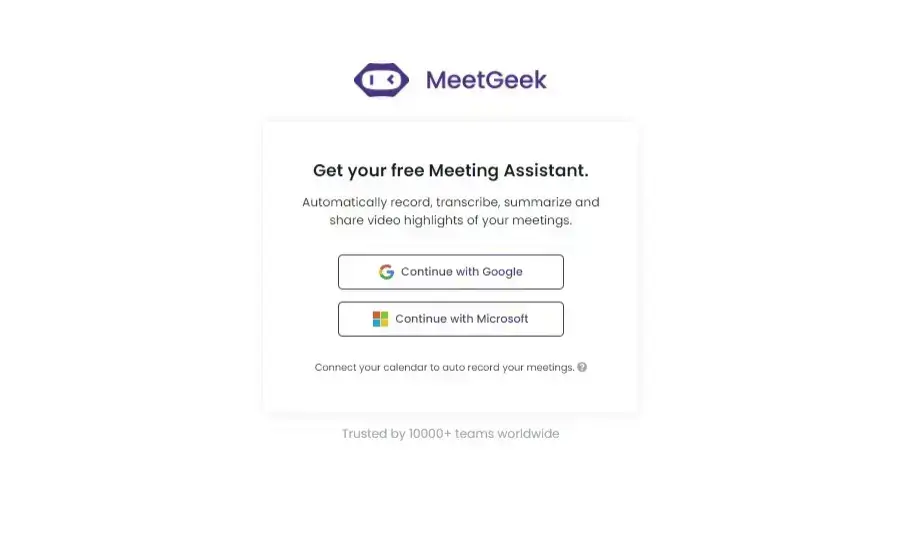
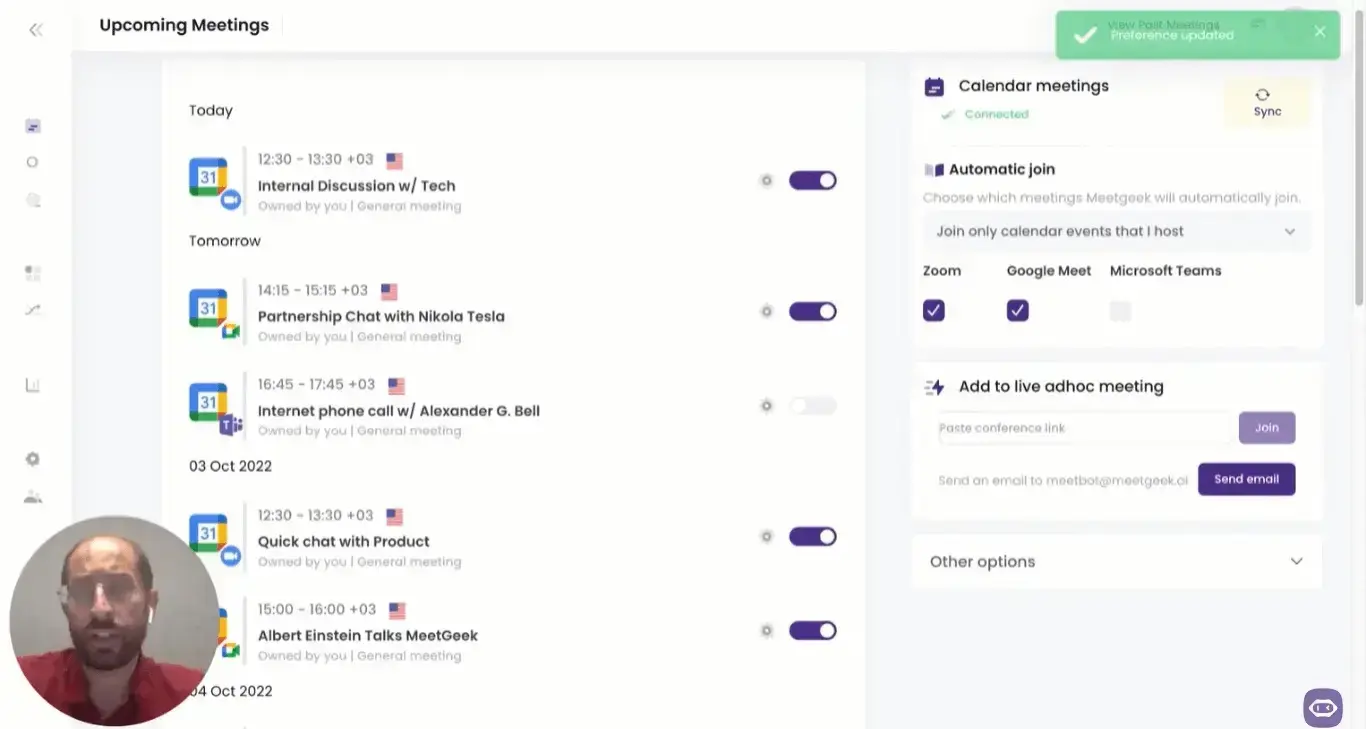
- Sync your Microsoft calendar with the app to let our virtual assistant automatically join your meetings. For spontaneous meetings, paste the Teams meeting link into the ‘live ad hoc meeting’ bar.
- Once your meeting starts, MeetGeek enters the meeting as a unique participant, quietly recording video and audio, while upholding privacy and consent standards.
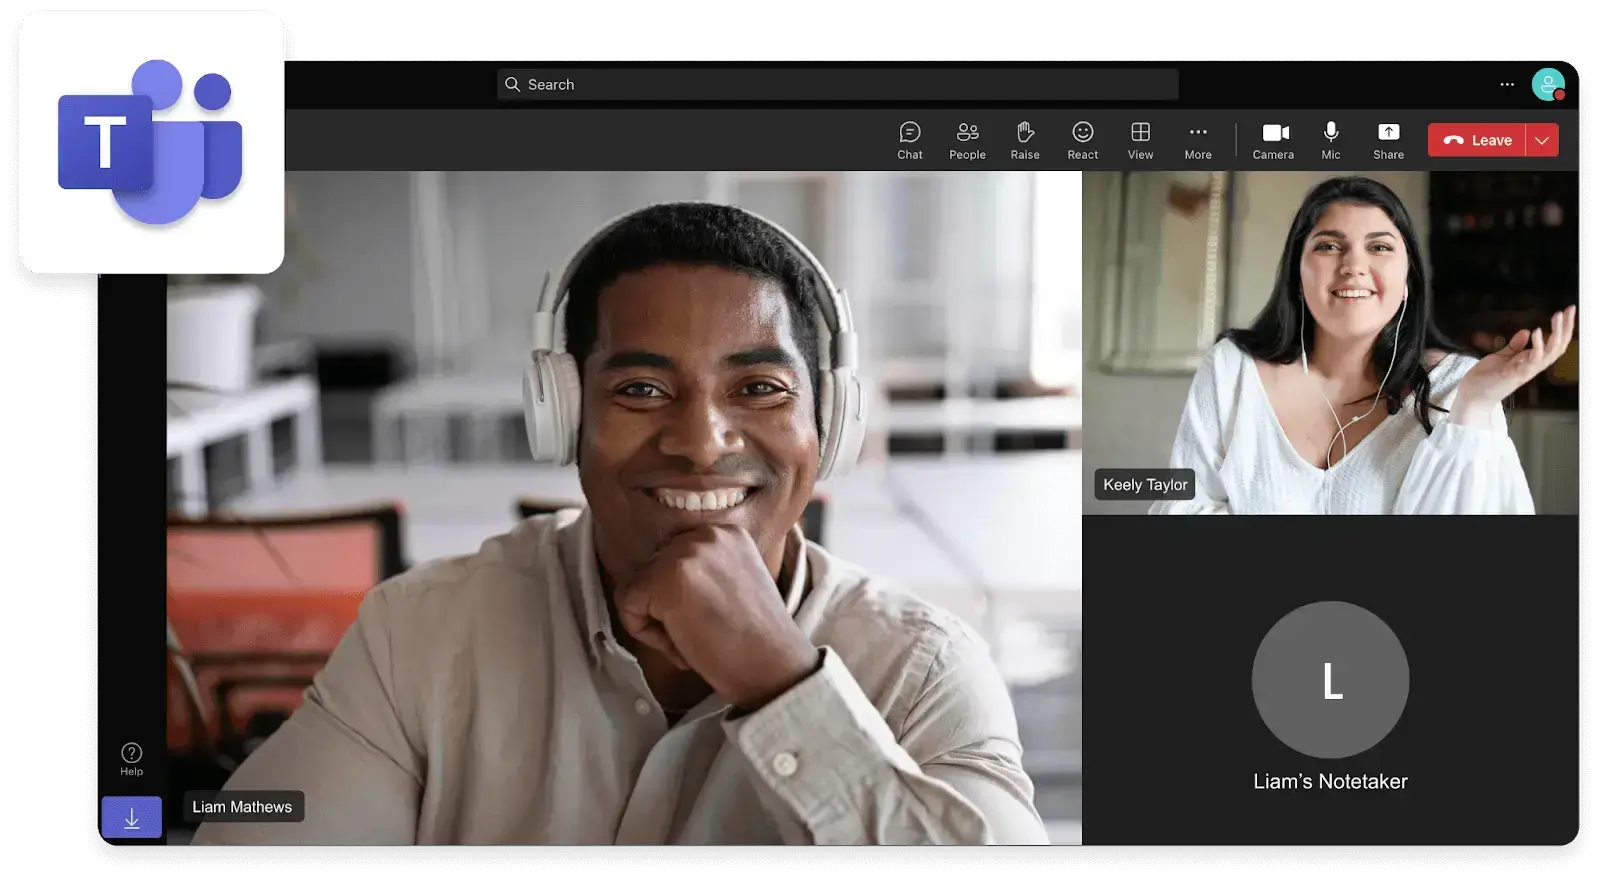
PRO TIP: Can’t attend a Teams meeting? Send MeetGeek to attend that meeting and rewatch it at your earliest convenience directly from your MeetGeek account.
Best Practices to Create the Perfect Teams Meeting Invitation
1. Include Essential Information
Get your basics right: ensure your invitation includes the meeting title, date, time (with time zones), and the link to join. Additionally, beware of any DST transitions, if applicable.
Remember, clarity is key, so keep this information concise and easy to understand. If you want to provide more information, use the dedicated Meeting Details section instead of trying to condense it all in the Meeting Title bar.
2. Specify Meeting Agenda
A clear agenda is at the heart of every productive meeting. It guides the discussion, ensures all essential topics are covered, and helps with effective time management. While you may be tempted to skip this step — especially for recurring meetings — don’t.
Instead, use a customizable template and adapt it to fit your unique requirements. The agenda not only informs participants about the purpose of the meeting but also allows them to prepare any questions or comments in advance.
3. Provide Relevant Documents
If the meeting requires attendees to review documents, slides, or any other materials beforehand, attach these directly to the invitation or include links.
This step ensures everyone comes prepared, making for a smoother, more efficient meeting. It's a simple addition that maximizes the contributions of participants.
4. Clarify Roles and Responsibilities
If certain attendees need to fulfill specific roles (e.g., presenter, timekeeper, note-taker) during the meeting, specify that in the invitation. A proactive approach gives participants enough time to gather the means to complete their tasks and prevents any last-minute confusion.
5. Highlight Technical Requirements
For participants who may not be familiar with Microsoft Teams or those who might be joining from different devices, include a brief note on any technical requirements or instructions on how to join the meeting.
It's also helpful to mention if they'll need to download any software or apps beforehand, so everyone can be tech-ready when the meeting starts.
6. Confirm RSVP
Encourage attendees to RSVP to the meeting invitation. Knowing who will attend can also influence the structure and content of your meeting, making it more relevant and engaging for those involved.
If any key participant can’t attend, you also have enough time to find alternative team members with the same expertise or competencies.
7. Follow Up with Reminders
Life gets busy, and meetings can slip through the cracks. A day or two before the meeting, send out a reminder with the meeting link and any last-minute details. This little nudge can significantly improve attendance rates and show participants you're organized and looking forward to their contribution.
8. Provide Contact Information
Include contact information for someone who can assist with technical difficulties or answer questions about the meeting.
Whether it's your contact details or those of a designated support person, having this info readily available eases anxieties about technical issues and ensures everyone can participate smoothly.
9. Announce the Meeting Will Be Recorded
If you plan to record the Teams meeting, it's essential to inform participants in advance for privacy and consent reasons. Mention this in your invitation and briefly explain how the recording will be used (e.g., for minutes, to share with those who cannot attend).
Additionally, at the beginning of your meeting, reiterate your intention to record the conversation. This level of transparency helps build trust and ensures everyone is on the same page.
Have Better Teams Meetings with MeetGeek!
As we wrap up our journey through the ins and outs of sending a Microsoft Teams meeting invite from any device, it's clear that the power to connect, collaborate, and create is literally at our fingertips. Remember, the key to a successful virtual meeting starts long before the actual gathering—it begins with a well-crafted invitation.
As you continue to explore Microsoft Teams' exciting features, MeetGeek acts as your AI-powered meeting assistant, offering features like real-time transcription, action item extraction, and even sentiment analysis to ensure no critical information slips through the cracks.
It's time to transform how you meet and make every virtual gathering more impactful and efficient!
.avif)




.webp)
