How to Record a Teams Meeting with any Microsoft 365 Subscription
Discover our easy-to-follow steps for recording a Teams Meeting. Effortlessly save discussions, presentations, and collaborative sessions to never miss out on important details again!
✅ Free meeting recording & transcription
💬 Automated sharing of insights to other tools.

Want to learn how to record a Teams meeting? This guide shows you exactly how to do it, step by step. Whether you're a professional running client meetings or a manager recording weekly team meetings , you'll learn how to use both Microsoft Teams' built-in recorder and smarter options like MeetGeek.
We’ll cover who can record, where recordings are stored, and how to record a Teams meeting both manually and automatically.
Let’s get started.
Who Is Allowed to Record a Teams Meeting?
Not everyone in the meeting can start a recording. To record using Microsoft Teams’ built-in tool, you must meet the following conditions:
- You need a supported Microsoft 365 license (like E1, E3, E5, Business Premium, A3, etc.).
- Your IT admin must enable the recording feature for your account in the meeting settings.
- You must be the meeting organizer or part of the same organization.
If you're a guest, you’re from another organization, or joining anonymously, you won’t be able to record the meeting using Teams' built-in option unless your IT admin enables a special recording permission. But don’t worry, we’ll show you how to get around that using tools like MeetGeek.
Can You Record a Teams Meeting Without Asking?
Technically, some tools may let you record without informing the other attendants, but it’s a bad idea. Recording people without their permission can break privacy laws and lead to serious consequences.
To stay safe:
- Always get consent from all participants.
- Tell everyone the meeting will be recorded before it starts.
- Explain how the recording will be used and stored.
At the beginning of the call, remind attendees that recording helps with note-taking and creates a written record of key decisions. If you’re not sure what to say, check out these 15 meeting disclaimers you can use as examples.
Note: Privacy laws vary by country. Some require everyone to agree to being recorded. Recording secretly can result in fines or legal action. Always be transparent.
How to Record Microsoft Teams Meetings (Step-by-Step)
Before you hit record, check these basics to avoid any issues:
- Update your Microsoft Teams app to the latest version from the official site or App Store.
- Test your mic and camera. If built-in ones are poor, consider external options.
- Check your internet connection. A slow or unstable connection can affect video and audio quality.
How to Manually Record a Teams Meeting
Step 1: Start or join your Microsoft Teams meeting.
Step 2: Click the More Actions button (three dots) in the top bar of the meeting window.
Step 3: Select Start recording from the dropdown to begin recording audio, video, and screen sharing activity.
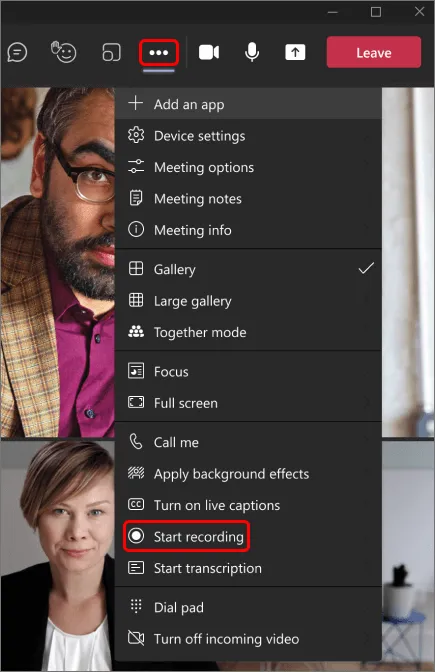
All participants will be notified once the meeting recording starts.

Note: Only one person can record Teams meetings at a time. Once it's started, the new screen recording is saved automatically in the cloud and shared with all the meeting participants.
Step 4: To stop recording, click More Actions again and select Stop recording.
NOTE: The recording continues even if the person who started it leaves. It will automatically stop when everyone exits or after 4 hours, whichever comes first.
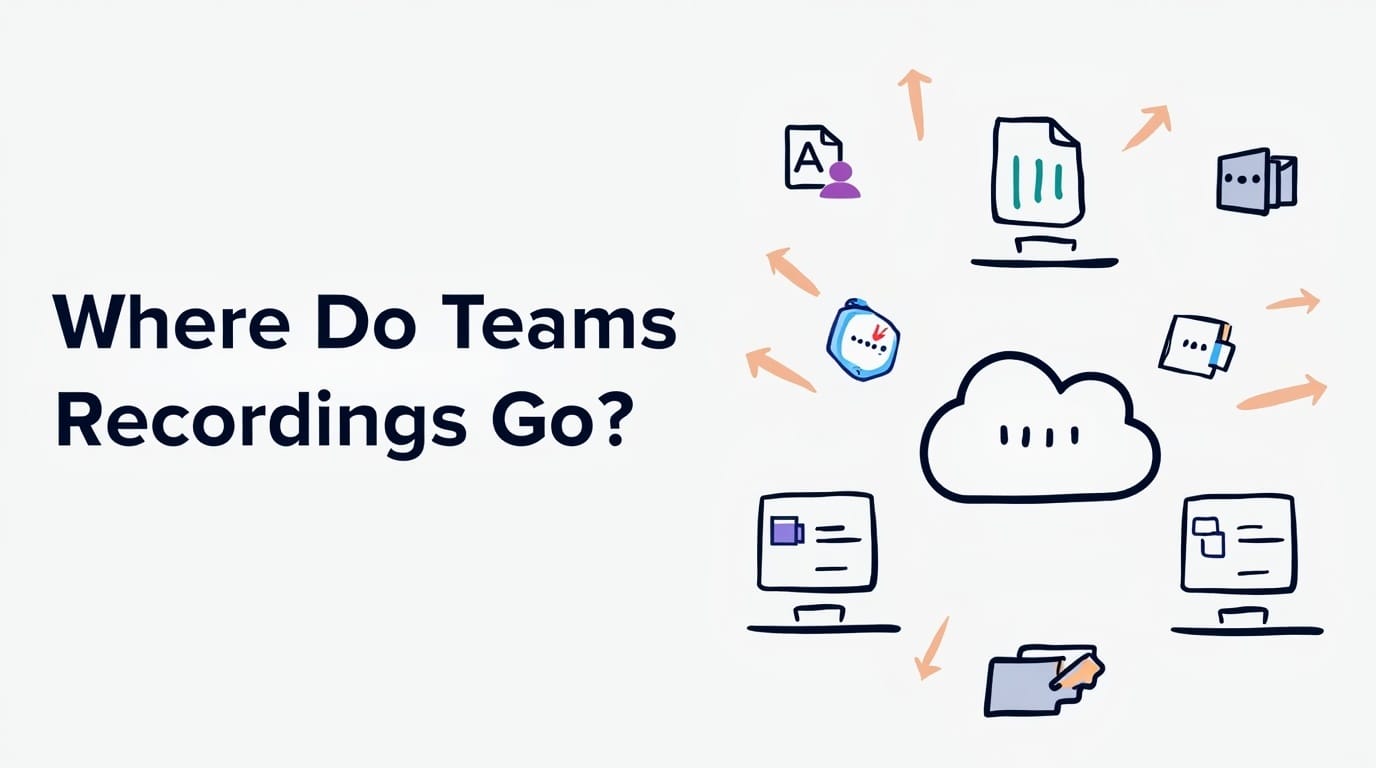
Where Do Teams Recordings Go?
Previously, Teams meeting recordings were saved to Microsoft Stream. Now, the recordings’ location depends on the type of meeting:
- Channel meetings → saved to SharePoint under the channel's files.
- All other meetings → saved to the meeting organizer’s OneDrive.
- Access → find the recording in the meeting chat or the Teams calendar event.
How to Manage the Expiration of a Teams Meeting Recording?
In most cases, Microsoft no longer sets automatic expiration dates by default. However, if your admin enabled expiration, here’s how to manage it:
- Open the recording in OneDrive or SharePoint.
- Click the Details or Info icon.
- Use the drop-down menu to change or remove the expiration date.
You can choose to keep recordings permanently by removing the expiration setting.
Understand the Limitations of Microsoft Teams Recording
Here’s what the built-in recording feature can’t do:
- Only organizers or users in the same organization can record. Guests and anonymous users can’t start a recording unless special admin permissions are enabled.
- Whiteboards, shared notes, and breakout rooms are not included in the recording.
- Recordings are limited to 4 hours per session.
- Only 4 participants' video feeds are included at a time.
- Audio may fail if the connection is unstable.
- If compliance recording is enabled for any attendee, the meeting may be auto-recorded based on that policy, even if no one manually presses record.
- Content shared using PowerPoint Live presentations is not always included in meeting recordings.
How to Automatically Record a Teams Meeting
If you join a lot of meetings, especially across different platforms, Microsoft Teams’ built-in recorder might not be enough. It doesn’t work for guests, doesn’t include transcripts unless you pay for Teams Premium, and requires manual setup.
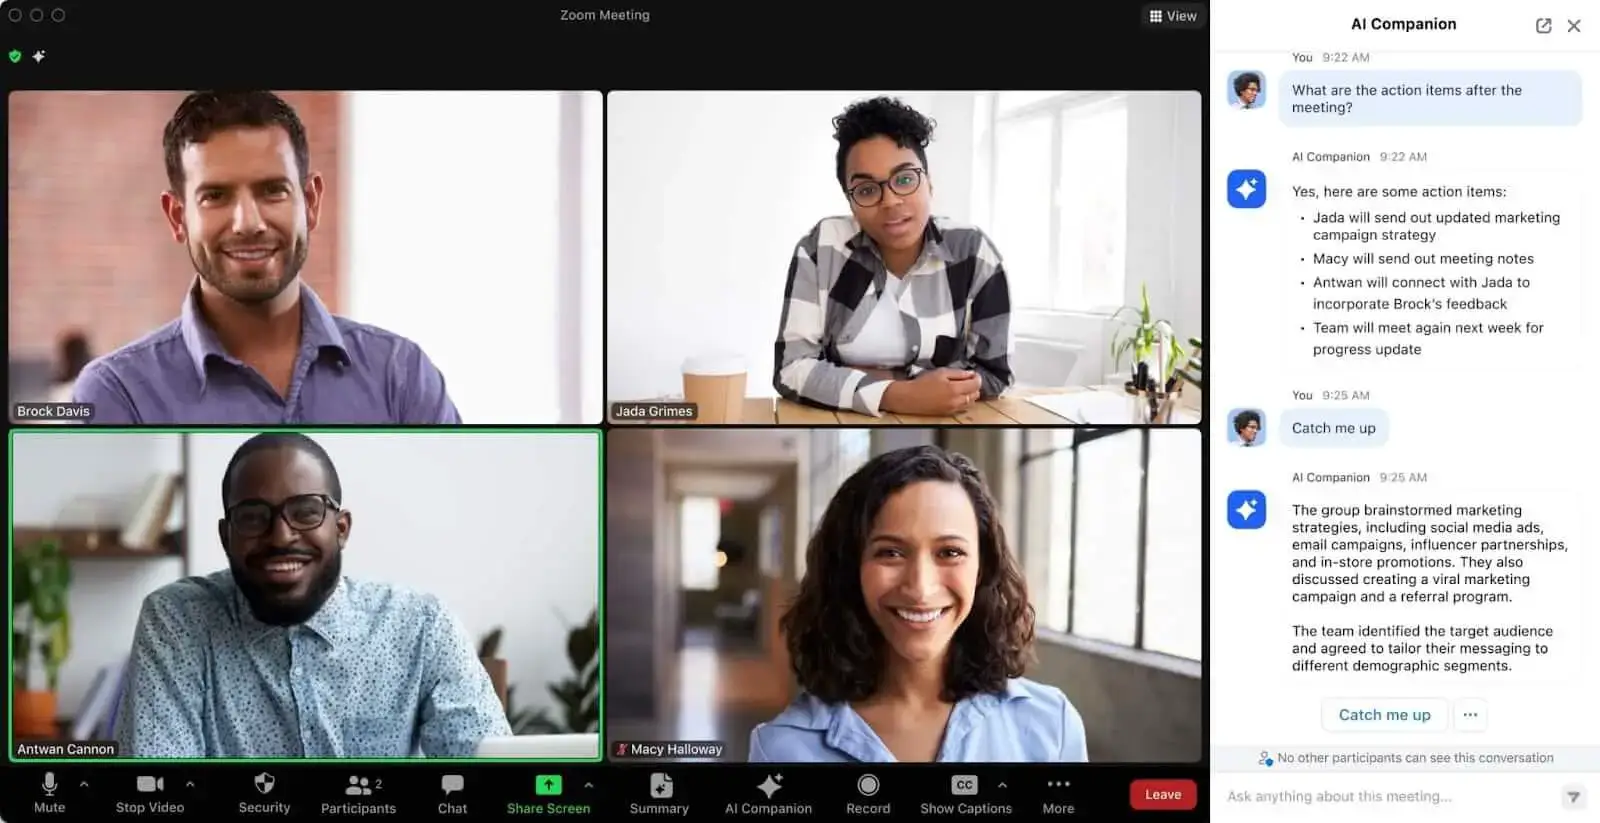
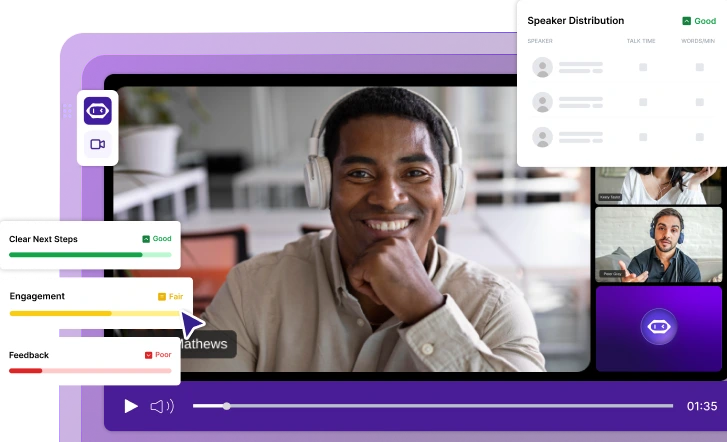
MeetGeek solves that. It’s an AI meeting assistant that automatically joins your meetings, records them, generates transcripts, and sends out summaries, without needing you to click “record.”
Here’s how to use it:
Step 1: Register for a MeetGeek Account
Go to MeetGeek.ai and sign up using your Microsoft or Google account. It’s free to get started and only takes a few seconds.
Step 2: Connect Your Calendar
Once you're in, link your calendar. This allows MeetGeek to see any scheduled meeting across:
- Microsoft Teams
- Zoom
- Google Meet
You can choose to record and transcribe all meetings or only specific ones. For ad-hoc meetings, just paste the meeting link into the “Add to live ad-hoc meeting” field in the dashboard or use MeetGeek Chrome Extension for faster meeting management

Step 3: Join Your Meeting
When the meeting begins, MeetGeek automatically joins as a silent participant and starts recording.
The host will be notified and needs to approve the assistant’s presence (for compliance reasons).

Afterward, you can carry on with your meeting normally, while your MeetGeek assistant diligently takes notes and records your conversation in the background.
Step 4: Access the Recording and Summary
A few minutes after the meeting ends, all participants get a summary via email. You can also log into your MeetGeek account to:
- Replay the full Teams recording
- Read the full transcript
- View AI-generated meeting notes
- Share the recording link with others, even outside your organization
MeetGeek works quietly in the background, so you can stay focused on the conversation while it handles the recording and note-taking for you.

Do More with the MeetGeek Virtual Assistant
According to a survey by Calendly, 46% of people are in more than three meetings a day, and 59% of enterprise employees spend over five hours per week in them. These numbers are especially important when we consider that 45% of respondents felt that the time they spend in meetings each week reduces their productivity significantly.
These statistics are proof that making meetings more efficient is a must. MeetGeek does more than just record your Microsoft Teams meetings. It also helps you organize, summarize, and learn from every conversation, without the manual work.
Here are the features that make it a powerful assistant for meeting recordings:
Meeting Insights
Our meeting insights deliver valuable information by supporting informed decision-making for professionals in a range of job roles.

MeetGeek uses AI to pull key takeaways and patterns from your calls. These insights help different teams improve how they work:
- Sales teams can track top performers and spot areas for coaching.
- Marketing teams can fine-tune messaging based on real customer feedback.
- Customer service teams can analyze recurring issues to improve support.
- HR and recruiting can quickly scan interviews and spot red flags or good fits.
- Cross-functional teams can stay aligned by sharing consistent feedback and goals.
Instead of digging through notes, teams get clear, actionable insights from every meeting.
AI Chat
Similar to chatting with ChatGPT, MeetGeek's AI chat allows you to interact with your past meetings. You can extract action items from multiple meetings at once, perform actions like writing follow-up emails, and even ask for coaching tips directly within your MeetGeek account. It's like having a searchable, interactive archive of all your discussions.
Meeting Templates + Highlights
Meeting Templates allow you and your team to easily structure and customize your discussions. Once you provide MeetGeek with the keywords of your choice, our virtual meeting assistant creates a meeting transcript that perfectly fits your needs.
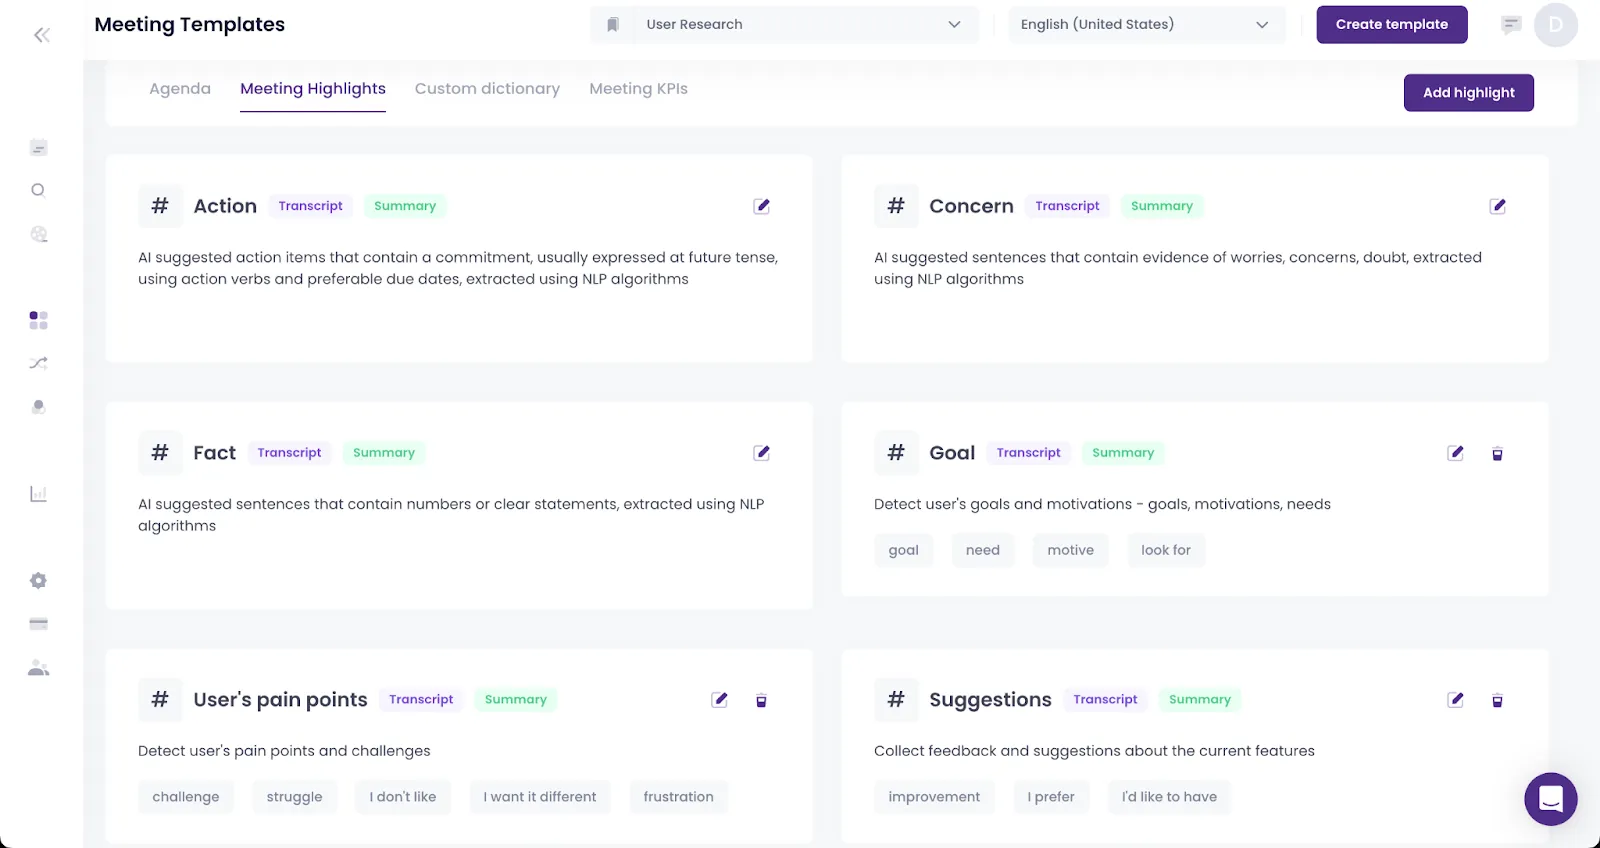
Through the Highlights feature, MeetGeek uses the keywords you provide in the Meeting Templates to intelligently identify and extract the most important parts of your Teams meetings.
Automated Meeting Minutes
AI meeting notes help everyone remember what was discussed, track next steps, and stay accountable. But taking notes manually can be slow, distracting, and often incomplete, especially if you're trying to participate and capture details at the same time.
MeetGeek solves this by generating meeting summaries automatically. After each call, it uses AI to create clear notes that include key points, action items, and decisions made. You can easily share these notes with your team through email, Slack, share meeting notes to Google Docs or other tools you already use. It’s a faster, more reliable way to keep everyone aligned, without the extra work.

“After implementing MeetGeek, our client retention went up by three months and our refunds decreased by 30%.” — Jay Feldman, visionary and Chief Marketing Officer at OtterPR.
MeetGeek vs. Microsoft Teams Premium: Which One Is Better for Recording Meetings?
If you're wondering whether to upgrade to Teams Premium or try MeetGeek, here's a clear breakdown of what each option offers. While both include recording features, they’re built for different use cases. The two can co-exist perfectly together in most cases, but if you have to make a choice, this detailed look at their functionalities will help.
Teams Premium is designed for Microsoft 365 users who want native tools inside Teams. MeetGeek works across Microsoft Teams, Zoom, and Google Meet, and focuses on automated recording, transcription, and note-taking, even if you're not the host.
Here’s how they compare:
Which One Should You Choose?
If you only use Microsoft Teams and already have Teams Premium, the built-in features may be enough for basic recordings and transcripts.
But if you:
- Join meetings on multiple platforms
- Need to record without being the host
Want fast AI-generated notes and summaries - Prefer customizable insights and sharing options
…then MeetGeek gives you more flexibility without locking you into one ecosystem.
Frequently Asked Questions
Why can't I record in a Teams meeting?
You may not have permission to record. Only meeting organizers or users from the same organization can start a recording using Microsoft Teams’ built-in tool. Guests, anonymous users, or external participants usually can't record unless your IT admin has enabled special permissions from the meeting controls. You also need a supported Microsoft 365 license, and recording must be turned on by your admin.
How to record a Teams meeting when you are not the host?
If you’re not the host or don’t have permission to record, you can use a third-party tool like MeetGeek. It can automatically join the meeting, record it (with host approval), and generate transcripts and summaries. This works even if you're a guest or using a basic Teams plan.
How do I enable the recording option in Microsoft Teams?
Recording must be enabled by your Microsoft 365 admin. They can do this by going to the Teams Admin Center, opening the meeting policies, and toggling on the “Allow cloud recording” setting. If you don’t see the option to record, contact your IT department to check your permissions and policy setup.
How do I record a Teams meeting just for me?
To record a meeting privately or for personal reference, use a tool like MeetGeek. It lets you automatically record meetings you attend, even if you’re not the organizer, and gives you access to the recording and transcript in your account. Just make sure all participants are aware and give consent before recording.
Maximize Your Meeting Productivity with MeetGeek!
Recording meetings can help professionals and teams everywhere maximize their productivity and effectiveness, all while saving hours of their time.
MeetGeek handles the tedious tasks of recording and note-taking, giving you the freedom to actively engage in virtual conversations. If you're looking to experience the numerous benefits of having your own virtual AI meeting assistant and eliminate the reliance on traditional methods, try MeetGeek for free!
.avif)


