.avif)

How to Record Yourself on Zoom, Step-by-Step
Master the art of recording on Zoom with our straightforward guide. Learn how to capture your meetings or personal notes effortlessly.

✅ Free meeting recording & transcription
💬 Automated sharing of insights to other tools.
Quick answer: You can record yourself on Zoom by starting a new meeting in the Zoom desktop app on Windows or Mac, clicking Record, and saving the video locally or to the cloud, depending on your account. This works even if you are the only participant.
Recording yourself on Zoom sounds simple, yet many people hesitate the moment they open the app. Where does the recording save? What gets captured? Do you need a paid plan?
This guide explains exactly how to record yourself on Zoom, what Zoom actually records, and how to avoid the most common mistakes. It also covers an easier alternative if you want the recording to happen automatically.
Can you record yourself on Zoom?
Yes, Zoom allows you to record video during a Zoom meeting as long as you are signed into a Zoom account and using the Zoom desktop app. This applies whether you are hosting a group call or recording alone.
You can start a new meeting without inviting anyone, turn on your camera and audio, and record directly from your computer. If you join someone else’s Zoom call, the host must grant permission before you can record.
This feature works on supported operating systems, including Windows and macOS. Recording is not available in the Zoom mobile app.
What does Zoom record during a meeting?
Zoom records only what you choose to show. It does not automatically capture everything on your computer.
A Zoom recording can include:
- Your camera video
- Audio from your microphone and participants
- A shared screen, window, or browser tab
- Gallery view showing all participants
- Speaker view focusing on the active speaker
You can switch between gallery view and speaker view during the meeting. The view you select is what appears in the final video.
Note: If you share your screen, Zoom records the selected screen or tab, not your entire desktop, unless you choose it.
How do you record yourself on Zoom from your computer?
Recording yourself on Zoom takes only a few steps once your setup is ready.
- Open the Zoom app on your laptop and sign in to your account.
- Click New Meeting to start a Zoom meeting, even if you are the only participant.
- Turn on your camera, check your audio, and make sure everything looks right.
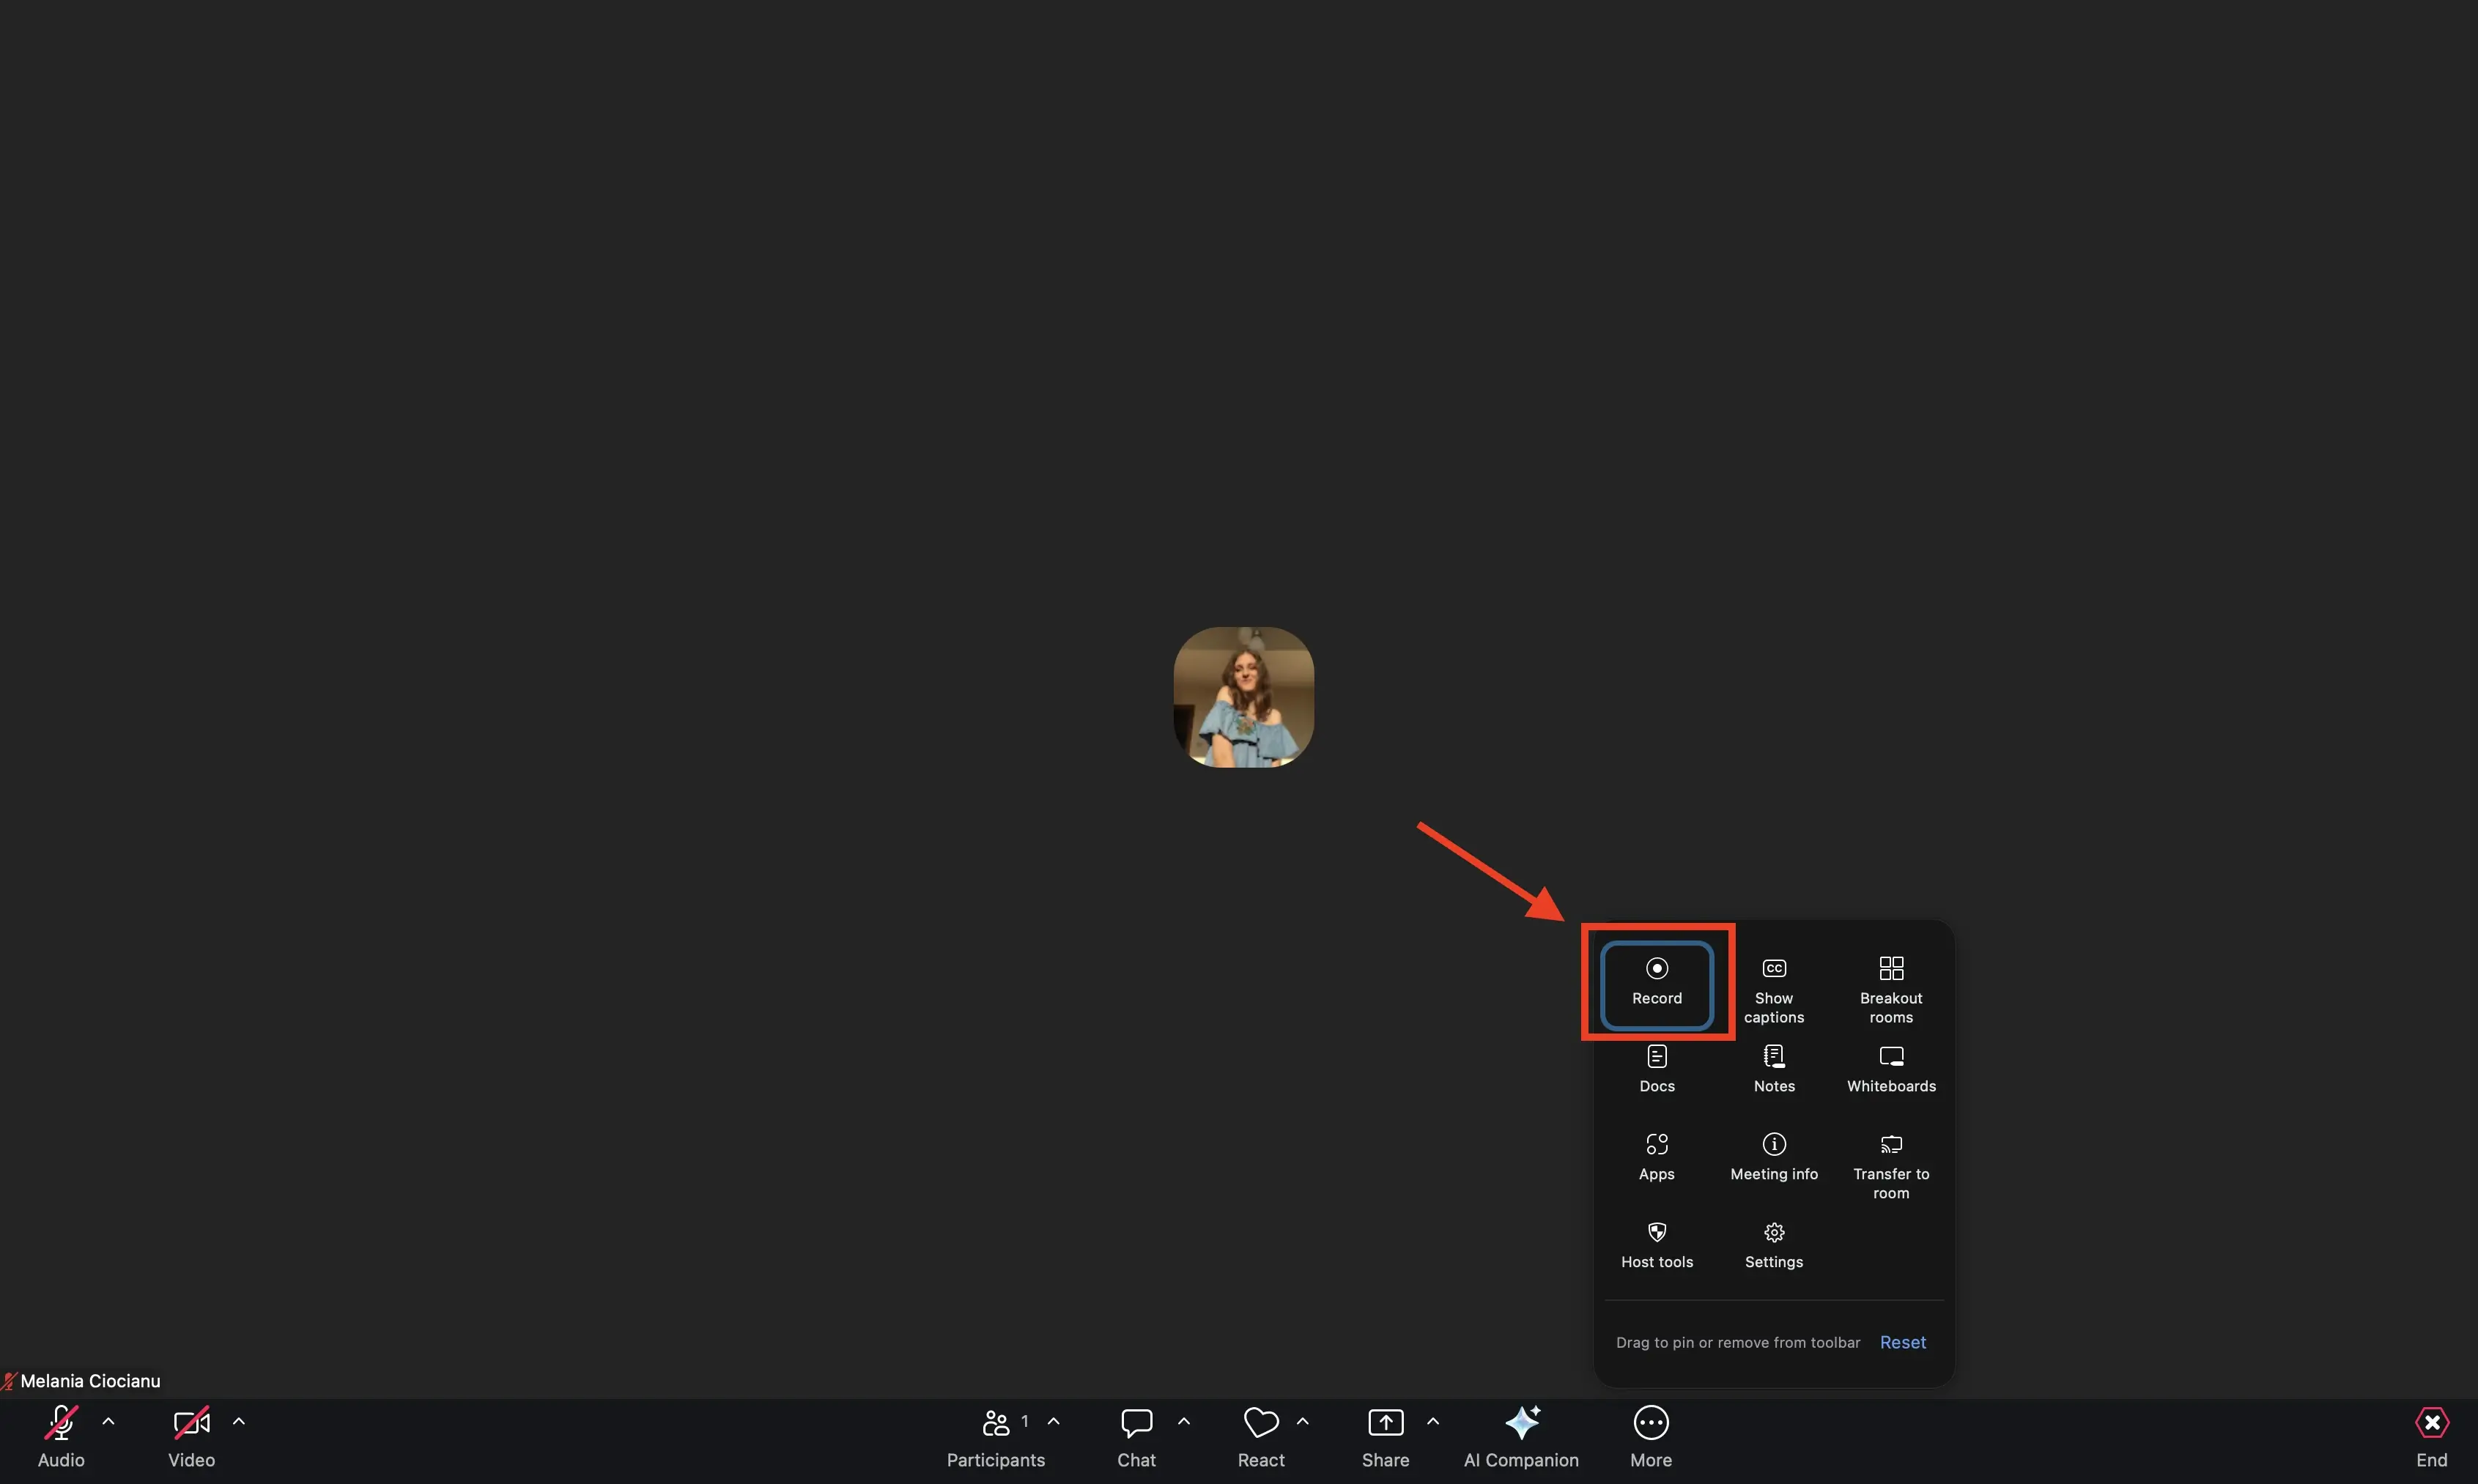
- When you are ready, click Record in the Zoom toolbar and choose to record on your computer.
- Zoom will begin recording immediately. When you finish, click Stop Recording and then, if you want to end the call, click End Meeting.
Zoom processes the video automatically and saves the files to your computer.
Where do Zoom recordings save on your computer?
By default, Zoom saves local recordings to a Zoom folder inside your Documents directory.
- On Windows, you can usually find recordings in Documents > Zoom.
- On Mac, they are saved in the same location unless you change it in settings.
Zoom creates separate video and audio files. From there, you can edit the video, upload it to YouTube, share it with a link, or download the files for backup.
How do you record yourself giving a presentation on Zoom?
Zoom is commonly used to record presentations, demos, and walkthroughs.
- Start by opening your presentation on your computer.
- Open the Zoom desktop app and start a new meeting.
- Click Share Screen and select the window, application, or browser tab that contains your slides.
- Once the screen is shared, click Record. Zoom will capture your screen, your voice, and your camera if it is turned on. When you are done presenting, click Stop Recording and end the meeting.
This setup works well for product demos, training videos, and educational content created for internal use or YouTube.
How do you record a Zoom meeting automatically with MeetGeek?
If you prefer not to rely on manual recording, MeetGeek offers an automated way to record Zoom meetings without changing how you normally work.
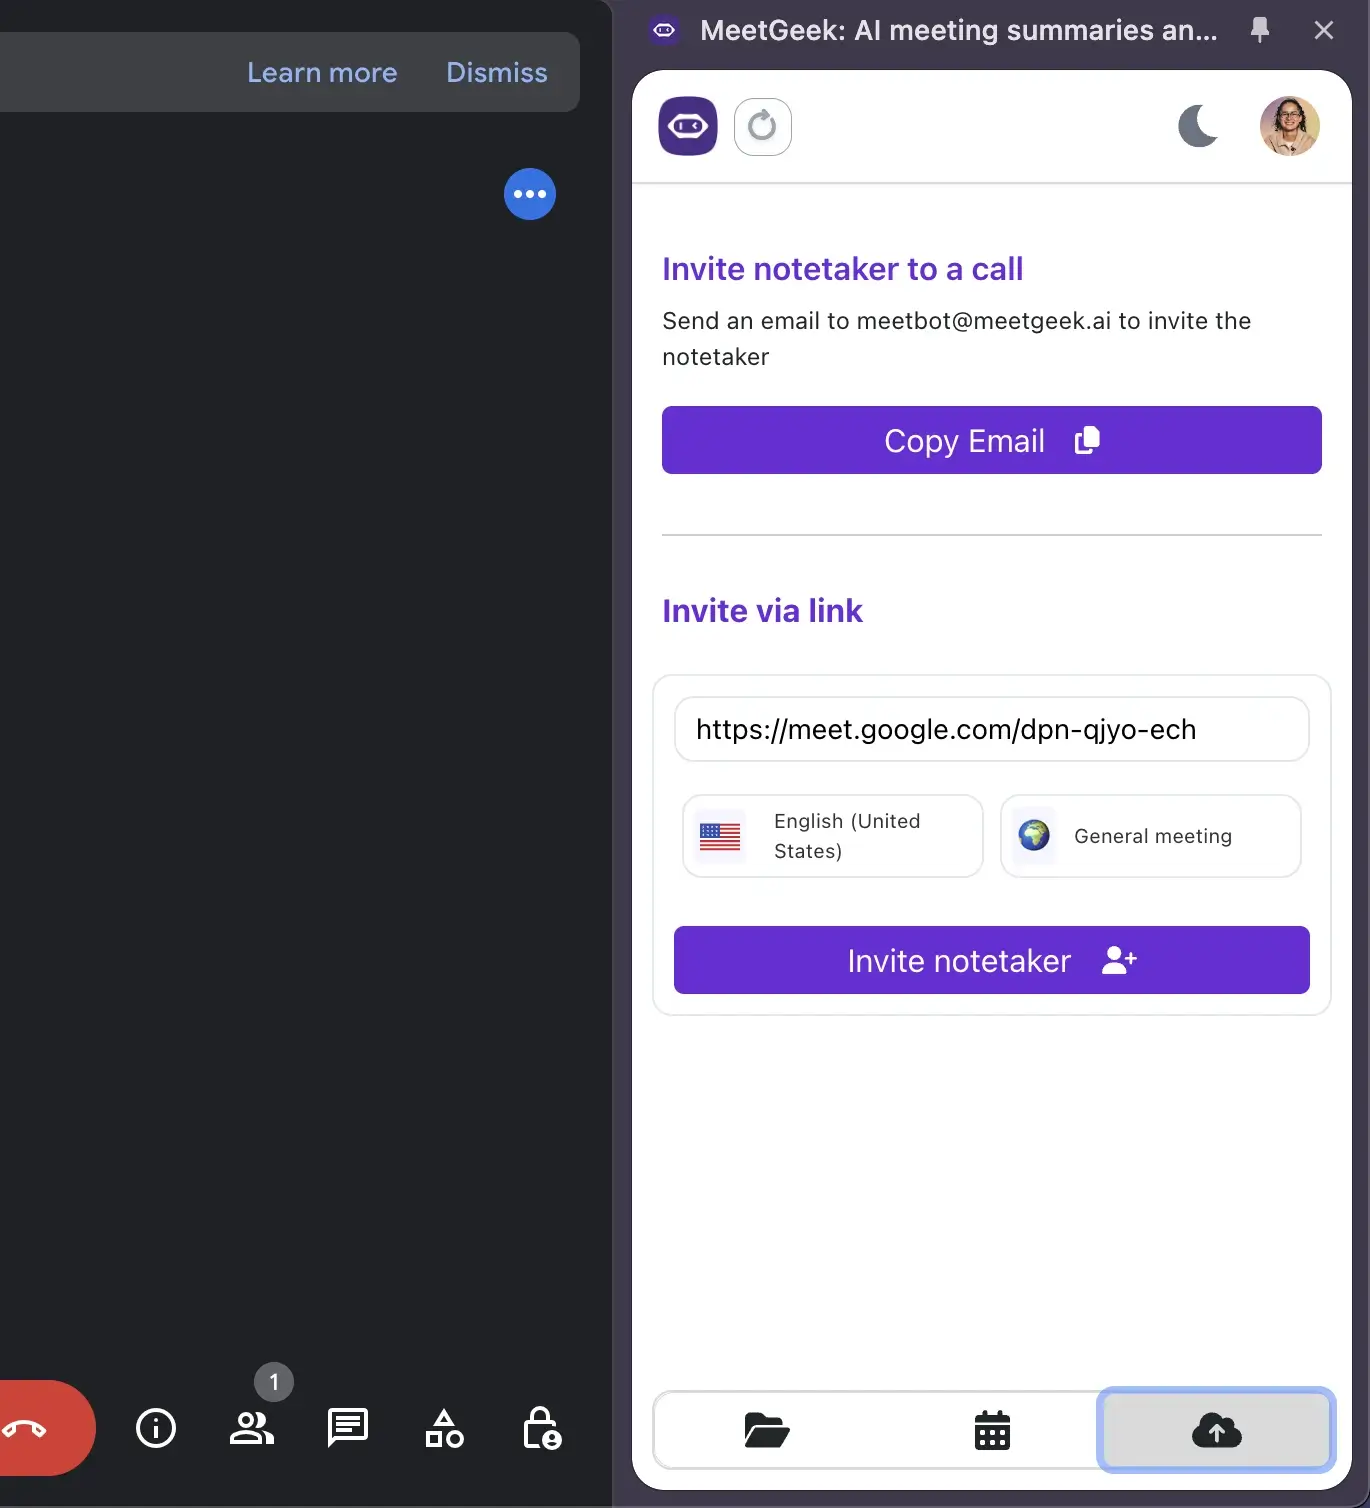
You can start by connecting MeetGeek to your calendar and Zoom account. Once this is set up, MeetGeek automatically joins scheduled Zoom meetings as a participant and begins recording video, audio, and shared screens. There is no need to open another app, invite a bot manually, or remember to click record before the meeting starts.
For ad-hoc Zoom calls or meetings that are not on your calendar, MeetGeek also provides a Chrome extension. With the extension installed, you can start recording directly from your browser with a single click. This is useful when you join a Zoom meeting from a link or need to record something on short notice.
In both cases, the meeting runs as usual. You can talk, present, share your screen, and interact with participants while MeetGeek handles the recording in the background.
After the meeting ends, the recording is processed automatically and saved to your MeetGeek account, where it remains accessible at any time.
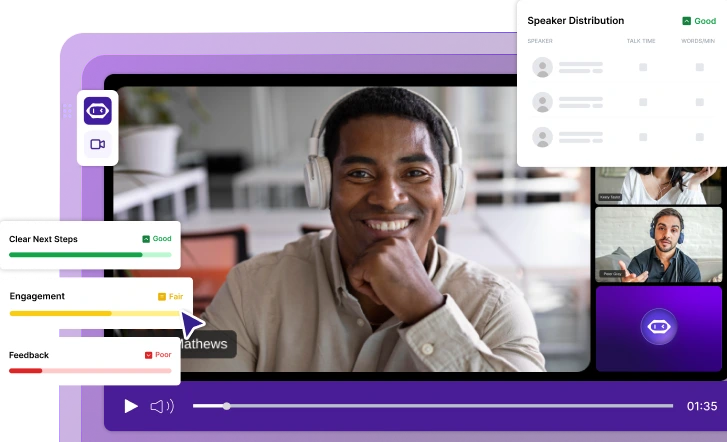
What else does MeetGeek do beyond recording?
Recording is only the first step. Once a Zoom meeting is captured, MeetGeek turns it into something far more useful than a standalone video file.
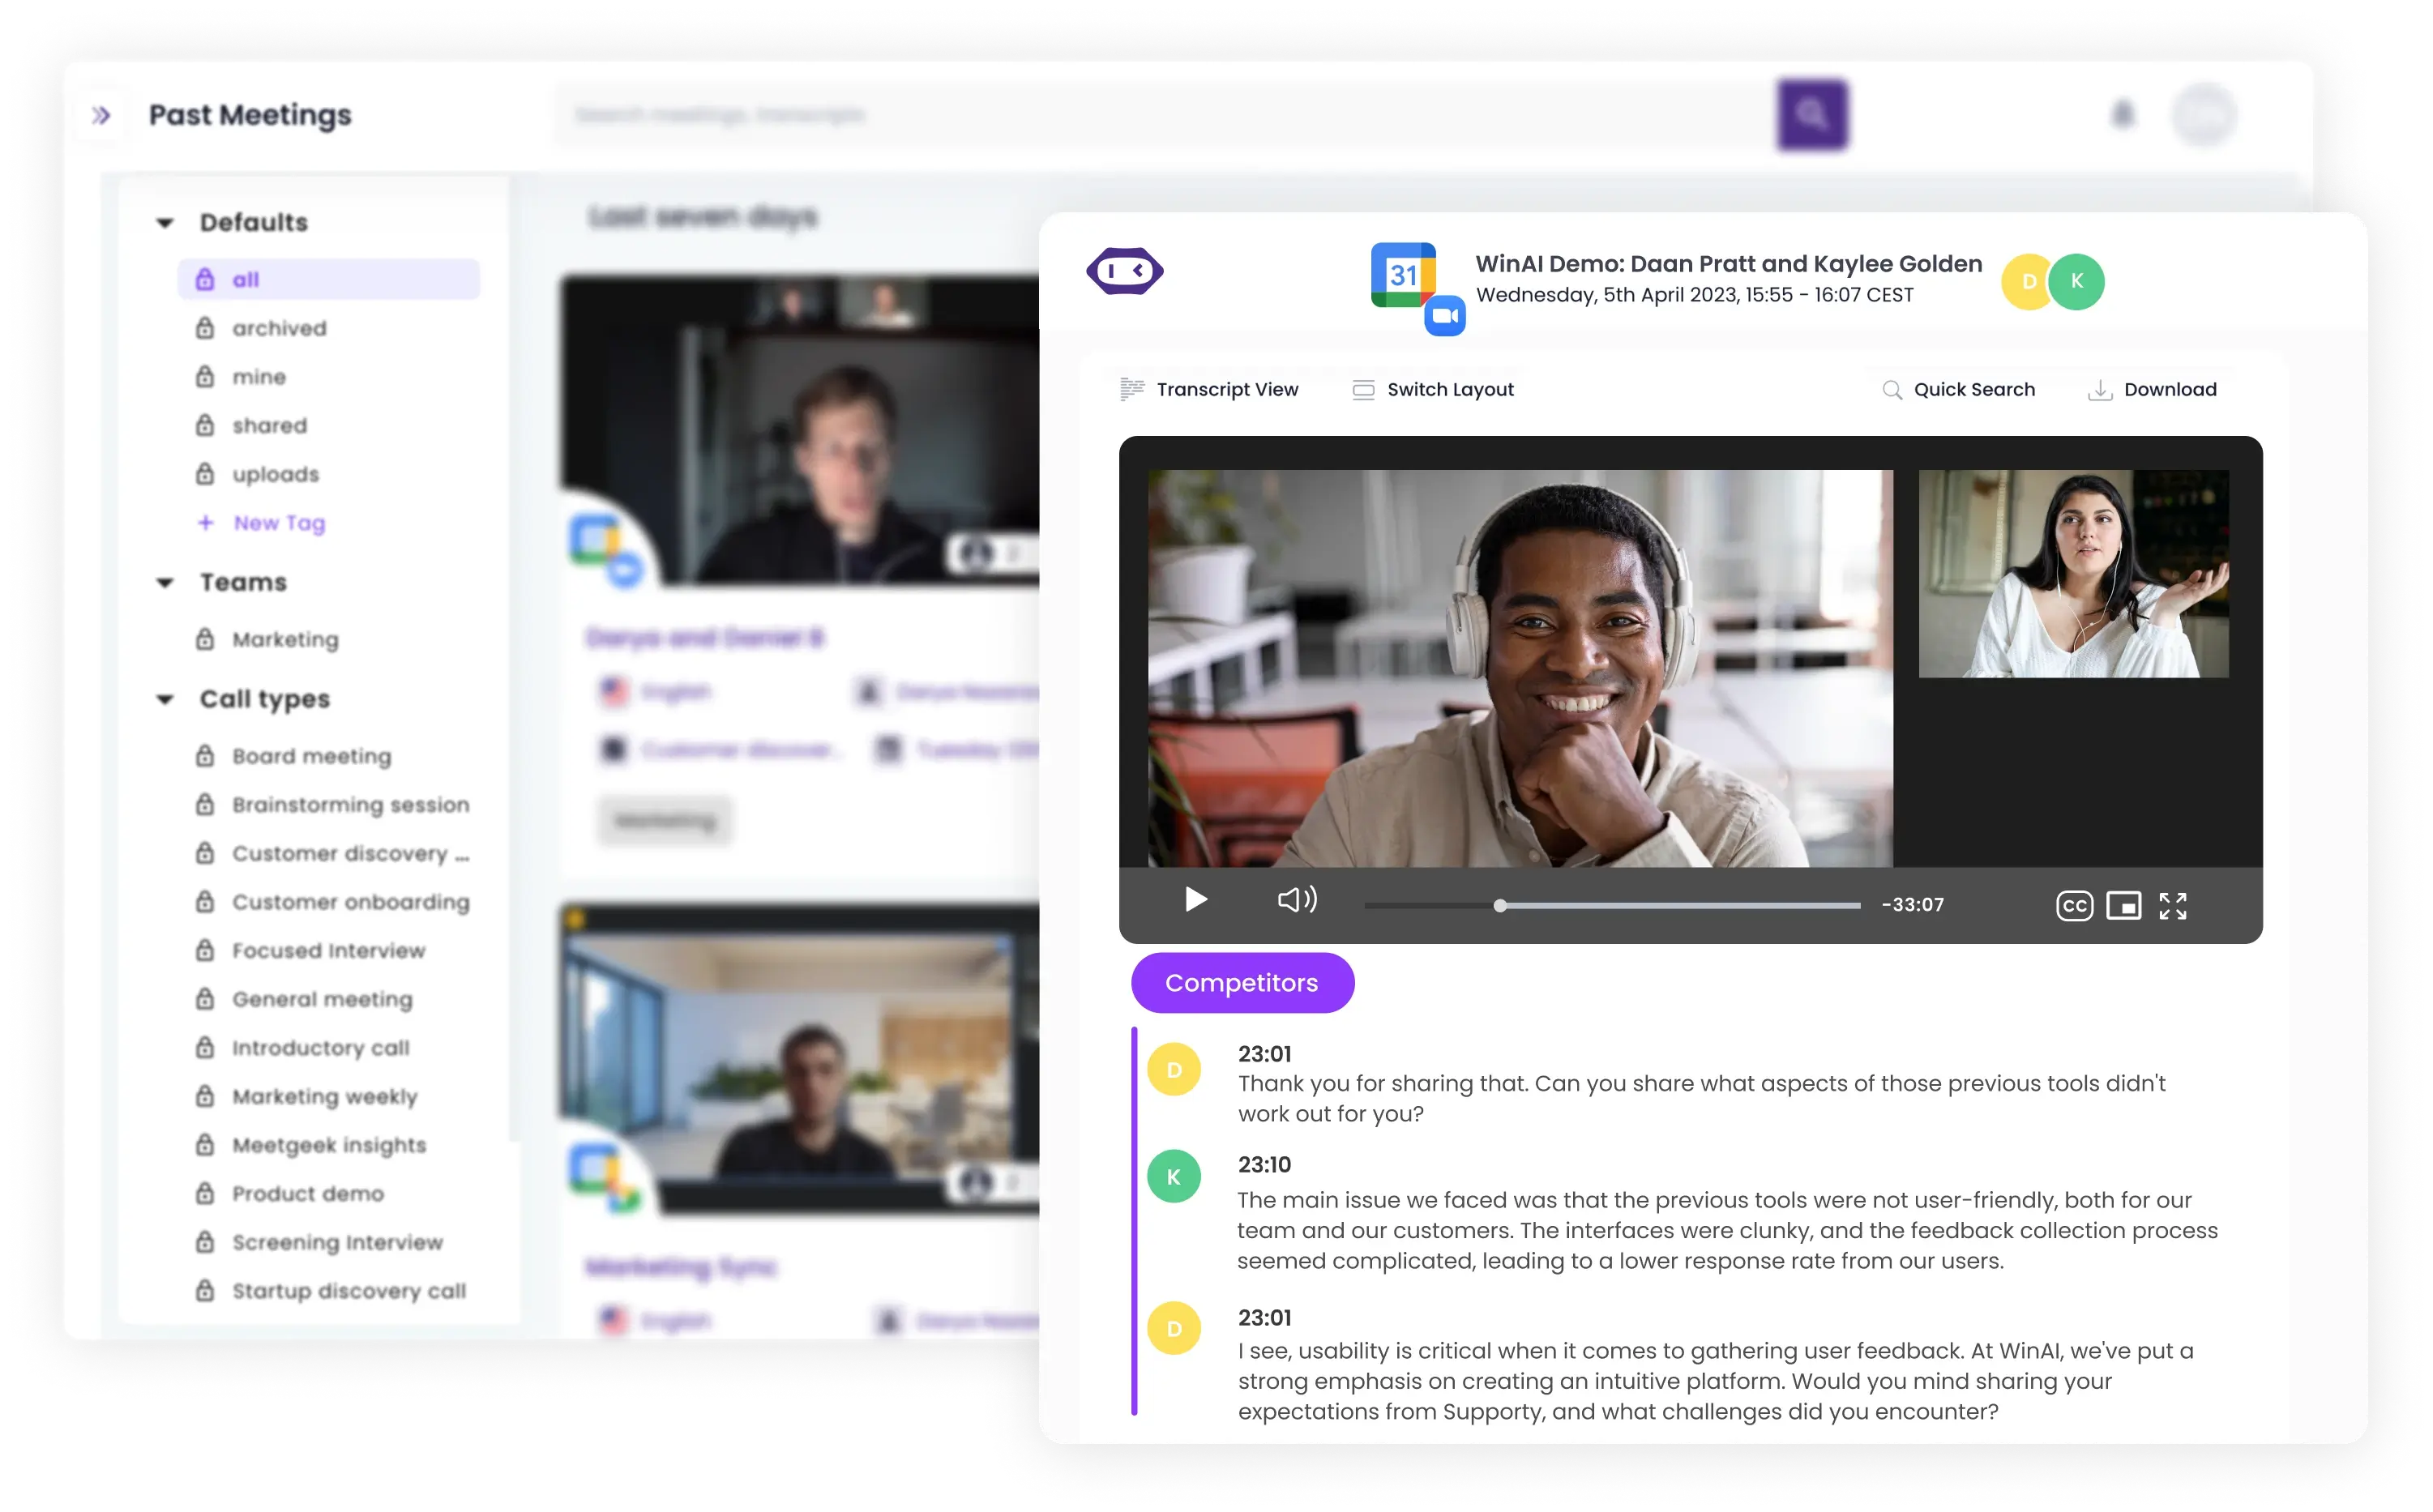
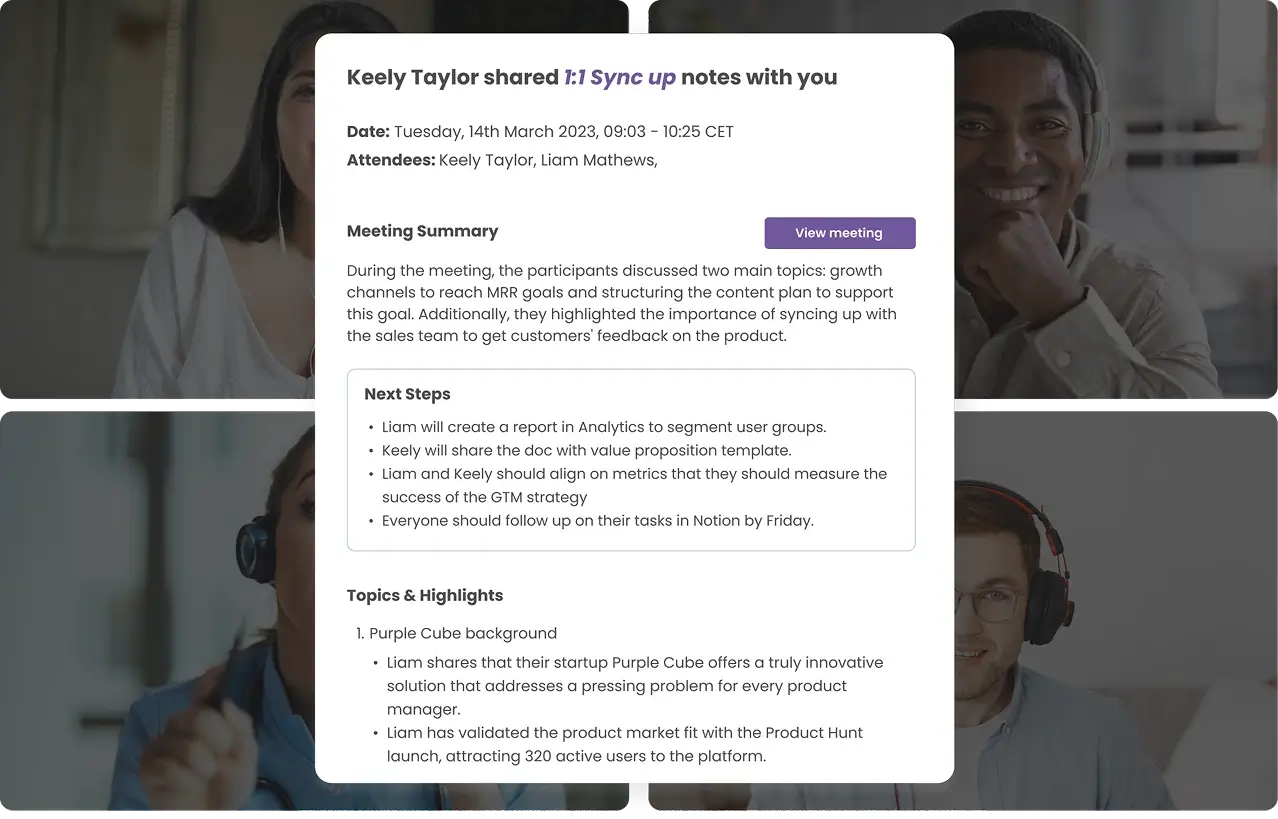
MeetGeek creates full transcripts and clear summaries so you can review key moments without replaying the entire recording. You can search across meetings by keyword, speaker, or topic, which makes it easy to find specific discussions later.
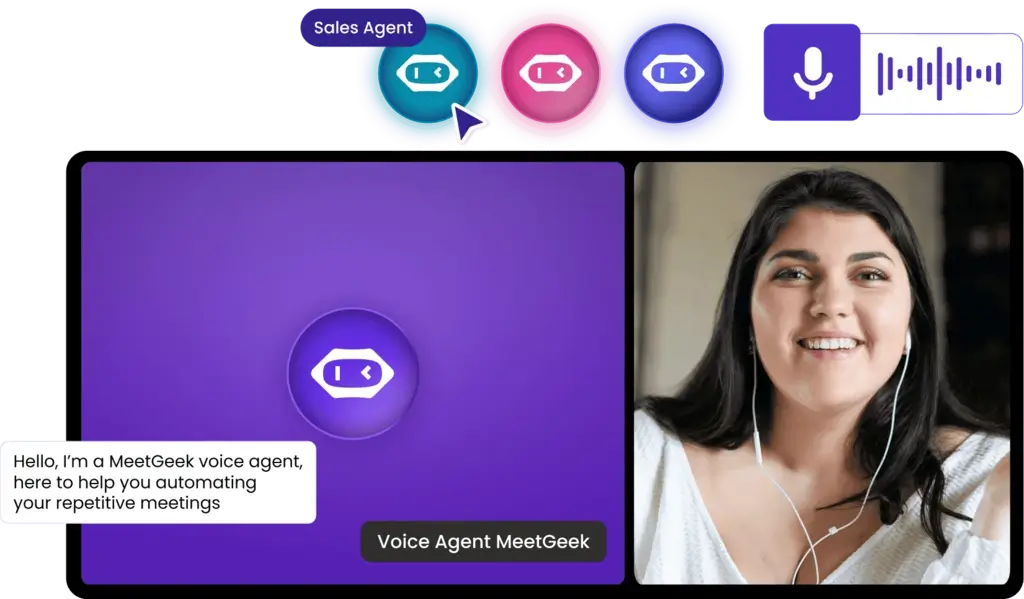
MeetGeek also includes an AI voice agent that can join calls on your behalf. This voice agent can handle routine conversations, attend repetitive meetings, or collect information when you do not need to be present live. It is especially helpful for interviews, follow-ups, or structured calls where consistency matters.
All recordings, notes, and insights are stored in a searchable knowledge base that connects with more than 10,000 integrations. MeetGeek works with CRM systems, project management tools, collaboration platforms, and documentation apps, allowing meeting content to flow directly into the tools you already use.
Instead of just recording Zoom meetings, MeetGeek helps you capture, organize, and reuse conversations without adding extra steps to your workflow.
Can you record yourself on Zoom from your phone?
Yes, you can record yourself on Zoom from your phone, but only if you use cloud recording and have the right permissions. Zoom does not support local recording on mobile devices, which means recordings cannot be saved directly to your phone.
To record from a phone, you need the Zoom mobile app and a Zoom account with cloud recording enabled. You also need to be the host of the meeting or have permission from the host. During the meeting, you can tap the More option and select Record to the cloud to start recording.
Once the Zoom meeting ends, the recording is processed and saved to your account in the cloud. You can then access the video later by signing in to Zoom from a browser on your computer, where you can view, download, or share the recording link.
If you are not the host, or if your account does not include cloud recording, you will not be able to record yourself from your phone. In those cases, recording from a computer or using an automated tool like MeetGeek is usually the more reliable option.
Should you record locally or to the Zoom cloud?
You can record on Zoom in two different ways: local recording and cloud recording.
Local recording is available on free accounts and saves files directly to your computer. Cloud recording stores videos in your Zoom account and provides a shareable link, but it requires a paid plan.
The choice depends on how often you record and how you plan to share the video. Local recording works well for quick videos. Cloud recording is useful when you want easy access and sharing without managing files.
For a more detailed explanation of local vs cloud recording, check out this video:
Zoom recording vs MeetGeek (quick comparison)
| Feature | Zoom local recording | Zoom cloud recording | MeetGeek |
|---|---|---|---|
| Works on Windows and Mac | Yes | Yes | Yes |
| Requires paid Zoom plan | No | Yes | No |
| Automatic recording | No | No | Yes |
| Transcription and summaries | No | Limited | Yes |
| Searchable meeting library | No | No | Yes |
| Records even if you forget to click record | No | No | Yes |
Final thoughts
Recording yourself on Zoom does not have to be complicated. Once you know what Zoom records, where files are saved, and which option to choose, the process becomes predictable and reliable.
That said, if you record more than once in a while, manual recording quickly becomes something to remember, double-check, and clean up afterward. With MeetGeek, instead of thinking about recording at all, your Zoom meetings are captured automatically, summarized clearly, and stored in one searchable library.
If you want your meetings to be recorded, searchable, and ready to share without extra steps, try MeetGeek for free and let it handle the work in the background, so you can focus on the conversation itself.
Frequently asked questions
Can I record myself on Zoom without showing my face?
Yes, you can record yourself on Zoom without showing your face by keeping your camera turned off and recording only audio or shared screen content. The most reliable approach is to start a Zoom meeting with your camera disabled, turn on your microphone, and use Share Screen if needed. This ensures the recording captures your voice and screen without including your video.
Does Zoom notify participants when the recording starts?
Yes, Zoom automatically notifies all participants when a recording begins by displaying a visible recording indicator on the screen. This applies to both local and cloud recordings, so everyone in the meeting is aware that the session is being recorded.
Can I pause or stop a Zoom recording?
Yes, Zoom allows you to pause or stop a recording at any time during a meeting. You can pause the recording temporarily and continue later, or stop it completely when you are finished. Once the meeting ends, Zoom processes and saves the recorded files automatically.
Can I edit Zoom recordings?
Yes. After a Zoom recording is saved to your computer or cloud account, you can edit the video using standard video editing software. This allows you to trim sections, adjust audio, or prepare the recording for sharing or uploading to platforms like YouTube.

Recruiting Software: die 7 besten Tools zur Automatisierung
Entdecken Sie die besten Recruiting Tools, um manuelle Arbeit zu reduzieren und schneller einzustellen.

Zoom Transkription mit KI: 8 Tools im Test (2026)
Wie 8 KI-Tools für die Zoom Transkription sich wirklich mit Zoom verbinden und was jedes davon tut, wenn Sie nicht der Host sind.
KI Meeting Protokoll Kostenlos: 7 Tools im Test
Sieben kostenlose Tools für Ihr KI Meeting Protokoll im Vergleich, und vor allem: wie viele Meeting-Stunden Sie bekommen, bevor Sie zahlen müssen.
Beste Recruiting Software und Bewerbermanagement 2026
Die besten Bewerbermanagementsysteme im Vergleich: für wen sich welches Tool eignet, was es kostet und wie Sie das richtige auswählen.
Die Geschäftsleitung: Rollen, Aufbau und Best Practices
Entdecken Sie die Rollen, Aufgaben und Merkmale erfolgreicher Geschäftsleitungen sowie praktische Strategien für eine stärkere Führung.
Am Handy Aufnehmen: Telefonat, Bildschirm und Sprache
So nehmen Sie am Handy ein Telefonat, den Bildschirm und Sprache auf, unter Android und iPhone, mit Apps, Qualitätstipps und Rechtslage.
Bericht Schreiben: Aufbau, Typen und Beispiel
Ein Bericht verwandelt komplexe Informationen in klare Erkenntnisse. Lernen Sie die Typen, die wichtigen Abschnitte, ein Beispiel und Best Practices kennen.
Meeting-Notizen in Claude: Was Sie Erstellen Können und Wie Sie Verbinden
Verbinden Sie Ihre Meeting-Notizen mit Claude und verwandeln Sie vergangene Gespräche in Antworten, fertige Dokumente und mehrstufige Arbeit.
Die 6 Besten Airgram-Alternativen für 2026
Vergleichen Sie die besten Airgram-Alternativen für 2026, darunter MeetGeek, Fireflies, Otter, tl;dv, Fellow und Sembly AI.
Meeting Notes in ChatGPT: Vorteile und Anwendungen
Verbinden Sie Ihre Meeting-Notizen mit ChatGPT und verwandeln Sie vergangene Calls in sofortige Antworten, Protokolle und Automatisierungen, in natürlicher Sprache.
Schneller tippen lernen: 15 Tipp-Tricks, die funktionieren
Möchten Sie schneller tippen und weniger Fehler machen? Entdecken Sie praktische Tipp-Tricks, Tastenkombinationen und Tools, die Ihnen helfen, intelligenter zu arbeiten.
Die 10 besten ChatGPT-Alternativen für die Arbeit 2026
Sie suchen eine ChatGPT-Alternative? Vergleichen Sie die besten KI-Tools für Recherche, Meetings, Schreiben, Programmierung, Suche und Produktivität im Jahr 2026.
Die 9 besten Calendly-Alternativen im Jahr 2026 (Getestet + Verglichen)
Cal.com, Acuity, Chili Piper und weitere – die besten Calendly-Alternativen im Jahr 2026, getestet und nach Anwendungsfall bewertet.
Die 8 besten Google Meet-Erweiterungen im Jahr 2026 (Auf Produktivität getestet)
Von KI-Notizen bis zur Geräuschunterdrückung: Hier sind 8 Chrome-Erweiterungen, die beheben, was Google Meet nativ nicht kann.

KI-Produktivitätstools, die wir tatsächlich im Vertrieb und Marketing nutzen
Ein praktischer Einblick in die KI-Produktivitätstools, die wir täglich für Meetings, Inhalte, Automatisierung, Vertriebs-Workflows und Teamarbeit nutzen.

Gemini vs. Google Assistant: Umfassender Vergleichsleitfaden
Verwirrt über Gemini vs. Google Assistant? Erfahre die wichtigsten Unterschiede, was Google ändert und welcher Assistent am besten zu dir passt.
Management hybrider Teams 2026: Häufige Herausforderungen und wie man sie meistert
Kommunikationslücken, Zeitzonen-Reibung, Kulturdrift – die vier Herausforderungen, denen sich jede Führungskraft im Hybridmodell stellen muss, und wie man sie löst.

MeetGeek vs tl;dv: Welches KI-Meeting-Tool ist das Richtige für Ihr Team im Jahr 2026?
Funktionen, Preise, Genauigkeit und Integrationen im direkten Vergleich mit einem klaren Urteil für Vertriebs-, CS- und Betriebsteams.
So konvertieren Sie MP4 in ein Transkript (schnell und genau)
Erfahren Sie, wie Sie MP4-Dateien mit KI-Tools für Besprechungen, Webinare und Interviews in genaue Transkripte, Untertitel und Bildunterschriften konvertieren.
Google Transkriptionsdienst 2026: Ehrliche Bewertung und beste Alternative
Google Meet, Cloud Speech-to-Text, Docs, Recorder — was jedes kann, wo jedes an seine Grenzen stößt und die bessere Alternative.

KI-Vertriebscoaching: Wie moderne Vertriebsteams KI nutzen, um mehr Geschäfte abzuschließen
Wie KI-Vertriebscoaching jeden Anruf analysiert (nicht nur die 3%, die ein Manager in die Stichprobe einnimmt) und anhand von Repräsentant, Phase und Art des Einwands die zu coachenden Momente herausarbeitet.
Kann ChatGPT Audio transkribieren? Was es kann und was nicht
Kann ChatGPT Audio transkribieren? Erfahren Sie, wie es funktioniert, welche Einschränkungen es gibt und wann Sie MeetGeek für bessere Ergebnisse verwenden sollten.
KI für den Kundenerfolg: Das Playbook 2026
Wo KI in den CSM-Tag integriert wird (Verlängerungen, Risiko, Referenzen, Bewertungen) sowie ein Reifegradmodell und eine 10-teilige Checkliste für die Auswahl der Tools.
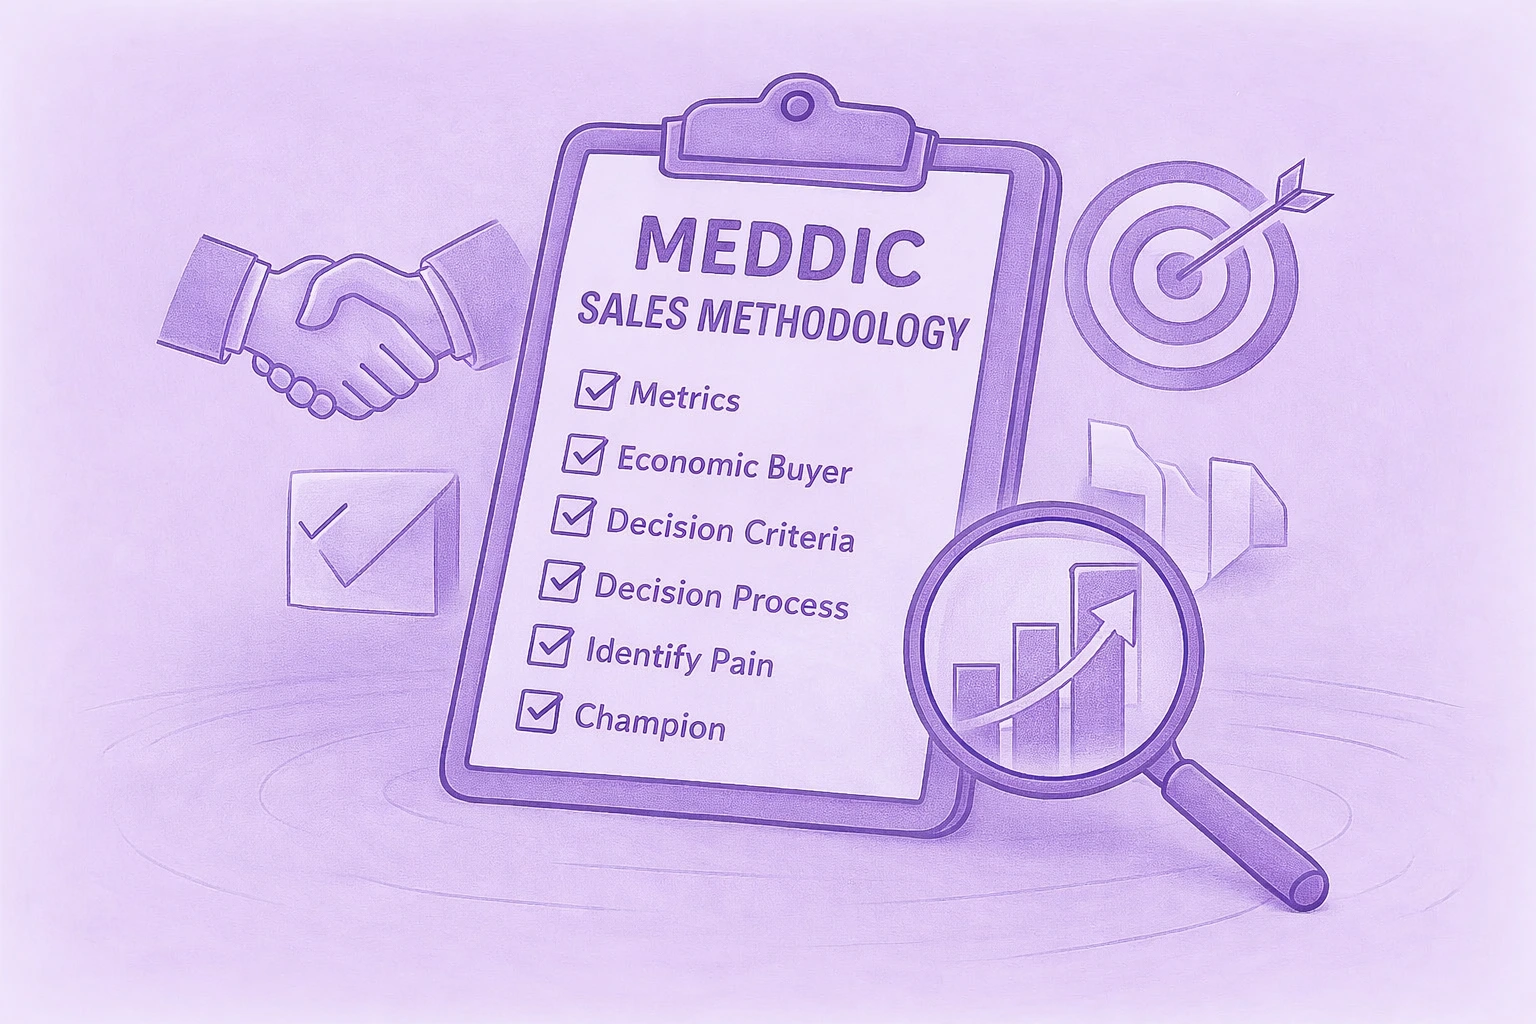
Ein vollständiger Leitfaden zur MEDDIC-Vertriebsmethodik
Erfahren Sie, wie MEDDIC Sales dabei hilft, Leads zu qualifizieren, Entscheidungsprozesse zu verstehen und die Gewinnraten in komplexen B2B-Verkaufszyklen zu verbessern.
So schreiben Sie eine Abwesenheitsnachricht
Erfahren Sie, wie Sie eine klare Abwesenheitsnachricht verfassen, was Sie einbeziehen sollten, und verwenden Sie kopierfertige Beispiele für jede Situation.
.webp)
So kündigen Sie Ihr Zoom-Abonnement im Jahr 2026
Müssen Sie Ihr Zoom-Abonnement kündigen? In dieser Anleitung wird genau erklärt, wie Sie dies auf der Zoom-Website, im Apple App Store oder bei Google Play tun, was nach der Kündigung passiert und wie Sie zusätzliche Rechnungsgebühren vermeiden können.
MeetGeek vs Fellow: Vergleich von Besprechungsnotizen, Tagesordnungen und Automatisierung
Vergleich von MeetGeek gegen Fellow? Sieh dir an, wie sich die KI-Besprechungsnotizen, Tagesordnungen, Aufzeichnungen und Automatisierungsfunktionen der Anbieter unterscheiden, um die beste Lösung für dein Team zu finden.
So nehmen Sie auf dem Mac auf dem Bildschirm auf (mit Audio, Systemsound und Profi-Tipps)
Erfahren Sie, wie Sie mit den integrierten Tools auf dem Mac Bildschirmaufnahmen machen, Audio korrekt aufnehmen und herausfinden, wann MeetGeek die intelligentere Option ist.
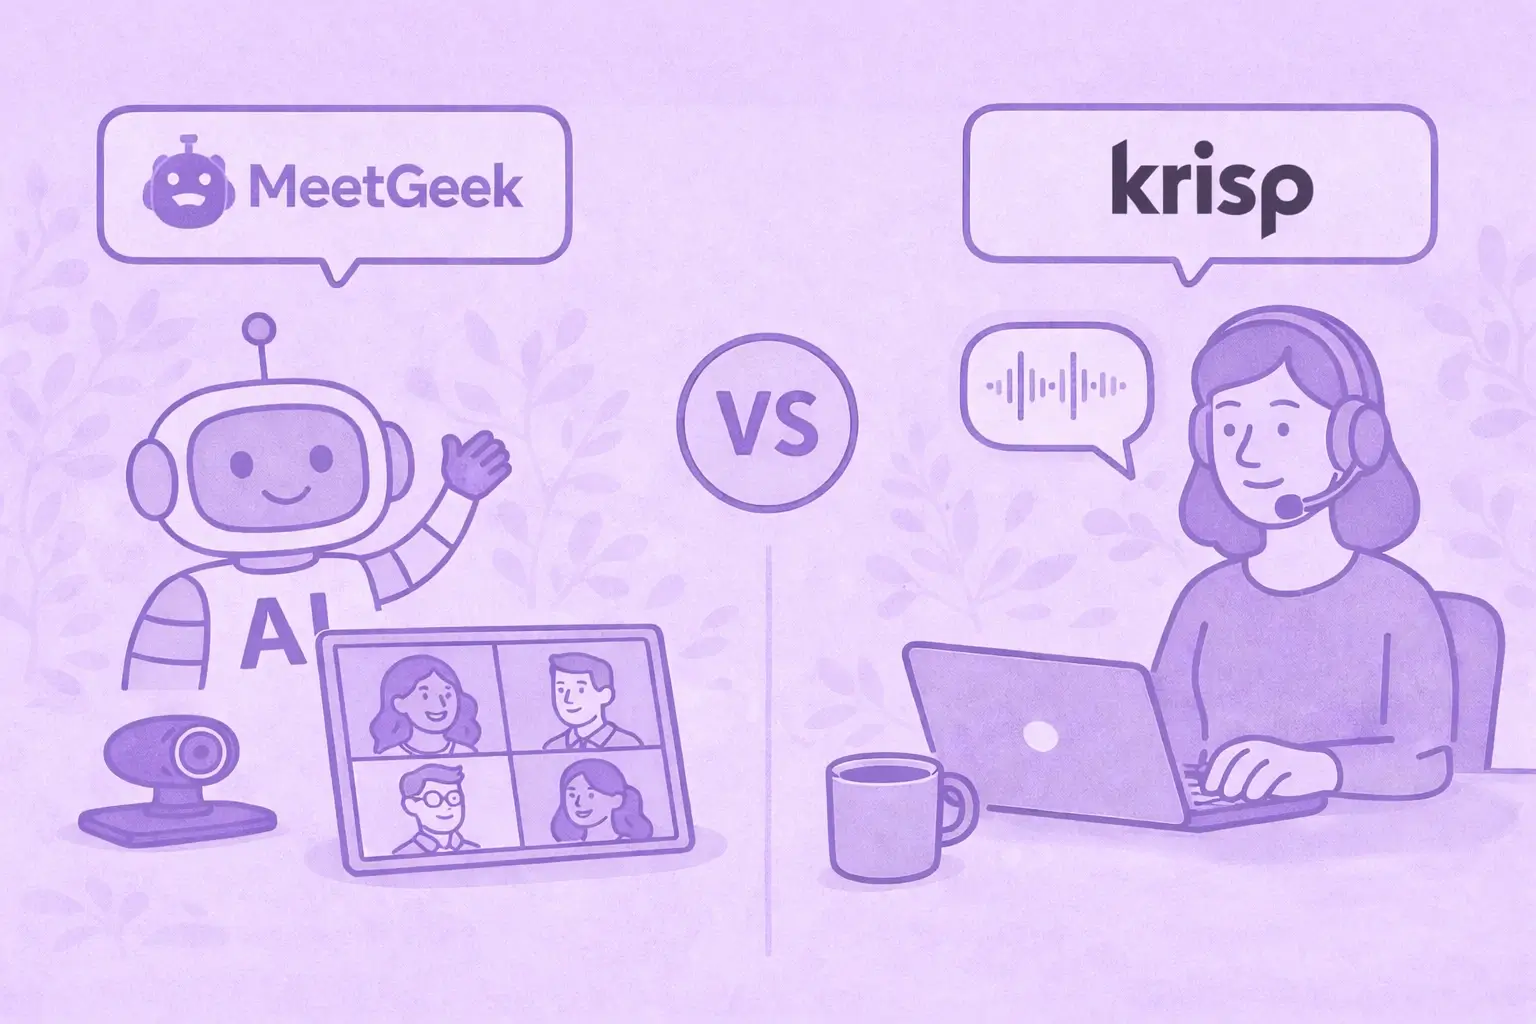
MeetGeek gegen Krisp: Welcher KI-Meeting-Assistent ist der richtige für Ihr Team?
MeetGeek und Krisp im Vergleich: KI-Hinweise, Geräuschunterdrückung, Preisgestaltung, Integrationen und Aufnahmefunktionen klar erklärt.
Tipps für Videokonferenzen für erfolgreiche virtuelle Besprechungen
Erfahren Sie praktische Tipps für Videokonferenzen, die die Audioqualität, das Engagement und die Nachverfolgung verbessern und Teams helfen, auch nach virtuellen Besprechungen an einem Strang zu ziehen.
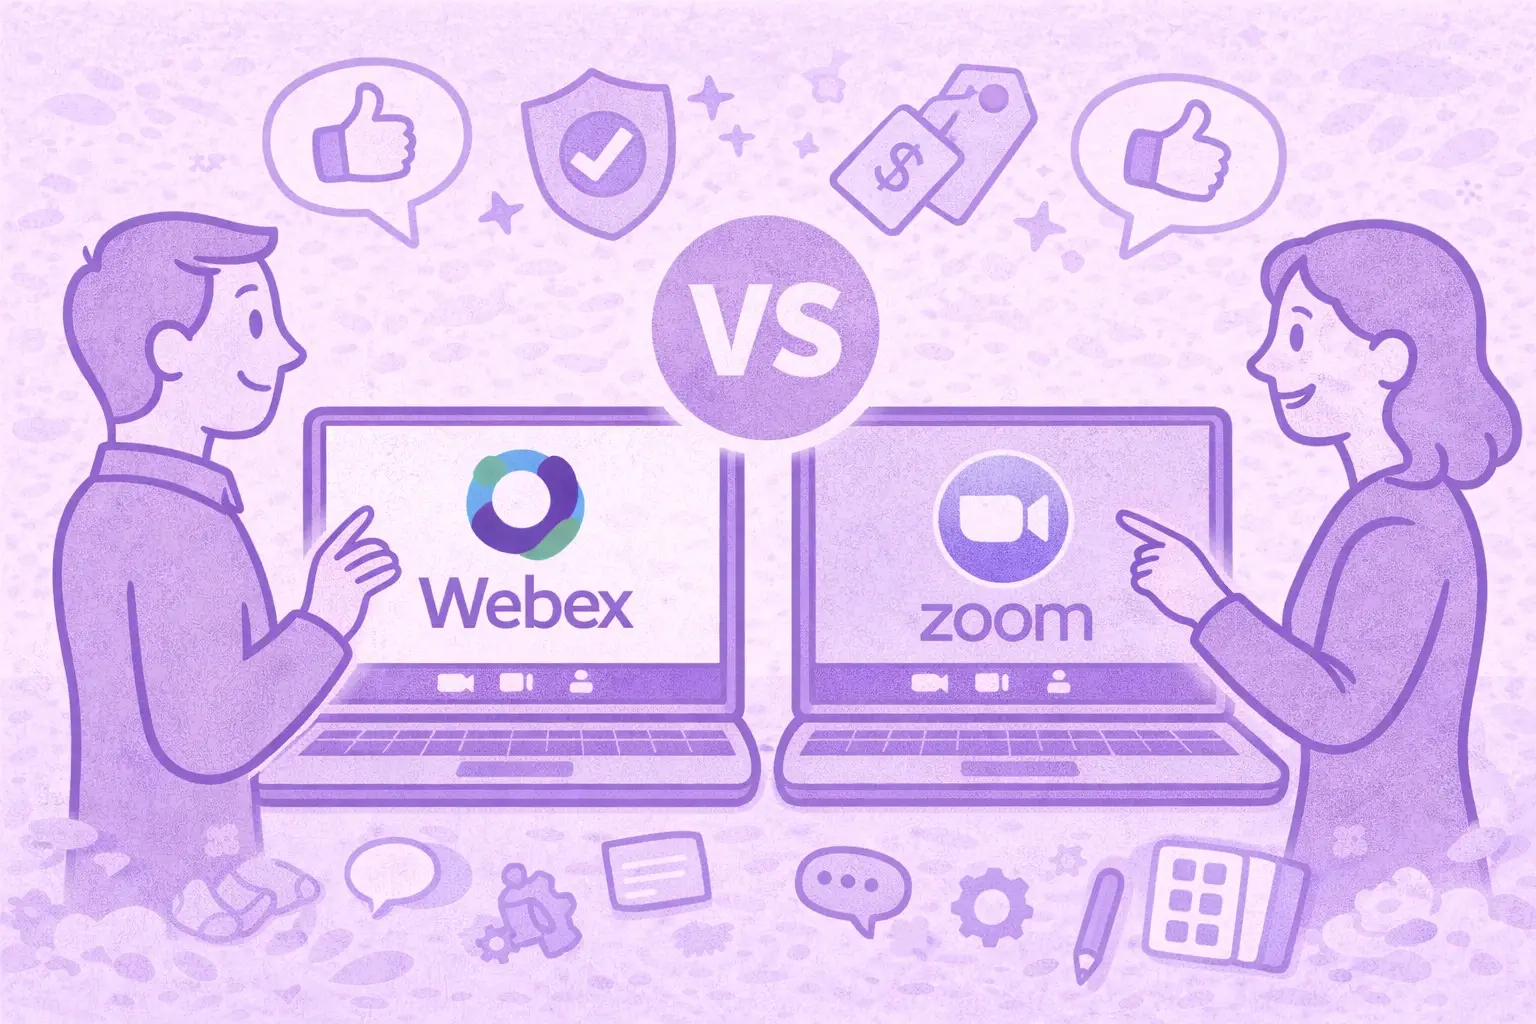
Webex vs Zoom: Welche Videokonferenzplattform passt am besten zu Ihren Meetings?
Ein klarer Vergleich von Webex und Zoom, von Funktionen und Preisen bis hin zu Sicherheit und Integrationen.
Wie man im Zoom die Hand hebt und tatsächlich gehört wird
Erfahren Sie, wie Sie in Zoom auf jedem Gerät Ihre Hand heben, Unterbrechungen vermeiden und Besprechungen von Anfang bis Ende organisieren können.
Gute Fragen, die Sie in einem Interview stellen sollten und die Ihnen helfen, die richtige Wahl zu treffen
Erfahren Sie, welche Fragen Sie stellen sollten, wann Sie sie stellen sollten und wie Sie Interviews nutzen können, um zu entscheiden, ob eine Rolle, ein Team und ein Unternehmen wirklich zu Ihnen passen.
Was ist der Companion Mode in Google Meet? Alles was du wissen musst
Lesen Sie weiter, um eine praktische Anleitung zur Verwendung des Begleitmodus in Google Meet für klarere, ausgewogenere Hybrid-Meetings zu erhalten.
Was ist ein Skip-Level-Meeting? Wie Führungskräfte Skip-Levels nutzen, um die Kommunikation zu verbessern
Ein detaillierter Einblick in Besprechungen auf Skip-Level-Ebene und wie sie Führungskräften helfen, mit Teams in Kontakt zu treten und echte Einblicke zu gewinnen.
Was ist ein AI-Sprachagent? Ein praktischer Leitfaden, wie Sprach-KI wirklich funktioniert
In diesem Leitfaden wird erklärt, was ein KI-Sprachagent ist, wie er funktioniert, welche Vorteile er bietet und wo er am besten zu menschlichen Teams passt.

Leitfaden für Stand-Up-Meetings: Was sie sind und wie man sie durchführt
Finden Sie heraus, was ein Stand-up-Meeting tatsächlich nützlich macht. In diesem Leitfaden wird erklärt, wie du tägliche Stand-Ups durchführst, die kurz bleiben, Blockaden zum Vorschein bringen und die Teams auf einer Linie halten.
Alles über Microsoft Teams AI Interpreter + So gehen Sie über die Übersetzung hinaus
Erfahren Sie, wie Microsoft Teams AI Interpreter funktioniert, wo er zu kurz kommt und wie Sie über die Übersetzung hinausgehen können.
Beste App zur Vorlesungsaufzeichnung im Jahr 2026:5 Tools, die Studierende tatsächlich verwenden
Schauen wir uns genauer an, was Studierende heutzutage verwenden, um ihre Vorlesungen sowohl online als auch offline aufzuzeichnen und zu organisieren.
Read AI-Preise erklärt für 2026: Lohnt es sich für Meeting-Notizen?
Erfahren Sie mehr über die Preisgestaltung für 2026 von Read AI, ihre Kernfunktionen und wie sie mit Besprechungsnotizen, Transkriptionen und Erkenntnissen umgeht, um moderne Teams zu unterstützen.

Was ist eine durchsuchbare Wissensdatenbank und wie funktioniert sie?
Erfahren Sie, wie durchsuchbare Wissensdatenbanken den Zugriff auf Informationen verbessern, und sehen Sie, wie MeetGeek Ihre Meetings in eine schnelle, zuverlässige Wissenszentrale verwandelt.
So verwischen Sie den Hintergrund in Google Meet (einfache Anleitung für alle Geräte)
Erfahren Sie, wie Sie Ihren Hintergrund in Google Meet auf Desktop und Handy verwischen, visuelle Effekte verwenden und bei jedem Anruf ein klareres, fokussierteres Aussehen erzielen.
So treten Sie Team-Meetings mit Code bei: Eine vollständige schrittweise Anleitung
Erfahren Sie, wie Sie mithilfe eines Besprechungscodes an Microsoft Teams-Besprechungen teilnehmen können, sowie über andere Optionen wie einen Link oder eine Einladung. In diesem Handbuch werden alle Methoden klar und Schritt für Schritt erklärt.

Die 5 besten NoteGPT-Alternativen im Jahr 2026
Entdecken Sie die 5 besten NoteGPT-Alternativen, mit denen Sie wichtige Erkenntnisse erfassen, Inhalte transkribieren und die Produktivität in Lern- und professionellen Arbeitsabläufen steigern können.
Was ist Perplexity AI? Ein Leitfaden für die KI-gestützte Suchmaschine, die die Art und Weise, wie wir Informationen finden, verändert
In diesem Artikel werfen wir einen genaueren Blick auf Perplexity AI, was sie im Vergleich zu herkömmlichen Suchmaschinen für Sie tun kann, und einige ihrer Vor- und Nachteile.
Die besten tl;dv-Alternativen zur Optimierung Ihrer Besprechungen
Entdecken Sie die besten tl;dv-Alternativen und erkunden und vergleichen Sie deren Funktionen, um das richtige KI-Meeting-Tool für Ihr Unternehmen auszuwählen.
ChatGPT-Aufnahmemodus gegen MeetGeek: Hier finden Sie alles, was Sie wissen müssen
Neugierig, wie der ChatGPT-Rekorder im Vergleich zu MeetGeek abschneidet? Wir haben uns die Funktionen, die Integration und die Datensicherheit für die Aufzeichnung von Besprechungen angesehen.
Fathom AI Pricing 2026: Lohnt es sich für moderne Teams immer noch?
Erkunden Sie die Preise von Fathom AI für 2026, einschließlich Funktionen, Limits und Tarifvergleiche, und erfahren Sie, wie MeetGeek Teams mehr Flexibilität bietet.
KI-Tagenten: Wie autonome KI die Zukunft der Arbeit verändert
Erfahren Sie, wie KI-Besprechungsagenten die Zukunft der Arbeit neu definieren. Sie kümmern sich um die Planung, Nachbereitung und sprechen sogar in Ihrem Namen, um Zeit zu sparen und jedes Meeting in echte Aktionen umzusetzen.
Notta AI Review: Lohnt sich dieses KI-Transkriptionstool im Jahr 2026?
Lesen Sie diesen ausführlichen Testbericht über Notta AI, um zu erfahren, wie gut es Besprechungen transkribiert, mehrere Sprachen verarbeitet und KI-Zusammenfassungen liefert und wo es im Vergleich zu intelligenteren Besprechungsassistenten zu kurz kommt.
Mit diesen 4 KI-Tools für gemeinnützige Organisationen zählt jede Stunde
Machen Sie Ihre gemeinnützige Organisation effizienter mit KI-Tools, die den Verwaltungsaufwand verkürzen, die Zusammenarbeit verbessern und jede Stunde der Wirkung maximieren.
Granola AI Notes-Alternativen: Die besten Optionen, die Sie 2026 ausprobieren sollten
Entdecken Sie die besten Granola AI Notes-Alternativen für 2026 mit intelligenteren Tools, die über die Transkription hinausgehen und Automatisierung, Einblicke und Zusammenarbeit bieten.
Folge-E-Mail nach dem Interview: Wie man es schreibt, wann man es sendet und was man sagt
Erfahren Sie, wie Sie nach einem Interview eine effektive Folge-E-Mail schreiben. Von Zeitplan und Vorlagen bis hin zu Ton und Struktur behandelt dieser Leitfaden alles, was Sie brauchen, um sich abzuheben und unvergesslich zu bleiben.

Tactiq Preise 2026: Lohnt es sich? Pläne und Kosten
Ein klarer Blick auf jeden Tactiq-Tarif, was die KI-Credits wirklich einschränken und wie sich die Kosten für Einzelnutzer und Teams summieren.

Bedeutung und Durchführung eines Ad-hoc-Meetings
Entdecken Sie die wahre Bedeutung von Ad-hoc-Meetings und lernen Sie, wie Sie spontane Diskussionen zielgerichteter und effektiver gestalten können. Finden Sie heraus, wann Sie sie abhalten und verwalten sollten.
Etikette für virtuelle Besprechungen: 15 grundlegende Regeln für professionelle Videoanrufe
Entdecken Sie 15 wichtige Regeln und Tipps zur Etikette virtueller Besprechungen, die dafür sorgen, dass Gespräche konzentriert, professionell und ansprechend bleiben.
So verwischen Sie den Hintergrund im Zoom: Schrittweise Anleitung
Erfahren Sie, wie Sie die Funktion zum Weichzeichnen des Hintergrunds von Zoom für mehr Privatsphäre und Fokus verwenden können, sowie Tipps, Korrekturen und wann Sie zu virtuellen Hintergründen wechseln sollten.
So teilen Sie den Bildschirm in Google Meet: Eine einfache schrittweise Anleitung
Erfahre, wie du deinen Bildschirm auf Google Meet mit klaren Schritten für Computer, iPhone, iPad und Android teilst.
Der MCP-Server von MeetGeek erklärt: Wie KI-Assistenten damit Besprechungen transformieren können
Erfahren Sie, wie der MCP Server von MeetGeek KI-Assistenten dabei unterstützt, Ihre Besprechungen in intelligente, umsetzbare Erkenntnisse zu verwandeln, und das alles von Ihrem lokalen Computer aus.

So ändern Sie den Namen auf Zoom (vor und nach dem Beitritt zu einem Meeting)
Erfahre Schritt für Schritt, wie du deinen Zoom-Namen auf jedem Gerät änderst, und erhalte Tipps für Gastgeber, Wartezimmer und Problemlösungen.
KI zum Notieren für Studierende: Die besten Tools, um 2026 intelligenter zu lernen
Ein Leitfaden zu den besten KI-Tools zum Notieren für Schüler im Jahr 2026 mit Funktionen, Vor- und Nachteilen, die Ihnen bei der Auswahl der richtigen App für das Lernen helfen.
Beschreibung des Preisüberblicks 2026: Was es bietet, wo es zu kurz kommt und eine bessere Alternative
Ein genauerer Blick auf die Preisstufen von Descript, ihre Kompromisse und warum MeetGeek als intelligentere Wahl für YouTuber hervorsticht.
Google Meet Zeitlimit: Kostenlos und Bezahlt
Google nennt eine andere Dauer für kostenlose Konten, Workspace-Editionen und Google One. Hier ist jede einzelne davon.

So transkribieren Sie Sprachnotizen in Text (3 verschiedene Möglichkeiten)
In diesem Artikel erfahren Sie, wie Sie Sprachnotizen auf drei verschiedene Arten transkribieren und dabei die Vor- und Nachteile der einzelnen Optionen abwägen.
Beste ClickUp-Alternativen für KI-Notizen
Erfahren Sie mehr über die 5 besten ClickUp-Alternativen, wenn Sie über das einfache Erstellen von KI-Notizen hinausgehen und einen umfassenden Besprechungsassistenten finden möchten.
Was ist eine objektive Zusammenfassung und wie schreibe ich eine für Ihre Besprechungen
Objektive Zusammenfassungen sind ein Muss, wenn Sie wichtige Informationen aus langen Besprechungen benötigen. Wir werden in diesem Artikel alles darüber besprechen!

So zeichnen Sie ein Google Meet auf: Alle Optionen erklärt
In diesem Artikel erfahren Sie, wie Sie ein Google Meet sowohl nativ als auch mithilfe von Tools von Drittanbietern wie MeetGeek aufzeichnen.
Die 7 besten Apps für Meeting-Notizen 2026
Sie suchen die beste App für Meeting-Notizen für Ihr Team? Wir vergleichen Funktionen, Vor- und Nachteile der 7 besten Apps des Moments.
So zeichnen Sie ein Zoom-Webinar als Gastgeber oder Teilnehmer auf (2 Methoden)
In diesem Artikel erfahren Sie, wie Sie ein Zoom-Webinar als Gastgeber oder Teilnehmer mithilfe des integrierten Aufzeichnungs- und Drittanbietertools mit KI-Transkription von Zoom aufzeichnen.

Die 7 besten Chrome-Erweiterungen für Verkäufer und AMs
In diesem Artikel werden wir die besten Chrome-Erweiterungen für Vertriebsmitarbeiter untersuchen und uns dabei auf Tools konzentrieren, die die Intelligenz von Besprechungen verbessern, in CRMs integrieren und die Produktivität optimieren.
Die besten Chrome Audio Capture-Erweiterungen und -Tools im Jahr 2026 [Vergleich]
Wir werden uns mit einer Reihe von Optionen befassen, von einfachen Rekordern bis hin zu fortschrittlichen Plattformen, die Transkription, Zusammenfassungen und nahtlose Integrationen bieten.

Die 7 besten Speech-to-Text-Chrome-Erweiterungen: Vergleich und Funktionen
In diesem Leitfaden werden die 8 wichtigsten Chrome-Erweiterungen für Speech-to-Text für 2025 beschrieben. Dabei werden die wichtigsten Funktionen, Preise und idealen Anwendungsfälle beschrieben, damit Sie eine fundierte Entscheidung treffen können.
Die Überlastung von Besprechungen ist nicht das eigentliche Problem — schlechtes Meeting-Design schon
Wenn eine Überlastung der Besprechungen offensichtlich wird, gibt es einige kleine Änderungen, die Ihre gesamte Meetingkultur verändern können.
Beste Conversational Intelligence Software 2026
Durch den Einsatz von KI liefern diese Conversational Intelligence-Plattformen die Analysen, die erforderlich sind, um Verkaufs- oder Investorengespräche zu verfeinern, das Coaching zu verbessern und den Umsatz zu beeinflussen.

So fügen Sie Besprechungsnotizen zu Google Docs hinzu [3 einfache Möglichkeiten]
Schauen wir uns drei Möglichkeiten an, wie Sie Ihre Besprechungsnotizen zu Google Docs hinzufügen können — manuell oder automatisch.
Finden Sie die beste Zoom-Alternative im Jahr 2026
Suchen Sie nach einer Zoom-Alternative? Schauen Sie sich die besten Optionen für 2026 an und finden Sie die perfekte Lösung für Ihre Meetings!
So verlängern Sie das Zoom-Zeitlimit: Bezahlte und kostenlose Lösungen
Benötigen Sie mehr Zeit für Ihr Zoom-Meeting? Erfahren Sie mit dieser einfachen Anleitung, wie Sie Ihre Sitzung einfach verlängern können.
So installieren Sie Microsoft Teams für Mac (Anfängerfreundliche Anleitung)
Das Einrichten von Microsoft Teams auf dem Mac ist einfach! Folgen Sie unserer Kurzanleitung, um nahtlos mit der Zusammenarbeit zu beginnen.
Die 5 besten Integrationen für KI-Besprechungsassistenten im Jahr 2026
Sie möchten Ihre Meeting-Produktivität steigern? Entdecken Sie die besten KI-Integrationen für Besprechungsassistenten von 2026, die sich nahtlos mit Ihren bevorzugten Tools und Apps verbinden lassen.

Die viertägige Arbeitswoche: Wie Unternehmen den Talentkrieg gewinnen
Warum weniger Arbeit für Unternehmen, die nach Produktivität, Innovation und Talentbindung streben, der klügste Schritt sein könnte.
So zeichnen Sie WhatsApp-Anrufe auf: 5 Methoden für jedes Gerät (2026)
Entdecken Sie mit unserer klaren, schrittweisen Anleitung, wie Sie WhatsApp-Anrufe am einfachsten aufzeichnen können.
7 Möglichkeiten, wie KI-Meeting-Assistenten Vertriebsteams im Jahr 2026 Zeit sparen
Erfahren Sie, wie KI-Besprechungsassistenten die Vertriebsproduktivität im Jahr 2026 verbessern, indem sie manuelle Aufgaben eliminieren, Arbeitsabläufe rationalisieren und es den Mitarbeitern ermöglichen, sich auf den Verkauf zu konzentrieren.
Zoom Kosten in 2026: Alle Pläne, Add-ons und Preise
Eine klare Übersicht über jeden Zoom Workplace Plan, jedes Add-on und versteckte Kosten, mit dem echten Jahrespreis für Teams jeder Größe.
Kann ich in Teams einen Screenshot machen? Ihre Fragen, beantwortet
Sie fragen sich, wie Sie einen Screenshot in Teams machen können? Wir erklären, was funktioniert, was nicht und worauf Sie achten sollten.

Google Meet Preise 2026: Kostenlos vs. Bezahlt
Finden Sie mit unserer übersichtlichen Aufschlüsselung und intelligenten Tipps zum Kostensparen den richtigen Google Meet-Tarif für Ihr Team.
Wo werden Teamaufzeichnungen gespeichert? Alle Standorte, erklärt
Sie fragen sich, wo Ihre Microsoft Teams-Aufzeichnungen landen? Hier werden alle Speicheroptionen klar erklärt.
Finden Sie die beste Speech-to-Text-App für die Arbeit im Jahr 2026 (kostenlos und kostenpflichtig)
Auf der Suche nach einer Speech-to-Text-App im Jahr 2026? Wir haben die besten Tipps zusammengestellt, um die Produktivität zu steigern und Zeit bei der Arbeit zu sparen.

Verwaltung von Sicherheits- und Compliance-Risiken im Zusammenhang mit KI-Notizenschreibern
Sorgen Sie dafür, dass Ihre KI-gestützten Besprechungen sicher und konform sind! Erfahren Sie, wie Sie Sicherheits- und Compliance-Risiken verwalten, sensible Daten schützen und den Datenschutz in Ihren virtuellen Besprechungen gewährleisten können.
So schreiben Sie eine Follow-up-E-Mail für ein Geschäftstreffen mit Vorlagen und ChatGPT-Eingabeaufforderungen
Erfahren Sie, wie Sie mit Vorlagen und ChatGPT-Eingabeaufforderungen klare, professionelle Follow-ups zu Geschäftstreffen verfassen, um Zeit zu sparen und die Anzahl der Antworten zu erhöhen.

So erstellen Sie ein Protokoll für ein Meeting wie ein Profi [+ Kostenlose anpassbare Vorlage]
Nehmen Sie jedes Mal makellose Sitzungsprotokolle auf! Erfahren Sie Expertentipps, um wichtige Punkte festzuhalten, Maßnahmen zu verfolgen und Ihr Team mit professionellen Notizfähigkeiten zu beeindrucken.
So verwenden Sie Microsoft Teams AI für Besprechungen
Erfahren Sie, wie Sie Notizen automatisieren, die Teamzusammenarbeit und den Wissensaustausch verbessern und Teambesprechungen mit KI-gestützten Funktionen produktiver gestalten können.
Die 5 A effiziente Kommunikation: Ein Startup-Guide für eine bessere Teamzusammenarbeit
Zum Erfolg eines Startups gehören nicht nur gute Ideen, sondern auch, wie gut dein Team kommuniziert. Entdecken Sie das 5 A-Framework, um die Zusammenarbeit zu verbessern, Betriebsverluste zu reduzieren und die Umsetzung in die Praxis umzusetzen.
Anwesenheitsbericht zu Teamsitzung: Was ist das und wie wird er verwendet
Entmystifizieren Sie den Anwesenheitsbericht zu Teamsitzungen! Erfahren Sie, wie Sie auf ihn zugreifen, ihn interpretieren und nutzen können, um das Engagement zu verfolgen und Ihre virtuellen Besprechungen mühelos zu verbessern.
So erstellen und verwenden Sie Google Meet Breakout Rooms
Meistere die Breakout-Räume von Google Meet! Erfahren Sie, wie Sie erstellen, verwalten und verwenden, um die Zusammenarbeit und das Engagement in Ihren virtuellen Meetings zu fördern.
Fireflies vs Otter: Welches ist das Beste
Vergleichen Sie Fireflies.AI und Otter.AI, um herauszufinden, welches Transkriptionstool für Besprechungen am besten zu Ihren Anforderungen passt. Informieren Sie sich über Funktionen, Preise und mehr, um die richtige Wahl zu treffen!
Zoom AI Companion (jetzt ZoomMate): Funktionen, Einrichtung und Nutzung
Erfahren Sie, wie Sie die Funktionen von Zoom AI Companion verwenden können, um Ihre Besprechungen zu verbessern, Zeit zu sparen und die Produktivität mit hilfreichen Funktionen und Tipps für einen reibungsloseren Arbeitsablauf zu steigern.

So planen Sie ein Zoom-Meeting in Outlook auf einem beliebigen Gerät
Erfahren Sie in unserer schrittweisen Anleitung, wie Sie Zoom-Besprechungen in Outlook geräteübergreifend planen können. Optimieren Sie Ihren Planungsprozess für effiziente Besprechungen.

So schreiben Sie nach einem Verkaufsgespräch eine Dankeschön-E-Mail mit Beispielen
Lernen Sie, nach Verkaufsgesprächen überzeugende Dankes-E-Mails mit Beispielen zu verfassen, um Geschäfte zu beschleunigen und starke Kundenbeziehungen zu pflegen.
So zeichnen Sie ein Team-Meeting mit einem beliebigen Microsoft 365-Abonnement auf
Entdecken Sie unsere einfach zu befolgenden Schritte zum Aufzeichnen eines Team-Meetings. Speichern Sie mühelos Diskussionen, Präsentationen und gemeinsame Sitzungen, damit Sie nie wieder wichtige Details verpassen!

Google Meet Aufzeichnen auf Jedem Gerät (2026)
In unserer umfassenden Anleitung erfahren Sie, wie Sie ganz einfach ein Google Meet aufzeichnen können. Lesen Sie diesen Artikel, um sich nie wieder Sorgen zu machen, wichtige Informationen zu verpassen!