How to Change the Zoom Host + How to Add a Zoom Alternative Host
Learn the quick and easy steps to change hosts in Zoom meetings with this comprehensive and beginner-friendly guide.

✅ Free meeting recording & transcription
💬 Automated sharing of insights to other tools.

Image Source: mego-studio on Freepik
Whether you're organizing a team meeting, a virtual family gathering, or an online class, knowing how to change hosts on Zoom is a handy skill.
This article will walk you through the steps in a simple, easy-to-follow manner, ensuring that your meetings run smoothly and efficiently, no matter who's in charge. Without further ado, let's dive into the world of Zoom hosting!
💡 Want an easier way to manage and record your Zoom meetings without changing hosts? MeetGeek automatically records, transcribes, and summarizes your calls so you never miss a key discussion — try it for free.
Why Do You Need a Host in a Zoom Meeting
The role of a Zoom meeting host is multifaceted and crucial. With the right person at the helm, any Zoom meeting can be an efficient, engaging, and enjoyable experience for all participants.
The role of a host in a Zoom meeting is to:
- Manage meeting settings and participants
- Facilitate discussions and presentations
- Ensure a smooth and productive meeting experience
A. Manage Meeting Settings and Participants
Only the host can tailor the meeting settings according to the session's needs. This includes setting up a waiting room for participants, enabling or disabling video upon entry, and managing screen-sharing permissions.
Moreover, Zoom hosts are the ones who can enable meeting recording, which can further streamline the meeting experience.
Additionally, the host is responsible for managing participants: admitting attendees from the waiting room, muting or unmuting participants, and removing disruptive attendees. Effective participant management ensures that the meeting remains focused and eliminates unnecessary interruptions.
B. Facilitate Discussions and Presentations
A host is not just a technical overseer but also a guide. They facilitate the flow of the meeting by introducing speakers, moderating Q&A sessions, and ensuring that the discussion stays on track.
In meetings involving presentations, the host coordinates who presents and when. They can temporarily pass hosting privileges to allow others to share their screens, ensuring a seamless transition between speakers and presenters.
In meetings requiring participants to display media, the host must also optimize screen sharing for video clip to ensure participants can hear the video's audio.
C. Ensure a Smooth and Productive Meeting Experience
Technical glitches are inevitable. A host is often the go-to person for resolving these issues, whether it's helping participants with audio problems or troubleshooting other common Zoom hiccups.
Perhaps the most important thing is that a host plays a significant role in setting the tone of the meeting. They create a welcoming and inclusive environment, encouraging participation and ensuring everyone's voice is heard.
Prerequisites for Assigning an Alternative Host
When it comes to hosting meetings that are smooth and effective, having an alternative host or a co-host can be a game-changer. But before you can delegate host controls, there are certain prerequisites you need to consider.
To successfully assign an alternative host to your Zoom meeting, you need to:
- Have the right license: The ability to assign an alternative host is available primarily to those with Zoom Pro, Business, or Education accounts. Remember, you can only designate a co-host who is a licensed user on the same account.
- Obtain the right account permissions: Sometimes, adding alternative hosts might be restricted and needs administrative approval. Ensure that your Zoom account has the necessary permissions enabled by the administrator (if you’re part of an organization).
- Download the latest Zoom version: Ensure that both you, as the original host, and the alternative host are using the latest version of Zoom to avoid any compatibility issues with hosting features.
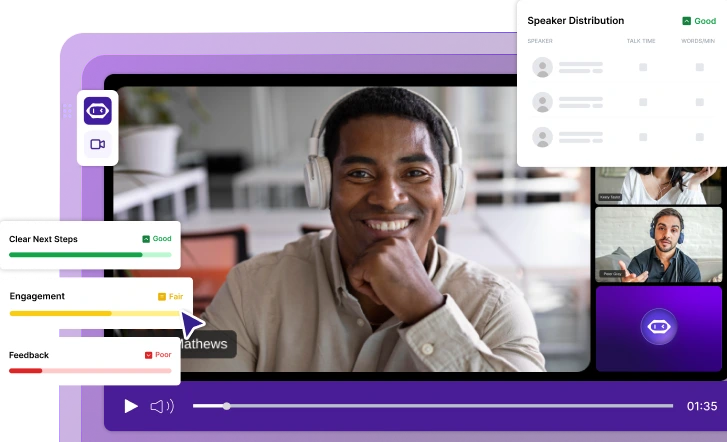
MeetGeek offers a seamless solution for managing and recording Zoom meetings without changing hosts or upgrading to higher-tier Zoom plans. It's particularly beneficial when changing the host just for recording purposes is impractical or disruptive.
Here’s how: MeetGeek joins your Zoom meetings as a participant of its own, so even if you have to leave the meeting earlier or can’t attend, the virtual meeting assistant will keep recording and transcribing the rest of the meeting.
This way, you — or anyone else who couldn’t attend — can catch up on everything you missed at your convenience.
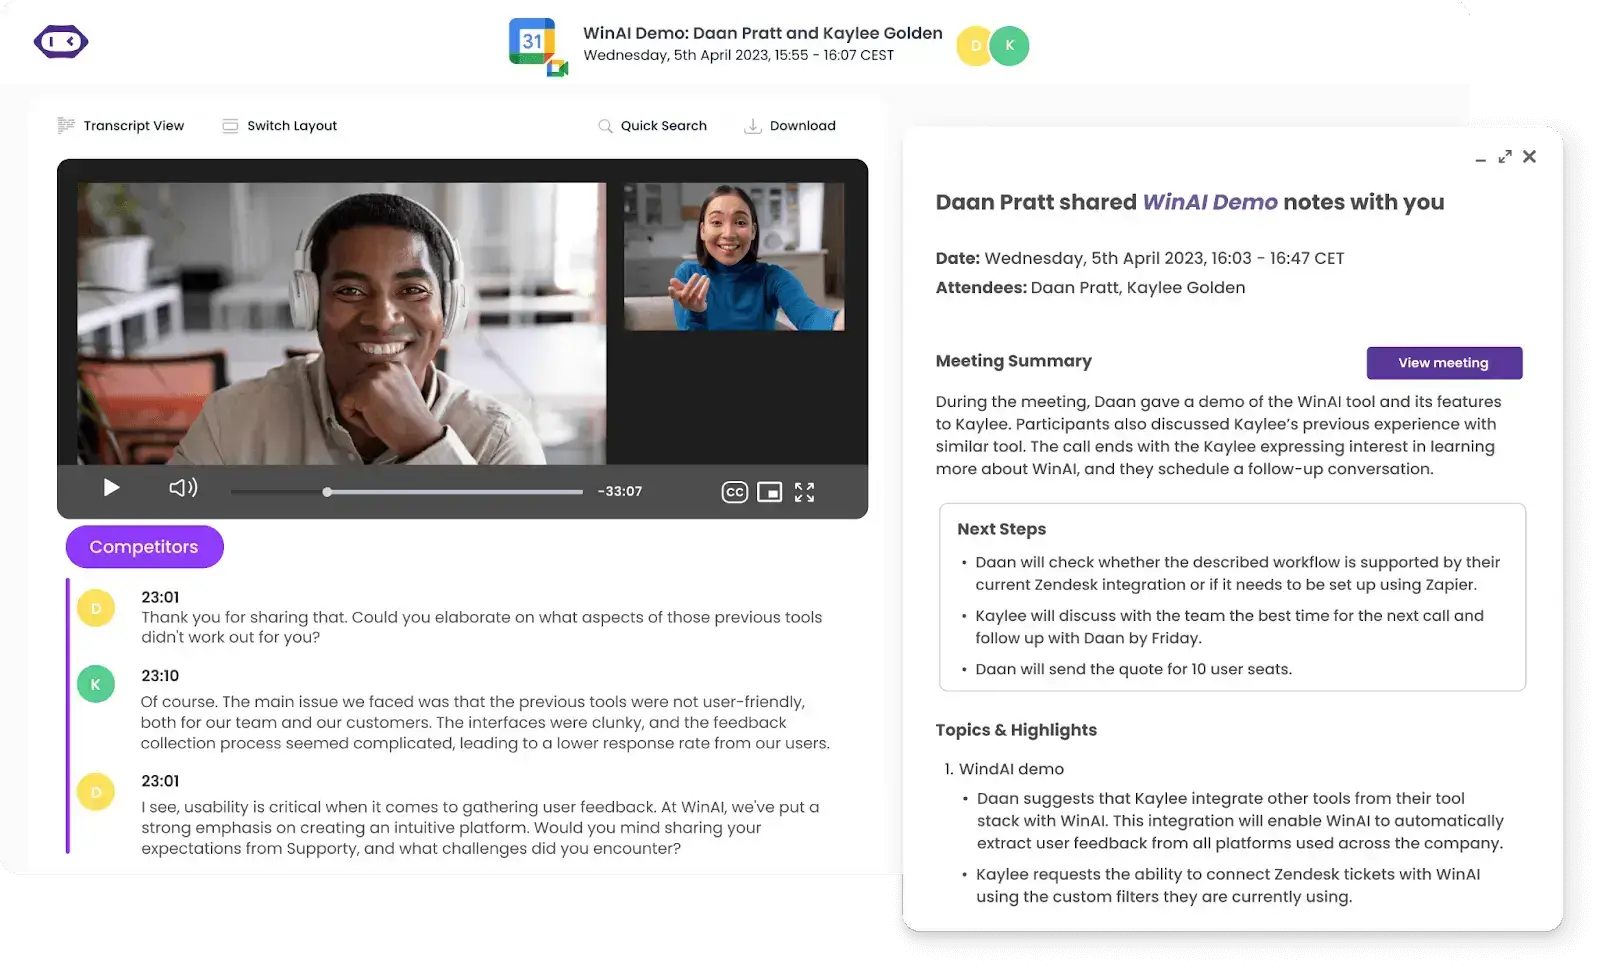
Here's what MeetGeek can do for your Zoom meetings:
- Automated recording: MeetGeek is an automated Zoom AI Notetaker that eliminates the need for Zoom’s manual setup. You don’t even have to be present in the meeting to have it recorded and transcribed, which is particularly useful when changing the host just for recording purposes is impractical or disruptive.
- Meeting highlights: The tool can identify and mark key moments and highlights within a meeting, aiding in quick post-meeting reviews and follow-ups.
- Actionable insights: Get accurate analytics and insights from meetings, such as participant engagement and topic trends, which can be valuable for future meeting planning.
- AI meeting summaries: Effortlessly share AI meeting notes, complete with highlights and action items, to ensure that everyone is on the same page post-meeting.
- Integration with workflow tools: MeetGeek integrates with various workflow and productivity tools, allowing for seamless incorporation of meeting information into existing work processes.
- Customization options: Users can customize settings to match their specific meeting needs, such as selective recording or targeted transcription.
I. How to Change Hosts Before a Zoom Meeting
Designating someone as an alternative host in Zoom for future meetings is an effective way to manage hosting responsibilities.
A. How to Add Alternative Hosts for a New Meeting on Zoom
You can share hosting privileges across various devices:
- Mac or Windows device
- Zoom Web App
- iOS and Android devices
1. For Windows or Mac
Here’s how to designate an alternative Zoom host on your Windows or Mac computer:
- Launch your Zoom application. If you haven’t already downloaded Zoom, you can get it from the Zoom website and install it on your device.
- Click on the “Schedule” icon, which usually looks like a calendar.
- In the scheduling window, you’ll fill out the necessary information about your meeting. Make sure everything is double-checked because this info is what your attendees will see:
- Topic: Name your meeting something clear and relevant.
- Date and time: Choose when your meeting will take place.
- Duration: This helps attendees plan their time (note: the meeting can continue past this time if needed).
- Scroll down to find the “Alternative Hosts” field. Here, enter the alternative host's email address. You can add more than one email by separating them with commas.
- While you’re here, click ‘Advanced options’ to explore some of the following features :
- Enable join before host: Allows participants to join the meeting before the host or any alternative hosts arrive.
- Mute participants upon entry: Helps manage larger meetings more smoothly from the start.
- Record the meeting automatically: If you need a record of the meeting, you can choose to have it recorded to the cloud or your local computer automatically.

- Once you’ve got everything set up, click “Schedule” to finalize your meeting. This will also prompt Zoom to invite participants to your meeting via email.
- Zoom will then offer you the option to add the meeting to your calendar (like Google Calendar, Outlook, etc.) to help you and your alternative hosts keep track of the meeting.
NOTE: Remember, the alternative host can start the meeting on the host's behalf. Before the meeting, inform your alternative hosts that they’ve been added to ensure they’re ready to host in your absence.
2. For the Zoom Web App
Here’s how to designate an alternative Zoom host on the Zoom Web portal:
- Go to the Zoom website and log in with the credentials that have hosting privileges.
- Once you’re logged in, find the navigation menu on the left side of the screen and click on “Meetings.”
- Click on the “Schedule a New Meeting” button at the top-right of the meetings page.
- Fill out the necessary information about your meeting. Make sure everything is double-checked because this info is what your attendees will see:
- Topic: Name your meeting something clear and relevant.
- Date and time: Choose when your meeting will take place.
- Duration: This helps attendees plan their time (note: the meeting can continue past this time if needed).
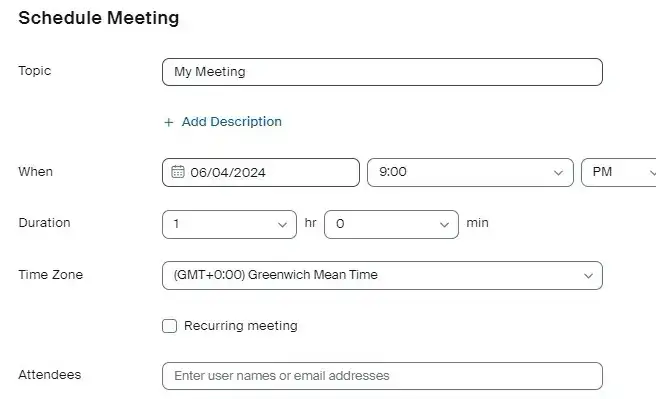
- As you set up or edit your meeting details, scroll down to find the “Alternative Host” field in the meeting options section. Type in the email addresses of the people you want to designate as alternative hosts.
NOTE: You can enter multiple emails by separating them with a comma. Remember, the email addresses must be associated with an active Zoom account.
- While you’re in the setup, consider enabling options like:
- Enable join before host to let participants enter the meeting room before any hosts arrive.
- Mute participants upon entry can help keep the meeting orderly until it officially starts.
- Once all details are correctly filled in, click “Save” at the bottom of the page to confirm all the meeting and alternative host settings. If prompted, add the meeting to your digital calendar to keep track of it and share the meeting id and link with your alternative hosts and participants.
3. For iOS and Android Devices
Here’s how to designate an alternative Zoom host on iOS or Android devices:
- Make sure you have the Zoom app installed on your iOS or Android device. If it's not already installed, you can download it from the Apple App Store or Google Play Store.
- Once installed, open the app and sign in with your Zoom account credentials.
- At the bottom of the Zoom app, you will see the navigation bar. Tap on “Meetings” to view your upcoming meetings list. This is where all your scheduled meetings are organized.
- To add an alternative host to a new meeting, tap on the “Schedule” button (usually represented by a “+” or calendar icon), which will open a new meeting form.
- Enter all the relevant details for your meeting, such as the topic, date, time, and any recurrence.
- Scroll through the meeting setup options until you find the “Alternative Hosts” section. Enter the email addresses of the individuals you wish to designate as alternative hosts. They will receive an email notifying them that they've been added as an alternative host, with a link to start the meeting.
- Once you’ve added the alternative hosts and finished setting up all other meeting details, tap “Done” or “Save” to finalize the meeting details and share the calendar invite with the co-host and meeting participants.
B. How to Change the Host Settings for a Zoom Meeting
When appointing a Zoom alternative host for a meeting, it's important to be aware of certain limitations to ensure your meeting runs smoothly:
- Starting the meeting as an alternative host: Alternative hosts can begin the meeting using the join link provided in the email or calendar invitation from the primary host. However, the meeting won't appear in their 'Upcoming Meetings' list on Zoom's desktop client, mobile app, or website.
- Restrictions on scheduling for the host: An alternative host cannot schedule meetings on behalf of the primary host. If you need someone to schedule meetings for you, it's better to use the scheduling privilege feature.
- Host control dynamics: If the original host enters the meeting after the alternative host has started it, the original host will be prompted with the option to reclaim control of the meeting. If they choose to do so, the alternative host will then revert to a participant role.
- Timing of assignment: Alternative hosts must be assigned during the scheduling process or before the meeting's scheduled start time. If a host requires assistance during a meeting, they should assign a co-host rather than an alternative host.
- Adhering to the original host's settings: The meeting will adhere to the original host's limitations or add-ons.
Here’s how to change the host settings for a scheduled meeting in Zoom:
- Ensure you are logged into your Zoom account. You can do this via the Zoom desktop client, mobile app, or web portal, depending on your device.
- Once logged in, click on “Meetings” in the navigation menu. This will show you a list of all your upcoming meetings.
- Tap on the meeting whose host settings you wish to change to open its details. Click on the title of the meeting, then click “Edit”.
- Within the meeting editing section, you’ll see several options that determine how the meeting is hosted and controlled:
- Co-Hosts: You can use the alternative host feature to add Zoom alternative hosts or co-hosts by entering their email addresses. Co-hosts can manage participant controls just like hosts.
- Security Settings: Adjust settings such as requiring a meeting password, enabling a waiting room, and allowing only authenticated users to join.
- Meeting options: Here, you can control various aspects like enabling/disabling participant video, audio, and more advanced features such as creating a breakout room, polls, or providing recording permissions.
- After you’ve made the necessary adjustments, tap “Done” or “Save” to update the meeting settings.
NOTE: If any significant changes were made to the meeting settings, especially concerning how participants engage in the meeting, consider informing all co-hosts and other participants about these updates. This ensures everyone is prepared and knows what to expect.
II. How to Change Hosts During a Zoom Meeting
If you, the host, need to exit the Zoom call and there's no designated alternate host, the remaining participants will lose access to host-specific controls. No need for concern, though. We've got you covered!
A. How to Add a Co-Host During a Zoom Meeting
In Zoom, the co-host feature is a powerful tool for the host to share administrative responsibilities during a call. Co-hosts can manage essential aspects like overseeing participants and controlling the start or stop of session recordings.
Here’s how to enable the Zoom co-host feature for your organization:
- Access your Zoom account on the web and sign in with administrator privileges to configure Account Settings.
- In the navigation panel, click 'Account Management', then 'Account Settings'.
- Under the 'Meeting' tab, make sure the co-host setting is activated. If not, click the toggle icon to enable it.
NOTE: Only the main host has the authority to assign a co-host.
Here’s how to add co-hosts during your Zoom meetings:
- Start your Zoom meeting.
- Click on the 'Manage Participants' button.
- Hover over the participant's name you wish to make a co-host.
- Click on 'More', then select 'Make Co-host' from the dropdown menu.
- Agree to the confirmation prompt.
By following these steps, you can smoothly assign co-hosts in your Zoom meetings, ensuring a well-managed and efficient virtual meeting environment.
IMPORTANT: To use the co-host feature for Zoom, ensure you have the following versions or higher.
| Zoom Desktop Client | Zoom Mobile App |
|---|---|
|
|
B. How to Assign an Alternate Host and Leave the Meeting
The host of a Zoom meeting has the flexibility to transfer host controls to another participant and exit the meeting, ensuring it continues smoothly with the new host in charge.
Below are step-by-step instructions for transferring meeting controls on different devices:
- Windows, macOS, and Linux
- the Zoom Web App
- iOS and Android devices
1. Zoom Client for Windows, macOS, and Linux
Here’s how to assign an alternate host and leave a Zoom meeting as a Windows, macOS, and Linux user:
- Log into your Zoom desktop app.
- Initiate the meeting as the host.
- In the host controls, select 'End', then choose 'Leave Meeting'.
- Pick a participant to be the new host.
- Click on 'Assign and Leave'.
2. For the Zoom Web App
Here’s how to assign an alternate host and leave the meeting as a Zoom Web app user:
- In the host controls, select 'Manage' to view the participant list.
- Hover over the participant's name, click 'More', and then 'Make Host'.
- Click 'Yes' to verify your choice.
- Leave the meeting.
3. For iOS and Android Devices
Here’s how to assign an alternate Zoom host and leave the meeting as an iOS or Android user:
- Tap on the 'Participants' button at the bottom of the Zoom window.
- Choose the participant you wish to make the host from the list.
- Tap on 'Host' and then 'OK' to confirm the new host.
These steps ensure a seamless transition of host responsibilities, keeping your Zoom meetings efficient and uninterrupted.
Embrace Flexible Zoom Host Management with MeetGeek!
Changing the host role in Zoom meetings, whether before or during the session, requires a bit of planning and coordination.
Remember, effective communication and technological readiness are key to successful host management. Embrace these practices and watch your Zoom meetings thrive with flexibility and ease.
And if you’re looking to take your Zoom meetings one step further, try MeetGeek for free!
.avif)





.png)


