



Microsoft Teams stores meeting recordings in the cloud, not on your computer. A recording of a standard meeting is saved in the meeting organizer's OneDrive, in a folder called Recordings. A recording of a channel meeting is saved in that channel's SharePoint site.
You don't have to open OneDrive or SharePoint to watch it. Once Teams finishes processing the recording, a link appears in the meeting chat or channel conversation, and in the Recap tab of the meeting in your Teams calendar.
The save location changes with the meeting type and account. The table below shows each case, including ownership and access.
Where Does Teams Save Recordings?
With a work or school account, Teams saves every recording as an MP4 file in OneDrive or SharePoint. Which one depends on the kind of meeting:
| Type of meeting or call | Where the recording is saved | Who can open it |
|---|---|---|
| Scheduled, recurring or Meet now meeting | The meeting organizer's OneDrive, in the Recordings folder | Organizer and co-organizers can edit, share and download; invited colleagues can watch |
| Channel meeting | The channel's SharePoint site, in Documents > Recordings | Channel members, with the channel's SharePoint permissions |
| 1:1 or group call | The OneDrive of the person who selected Record | That person owns the file; other people on the call from the same organization can watch |
| Meeting whose organizer has no OneDrive | The first co-organizer's OneDrive; if no co-organizer has OneDrive, the OneDrive of the person who started the recording | The organizer keeps permission to edit and share |
| Webinar or town hall | The organizer's OneDrive | The organizer; for town halls, only the organizer can manage recordings of past events |
| Meet now meeting started from a Teams Room | The room account's OneDrive, if it has one; otherwise a co-organizer's or the recording starter's OneDrive | When the file is in the room's OneDrive, no participant gets full permissions to it |
| Teams Free (personal account) | Microsoft's cloud, shown in the meeting chat for 30 days | Everyone in the meeting chat |
Table last updated: October 2, 2026.
For standard meetings, the file goes to the organizer's OneDrive even when a colleague is the one who starts the recording. The person who pressed Record only becomes the owner in 1:1 and group calls, or when neither the organizer nor a co-organizer has OneDrive. Microsoft documents each case in its guide to Teams recording storage and permissions.
For channel meetings, the file is stored in the SharePoint folder named after the team and the channel, under Documents > Recordings.
If you haven't recorded the meeting yet, our guide on how to record a Teams meeting explains who is allowed to start a recording and what to do when you're not the organizer.
How to Find a Teams Recording
The quickest way to open a recording is from Teams. OneDrive and SharePoint are useful when you need the file itself, for example to move, rename or download it.
Find the Recording in Teams
There are three places to look:
- Meeting chat: select Chat, open the meeting chat, then open the Shared tab and select the recording;
- Calendar: select Calendar, open the past meeting, then select Recap;
- Channel: select Teams, open the channel, and look in the meeting's post or in the channel's Shared tab.
In older versions of Teams, the Shared tab is called Files.
Find the Recording in OneDrive
If you organized the meeting, the file is in your own OneDrive:
- Open OneDrive in your browser or from the Microsoft 365 app launcher;
- Select My files;
- Open the Recordings folder, which Teams creates the first time you record;
- Look for the meeting by name and date.
If someone else organized the meeting, the file isn't in your OneDrive. Open it from the meeting chat or Recap, or look under Shared in OneDrive.
Find the Recording in SharePoint
For a channel meeting:
- Open the channel in Teams and select the Shared tab;
- Open the Recordings folder;
- Select Open in SharePoint if you want to manage the file there.
Where Are Teams Transcripts Stored?
For recorded meetings, Teams stores the transcript alongside the recording in OneDrive or SharePoint. Microsoft's documentation says meeting transcripts are saved in the meeting organizer's OneDrive, and channel meeting transcripts are saved in the channel's SharePoint site with the recording.
To read a transcript, open the meeting chat or the Recap tab of the meeting in your calendar. By default, the organizer and co-organizers can download it as a .docx or .vtt file, and they can also delete it.
Our guide on how to transcribe a Microsoft Teams meeting covers how to turn transcription on and which plans include it.
Who Can View, Download and Share a Teams Recording?
Access depends on your role in the meeting:
- The organizer and co-organizers can watch, edit, share and download the recording;
- Invited people from the same organization get a link to watch it, but can't download or share it;
- Guests and external attendees can't open the recording unless the organizer shares it with them directly;
- Channel members open a channel recording with the permissions they have in that channel, unless your IT admin has blocked downloads, in which case members can only watch it.
In meetings with more than 250 participants, some participants don't get access automatically and have to ask the recording's owner to add them.
Download a Teams Recording
- Open the recording's location in OneDrive or SharePoint;
- Select the file;
- Select Download in the top menu.

Share a Teams Recording
- Select the file in OneDrive or SharePoint, then select Share;
- Add the people who need access, or select Copy link;
- Open the link settings if you want to limit who the link works for.

To delete a recording, select the file in the same place and choose Delete. It moves to the recycle bin, where it can still be restored for a limited time.
How Long Are Teams Recordings Stored?
In work and school accounts, new Teams recordings and transcripts expire after 120 days by default. This is an organization setting: your IT admin can choose a different period or turn expiration off. For Microsoft 365 Education A1 users, the maximum is 30 days.
When a recording expires, it moves to the OneDrive or SharePoint recycle bin, and the owner gets an email. Microsoft says the owner has up to 90 days to recover it; once it's deleted from the recycle bin, it can't be restored.
If you own a recording, you can change or remove its expiration date:
- Open the recording so it plays in your browser;
- Select the expiration date shown beneath the video;
- Choose a new timeframe, or select Remove expiration.
Two cases have shorter limits:
- Teams Free: recordings stay in the cloud for 30 days, so download the ones you want to keep;
- Failed uploads: if the recording can't be saved to OneDrive, for example because the storage is full, Teams keeps it in temporary storage for 21 days and the organizer has to download it from the meeting chat.
Why Can't I Find My Teams Recording?
When a recording doesn't show up where you expect, one of these is usually the reason:
- It's still processing: the link only appears in the chat and in Recap after Teams finishes processing the file, and long meetings take longer;
- You're not the organizer: the file is in the organizer's OneDrive, not yours, so open it from the meeting chat or Recap;
- It was a channel meeting: look in the channel's Recordings folder in SharePoint, not in OneDrive;
- You're a guest or external attendee: ask the organizer to share the recording with you;
- It expired: the owner can check the OneDrive or SharePoint recycle bin;
- The upload failed: the organizer has 21 days to download it from the meeting chat;
- The meeting wasn't recorded: if no recording notice appears in the meeting chat, check whether recording was actually started.
Keep Your Own Record of Every Teams Meeting
A Teams recording belongs to the organizer. If you joined as a guest or the meeting was run by a client, you depend on someone else to share it, and by default it expires after 120 days.
With MeetGeek, your meeting record is saved in your own MeetGeek workspace rather than depending on the Teams organizer's OneDrive. MeetGeek can join and record scheduled Microsoft Teams meetings from your calendar whether you're the organizer or an attendee, provided the meeting settings allow the notetaker to enter.
After a recorded meeting, MeetGeek can provide:
- A transcript in 100+ languages;
- An AI summary with the decisions and action items, sent by email;
- One searchable library for your Teams, Zoom and Google Meet meetings;
- Summaries and action items sent automatically to Slack, Notion, your CRM or 10,000+ apps through Zapier, Make and n8n, on paid plans.
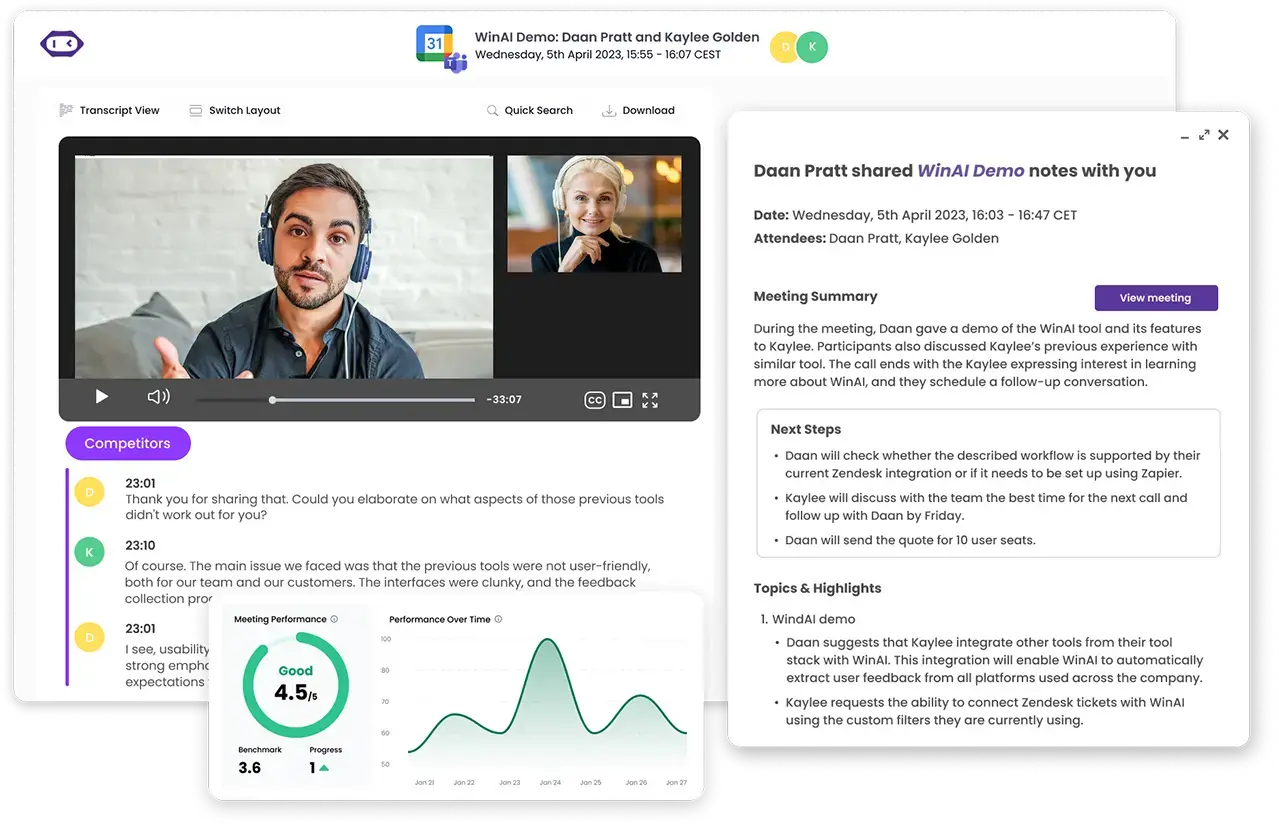
The free plan includes 3 hours of transcription a month, with an AI summary for every meeting. Video recording and video storage start on the Business plan; on Free and Pro, you keep the audio, the transcript and the summary.
Key Takeaways
- Teams saves standard meeting recordings to the meeting organizer's OneDrive, in the Recordings folder, and channel meeting recordings to the channel's SharePoint site;
- In 1:1 and group calls, the recording goes to the OneDrive of the person who selected Record;
- You can open a recording from the meeting chat, the channel conversation or the Recap tab in your Teams calendar;
- Only the organizer and co-organizers can download and share a standard meeting recording, and guests need it shared with them directly;
- Work and school recordings expire after 120 days by default, and Teams Free recordings after 30 days.
Frequently Asked Questions
Can Teams Recordings Be Saved Locally?
Not directly. Teams doesn't save recordings to your computer; it stores them in the cloud first, in OneDrive or SharePoint. To keep a copy on your computer, the organizer or a co-organizer can download the MP4 file from OneDrive or SharePoint.
Can You Change Where Teams Saves Recordings?
No. Teams has no setting that lets you pick a different save location, so recordings always go to OneDrive or SharePoint first. After the recording is saved, its owner can move or copy the file to another folder.
Why Can't I Download a Teams Recording?
In standard meetings, only the organizer and co-organizers can download the recording. Other invited colleagues can watch it but not download it, and guests need the organizer to share it with them. For channel meetings, members can download recordings unless your IT admin has blocked it.
Are Teams Recordings Still Stored in Microsoft Stream?
No. Teams used to save recordings to Microsoft Stream (Classic), and Microsoft moved new recordings to OneDrive and SharePoint during 2021. Stream (Classic) has since been retired. Today a recording is a regular video file in OneDrive or SharePoint.
What Happens to Teams Recordings When the Organizer Leaves the Company?
The recordings are treated like any other file in that person's OneDrive, so they follow your organization's OneDrive retention and deletion process. If you need a recording from someone who has left, ask your IT team before the account is deleted.






.avif)